For generations, the leather production business has relied heavily on dyeing and colouring procedures for leather. Chemicals that can change an animal hide’s colour, texture, and durability are used during the dyeing process.
The leather manufacturing sector in the United States is an important part of the nation’s economy, adding a substantial amount to GDP and generating a lot of job possibilities. Regarding product categories, the dominant segments are leather products and footwear, generating 26.7% and 54.7% of industry revenue, respectively.
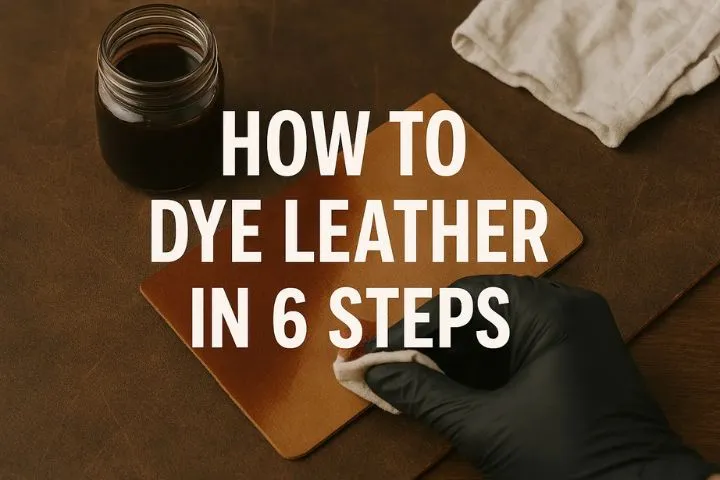
In order to keep a competitive advantage as the leather production sector grows, producers must stay current on the newest methods of dyeing and coloring leather. So, you can quickly change the color of a leather item by learning how to dye leather. Remember that each piece of leather is unique and may take colour variations somewhat. Before going ahead let’s understand what leather is, the different types of leather and the steps to complete leather dye.
What is Leather Dyeing?
Could it be said that you were curious to remember more about leather shading after you in any case listened nearly it? A collectible technique known as leather shading revives leather stock, for example, your valued leather lounge chair, wallet, or for sure, your best match of boots. Think of it as an update for your leather stock, giving broken down, old, or obsolete varieties a new, stimulating see.
So, how to dye leather? The leather is treated with an exceptional variety that changes its tone without impacting its extraordinary surface or grain. Dyeing leather is more than essentially a method for changing its tone — it’s an innovative articulation, a help of maintainability, and a demonstration of capacity.
In the past, our predecessors hued their leather things using spices, bark, and berries. Coloring leather has been done this way for centuries. The progression of this craft shape is captivating because the unused forms enable a wide range of colors and finishes. Isn’t it fascinating? The more you know about the enormous and contrasting universe of leather, the more capable you might be at investigating the shading handle.
Why You Should Consider Dyeing Leather or Dye Leather?
By and by you want to ask, “How could I dye leather?” at the moment. I investigated the same issue and discovered numerous clarifications. Viability quickly springs to insight as a hobby. You’ll be capable drag out the existence of your leather things, cut down on waste, and award them a cutting edge lease of life by shading them. It’s a little however essential step inside the course of a lifestyle that is more prudent.
Second, you will incorporate an extraordinary touch that imparts your taste and energy to your having a place by passing on leather. The times of being confined to pre-made colors are finished. You’re allowed to choose between a ruby-red satchel and a turquoise wallet!
Furthermore, last, it’s roughly getting an unused limit. While to variety of leather could seem frightening at in the first place, actually, a truly fulfilling recreation action progresses tirelessness and thought. Every item you dye becomes a handiwork and a result of your creative talent and energy.
Therefore, leather dyeing has a lot to offer whether you want to start a new modern activity, reduce waste, or revamp your closet. It’s a journey of change for both you and your colored leather items as you learn to create and appreciate its beauty. Together, we should investigate this fascinating make. Audit that we regard your examinations, solicitation, and experiences. Together, how about we set out on this examination undertaking!
Things You Need To Dye Leather
What tool do you use to apply leather dye? Things being what they are, you’re determined to variety your leather stock, right? Dyeing leather can be a tomfoolery and creative handle. Here’s a list of things you might need to dye leather.
Step 1. Essential Tools: Dye Leather
1. Pigments and Dyes
In the first place things in any case: without the variety, we were unable to variety, may we? The varieties used for leather shift from those used for materials. They usually come in both water-based and dissolvable based varieties, and they are remarkably created to enter and variety the leather. My suggestion for a claim? Start with the water-based ones in the first place since they are more straightforward for beginners to regulate. They’re besides less hurtful, which is, generally speaking, priceless.
2. Daubers and Brushes
What is the best brush to dye leather? Or Can you apply leather dye with a brush? Brushes and daubers are up following. The manner in which your variety resolve turns might be explicitly impacted by the brush you select. I’ve realized this the troublesome way, so acknowledge me. Little, changed brushes work best since they make it less requesting to arrive at those hard to-arrive at places and disperse variety all the more similarly. Then again, daubers function admirably on more prominent surfaces and may accelerate the strategy basically.
3. Supplies Cleaning
Make without question that your leather thing is perfect some time as of late thinking about any dyeing. Any debris or rottenness could make the variety drench unevenly or patchily, giving the variety a lopsided or conflicting appearance. Gather some clean clothes, a delicate brush, and some mild cleanser or leather cleanser to achieve that flawless appearance. Partners, don’t dismiss the gloves. Variety stains are problematic to clear.
Step 2: Select the Correct Dye Leather
Can you dye vegetable tanned leather? Any uncolored vegetable-tanned leather can be dyed. Indeed, it’s likely possible to colour pre-dyed vegetable-tanned leather. nevertheless, why? (really, however, if you do this, just know that some polished leathers have wax on top of them, which will make it difficult for the dye to saturate the leather). Having said that, there aren’t many factors to take into account while selecting leather. Just be aware that all of the markings and variations in colour will be visible on 100% top-grain leather.
While 100% dyeing top-grain leather is excellent in terms of quality, it does indicate that the top layer and any associated flaws have not been eliminated. When you utilise this method of dying instead of the one most industrial businesses use, which includes thoroughly immersing the leather in the dye, this will really show out. Although it requires more colour, the result is smoother and more penetrating. Thus, no matter how skilled you are at dying, if you choose a cheap piece of leather with more blemishes and irregularities, simply know that it will appear.
Step 3. Dye Leather: Wipe Down the Leather
There’s a fair likelihood that debris has gathered on your leather if it’s been in your shop for more than a day, particularly if you’re sanding the edges. How to dry leather? Before dying, give it a brief wipe-down with a dry towel to assist in ensuring an equal coat. Do you oil leather before dying? Some advise using a deglaze on the leather to get rid of any oils from objects like your hands that may have gotten on it. Although I haven’t used it before, I’ve read several recommendations for it. This Fiebings provides.
Step 4. : Dye Leather: Cut Your Dyes
With regards to cowhide coloring, “cutting” colors regularly alludes to weakening or changing the color focus to accomplish an ideal tone or impact. In order to lighten the color or produce a custom shade, this procedure involves combining the dye with a solvent or diluent.
Common methods of “cutting” dyes in leather dyeing include:
1. Adding Water to Dilute:
Can you add water in leather dye? To achieve lighter hues or a more subtle effect, some leather dyes can be diluted with water. This technique is frequently utilized for additional clear colors.
2. Using a solvent or alcohol to thin:
Adjusting the intensity of the dye’s color can be made easier by employing alcohol or a particular solvent as directed by the dye manufacturer. It’s crucial for utilize the right kind and measure of dissolvable to try not to think twice about color’s viability.
3. Combining Various Colors of Dye to Dye Leather:
Is custom color can apply on leather? Custom shades can be created by combining different dye colors. For instance, a distinctive maroon shade can be produced by combining a red dye with some brown.
4. Application in layers or gradations:
It is possible to achieve depth and richness in the final shade by applying multiple layers of dye or gradually building up the color.
During color cutting, it’s vital to test the incapacitated assortment on a little, unnoticeable extent of the leather to guarantee the fundamental tone is achieved preceding applying it to the whole piece. Additionally, keep in mind that the dye’s appearance can be affected by the characteristics of the leather, such as its type and texture; therefore, testing on a sample piece of the same leather is frequently recommended.
Step 5. Dye Leather: Apply the Base Coat in Circles
1. Shake the Dye:
Ensure the dye is well mixed before application.
2. Wear Gloves:
Protect your hands from the dye.
3. Dip the Applicator/Sponge:
Dip the sponge or applicator into the dye. Use just enough dye to cover the applicator without excessive dripping.
4. Start Circular Motion To dye Leather:
Begin applying the dye in circular motions on the leather surface. Start from one corner and work your way across the leather.
5. Even Application:
Maintain consistent pressure while applying the dye in circles. This method helps distribute the dye evenly and prevents streaks or blotches.
6. Overlap Strokes:
Overlap each circular stroke slightly to ensure complete coverage. Work on each section separately until the entire surface is covered.
7. Allow time for drying:
Following the directions the dye manufacturer provides, allow the leather to dry. Most of the time, this means letting the leather air dry or using a low, cool hairdryer.
8. Examine the Dye Leather’s Coverage:
Evaluate whether a second coat is required for better coverage or a more vibrant color after the first coat. If necessary, apply additional coats using the same circular motion.
Make sure to adhere to the particular directions given the color you’re utilizing for the best outcomes. Moreover, various kinds of cowhide might retain color in an unexpected way, so playing out a test on a little, unnoticeable region in advance is prudent.
Step 6. Dye Leather: Apply a Second Coat on the Left & Right
So, apply a second coat of dye in the left and right corners with great care for a perfect finish.
Step 7: Applying Finish and Buffing
How do you apply leather finish? Absolutely, the finishing step is crucial to protect the dyed leather and give it the desired sheen or texture. Here’s a guide for applying a finish and buffing:
1. Choose the Finish For Dye Leather:
What is the best finish to dye leather? Select a leather finish or sealer suitable for the type of leather and the desired outcome. There are various types available, from matte to glossy finishes.
2. Read Instructions:
Follow the manufacturer’s instructions for the specific finish you’re using. Some finishes may need to be diluted or require multiple coats.
3. Apply the Finish On Dye Leather:
Use a clean cloth or applicator to apply the finish evenly over the dyed leather. Apply in smooth, consistent strokes, ensuring complete coverage. How many coats of leather dye? If multiple coats are needed, allow each coat to dry before applying the next.
4. Buffing:
Once the finish has dried as per the manufacturer’s instructions, use a separate clean, dry cloth to buff the leather gently. Buffing helps even out the finish, removes any excess, and enhances the shine or texture.
1. Select the Dye Leather Finish:
Choose a sealer or finish for leather that is appropriate for the kind of leather and the result you want. There are different sorts accessible, from matte to reflexive completions.
2. Check the directions:
For the finish you’re using, follow the manufacturer’s instructions. Some finishes may require multiple coats or need to be diluted.
3. Apply the Completion On Color Leather:
Utilize a perfect material or implement to apply the completion equitably over the colored leather. Make sure that the entire area is covered by applying in even, smooth strokes. On the off chance that different coats are required, permit each coat to dry prior to applying the following.
4. Buffing:
Use a separate clean, dry cloth to gently buff the leather after the finish has dried in accordance with the manufacturer’s instructions. Buffing evens out the finish, gets rid of any excess, and makes the surface shine or feel smoother.
5. Optional Additional Coats:
Following the same application and drying procedure, additional coats of finish can be applied, depending on the desired level of protection or finish.
6. Allow to dry completely:
Guarantee the leather is totally dry and the completion has relieved prior to utilizing or dealing with the thing. Depending on the product used and the environment, this duration can vary.
The dyed leather is protected by the finish, but it also looks better and lasts longer. To ensure compatibility and the desired outcome, test the finish on a small, obscure area first.
How to Avoid Common Mistakes When Dye Leather
- Insufficient Preparation
- Uneven Application
- Using the Wrong Dye or Finish
- Skipping Test Patch
- Not Allowing Adequate Drying Time
Conclusion
As we’ve navigated the steps of how to dye leather, we’ve delved into the essence of this material and explored the final embellishments that give your creation its distinct identity. So, do you think Is dying leather easy? Throughout this journey, it’s essential to recognize that you’re not merely coloring leather; you’re crafting something exceptional, an extension of your own creativity and individuality. To know more about it, contact us today!