Introduction
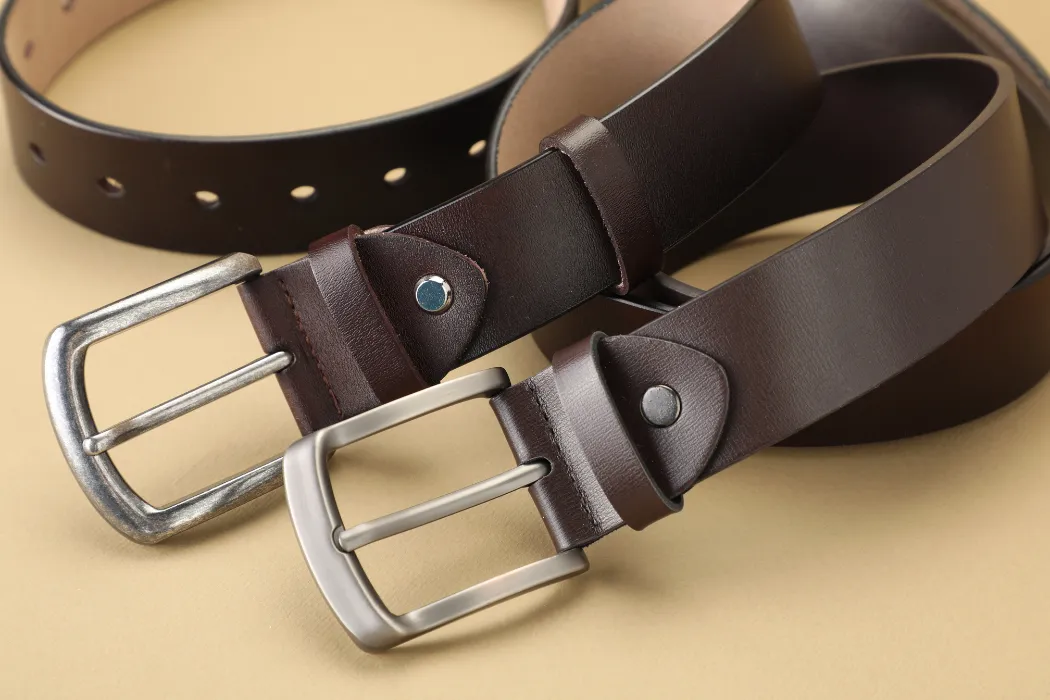
It’s a familiar frustration. You reach for your favorite leather belt, a trusty accessory that completes your look, only to find it no longer fits. Maybe you’ve lost a little weight, or perhaps the leather has stretched over time. Whatever the reason, a belt that’s too loose is both uncomfortable and unflattering. Before you consider throwing it away, you should know there is a simple solution. Adding a new hole is an easy DIY skill that can save your favorite accessory from the back of the closet.
Making a new hole in a leather belt is a simple process that you can do at home. The best method uses a specialized leather punch to create a clean, professional-looking hole. However, you can also get great results with common household tools like a drill or even a nail and hammer. The key is to measure the placement carefully and use the right technique to avoid damaging the leather, ensuring your belt remains both functional and stylish.
Learning how to properly add a hole to a belt is more than just a quick fix. It is a sustainable practice that extends the life of your accessories. It also gives you the power to customize the fit of any belt you own. However, there is a right way and a wrong way to do it. A sloppy hole can ruin the look of a beautiful leather belt and even cause it to tear over time. This guide will walk you through everything you need to know. We will cover the best professional tools, safe household alternatives, and the step-by-step process for a perfect result every time.
Why You Might Need to Add a Hole to Your Leather Belt
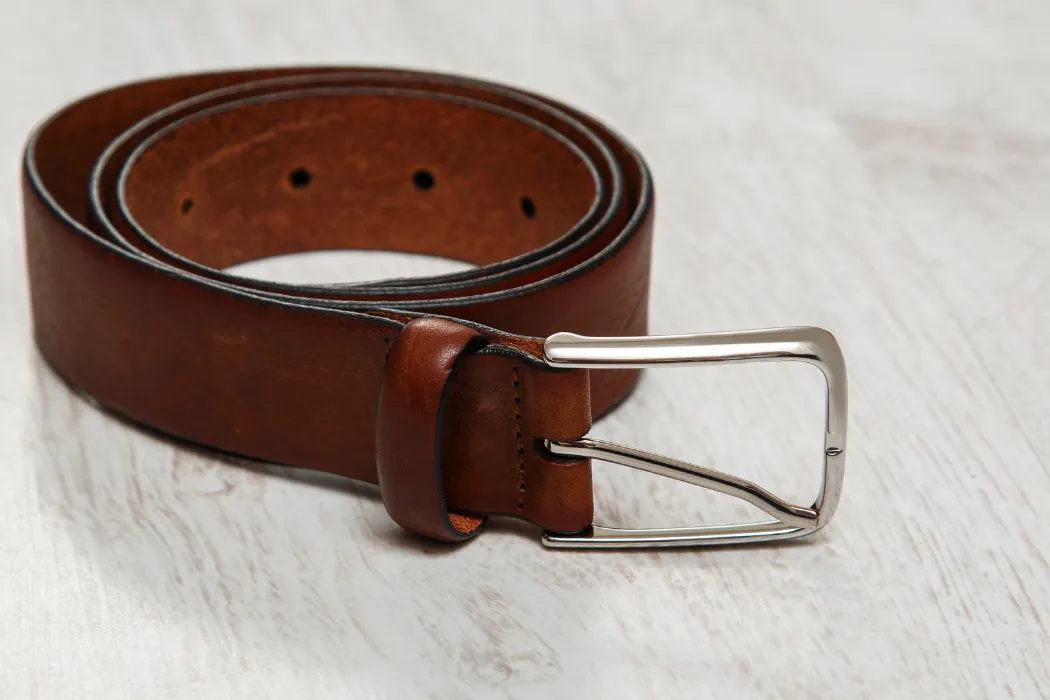
You might need to add a hole to your belt for several common reasons. These include weight loss or gain, the natural stretching of the leather over time, or incorrect sizing from an online purchase. Adding a hole is a great DIY solution. It saves money, extends the life of your belt, and allows you to customize the fit perfectly. This avoids the need to buy a new belt.
Common Reasons for a New Hole
A belt that doesn’t fit right can happen for many reasons. Some of the most common include:
- Weight Loss or Gain: Our bodies change. A new hole can make your favorite belt fit perfectly again.
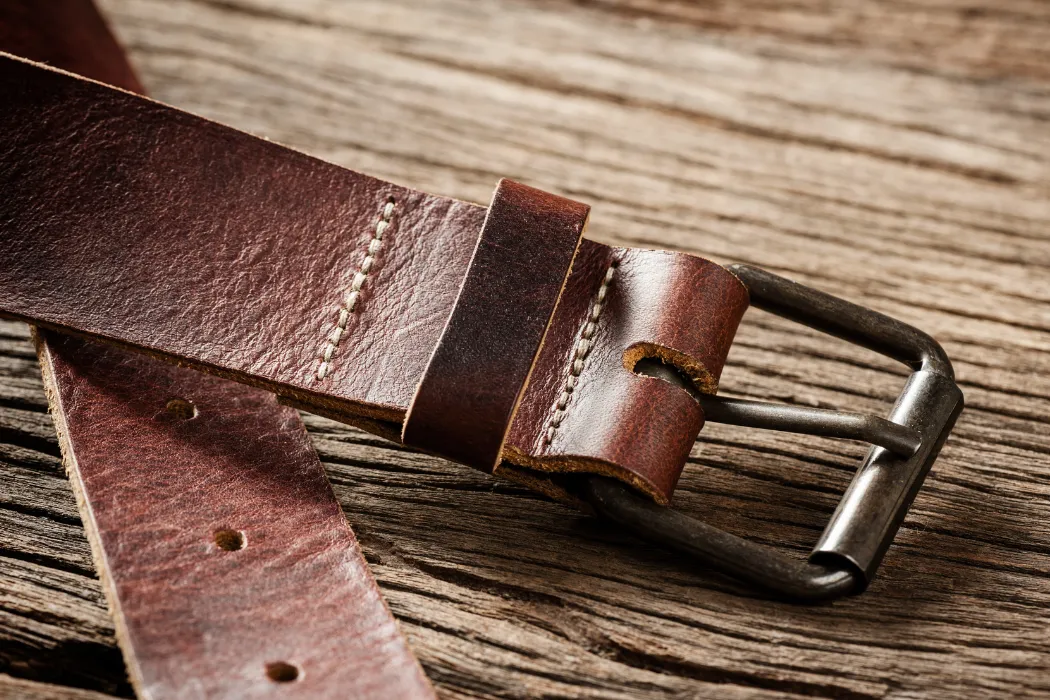
- Stretching Over Time: Real leather is a natural material. It can stretch slightly with regular use.
- Online Sizing Issues: Buying a belt online can be tricky. Sometimes the size is just a little off.
- Repurposing Vintage Belts: You might find a beautiful vintage belt that just needs a small adjustment to fit you.
Signs Your Belt Needs Adjustment
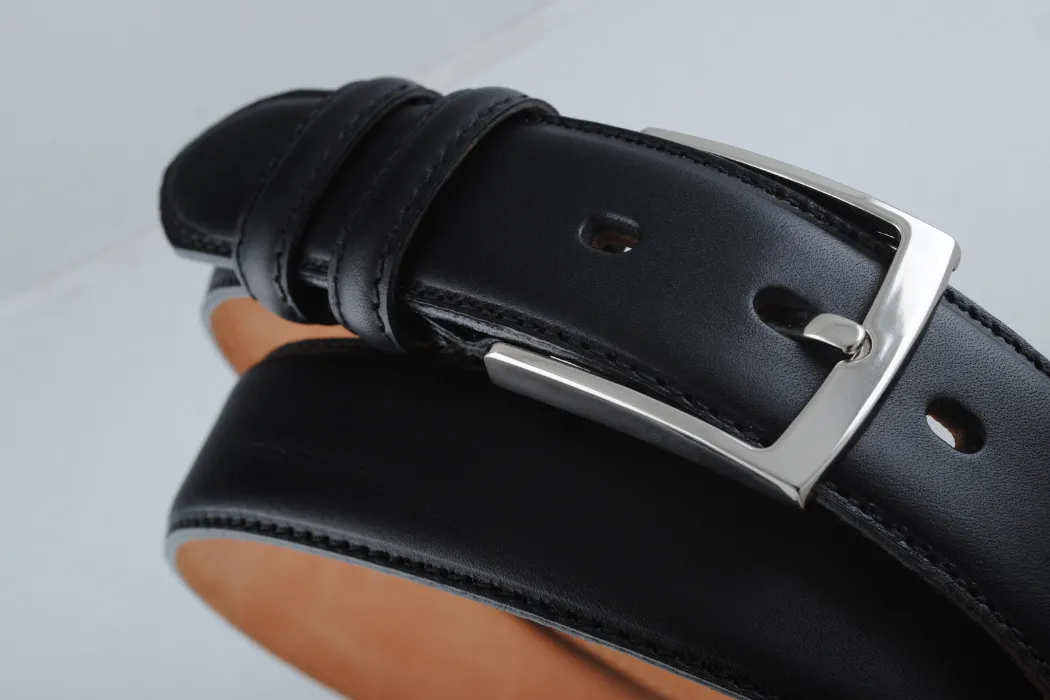
The most obvious sign is that your belt is simply too loose on the tightest hole or too tight on the loosest one. You might also notice that the buckle is straining or that the existing holes are starting to look stretched out and uneven.
Benefits of DIY
While you can always take your belt to a professional, adding a hole yourself has some great benefits. It gives you the satisfaction of a custom fit. It is also a great first step into the world of leather crafts. Learning this simple skill can give you the confidence to tackle more complex DIY projects in the future.
Understanding Leather Types and Their Impact on Hole Punching
The type of leather matters when punching a new hole. **Full-grain leather** is thick and requires a strong, sharp tool like a drive punch. **Top-grain** is also durable but easier to punch with a rotary tool. **Genuine and faux leathers** are softer and can be damaged easily. You should avoid using a drill on these types, as they can tear or melt.
An Overview of Leather Varieties
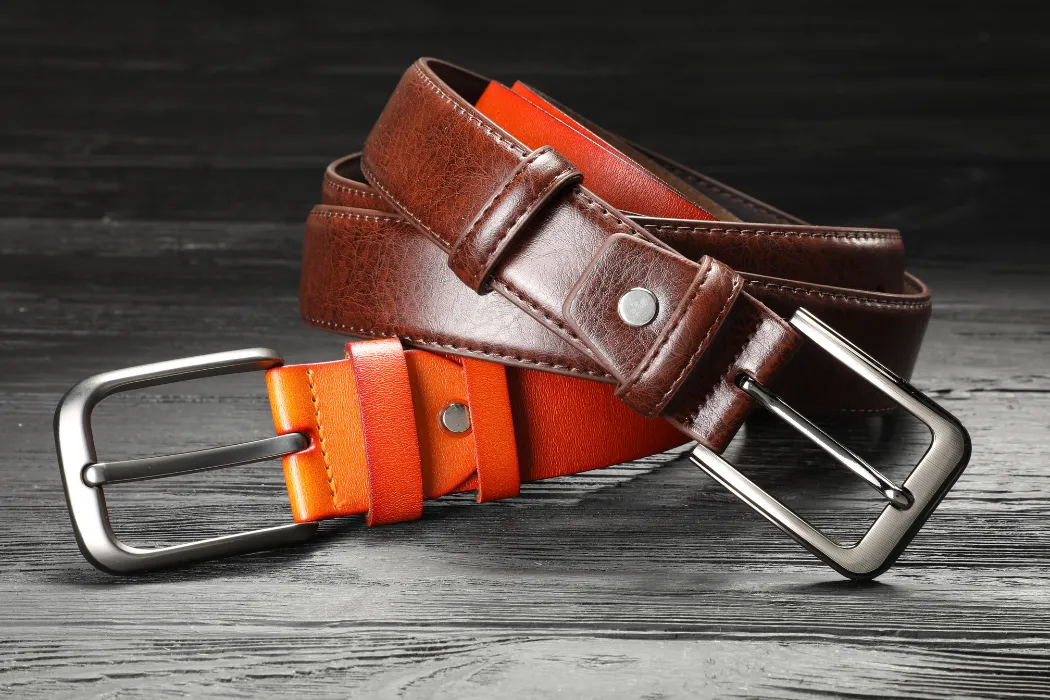
Not all leather is the same. The material of your belt will affect how you should punch a new hole. Some leathers are tough. Others are delicate. Knowing your leather helps you choose the right tool.
- Full-Grain Leather: This is the strongest and thickest type. It is very durable and requires more force to punch.
- Top-Grain Leather: This is also a high-quality leather. It is often smoother and more flexible than full-grain.
- Genuine Leather: This is a thinner, more processed leather. It is not as strong as the top grades.
- Faux/Vegan Leather: This is a synthetic material, usually plastic. It can be easily damaged by the wrong tool.
How the Leather Type Affects Punching
Thicker leathers like full-grain need a sharp, heavy-duty tool. A dull tool will struggle to get through and can create a messy hole. Softer materials like genuine or faux leather are easier to punch. However, you must be careful not to tear them. Faux leather can also melt if you use a heated tool or a power drill too quickly.
Always test your tool on a hidden part of the belt first. This is especially important with faux leather to make sure it doesn’t tear or melt. A small test can save you from ruining your belt.
Leather Punching Comparison Table
| Leather Type | Typical Thickness | Punch Difficulty | Ideal Method |
|---|---|---|---|
| Full-Grain | 3.0 – 4.0 mm | Hard | Drive Punch & Mallet |
| Top-Grain | 2.0 – 3.0 mm | Medium | Rotary Punch |
| Genuine Leather | 1.5 – 2.5 mm | Easy | Rotary Punch |
| Faux/Vegan | 1.0 – 2.0 mm | Easy (but can tear) | Sharp Rotary Punch |
Essential Tools and Materials for Punching Holes in Leather Belts
To make a hole in a leather belt, you can use professional tools or household items. **Professional tools** like a rotary punch or a drive punch set will give you the cleanest results. For a DIY approach, you can use a **power drill** or even a simple **nail and hammer**. Always use a cutting mat and safety gear like gloves and eye protection for any method.
Professional Tools
For the best results, a specialized leather tool is always the top choice. These tools are designed to cut clean, precise holes without damaging the leather.
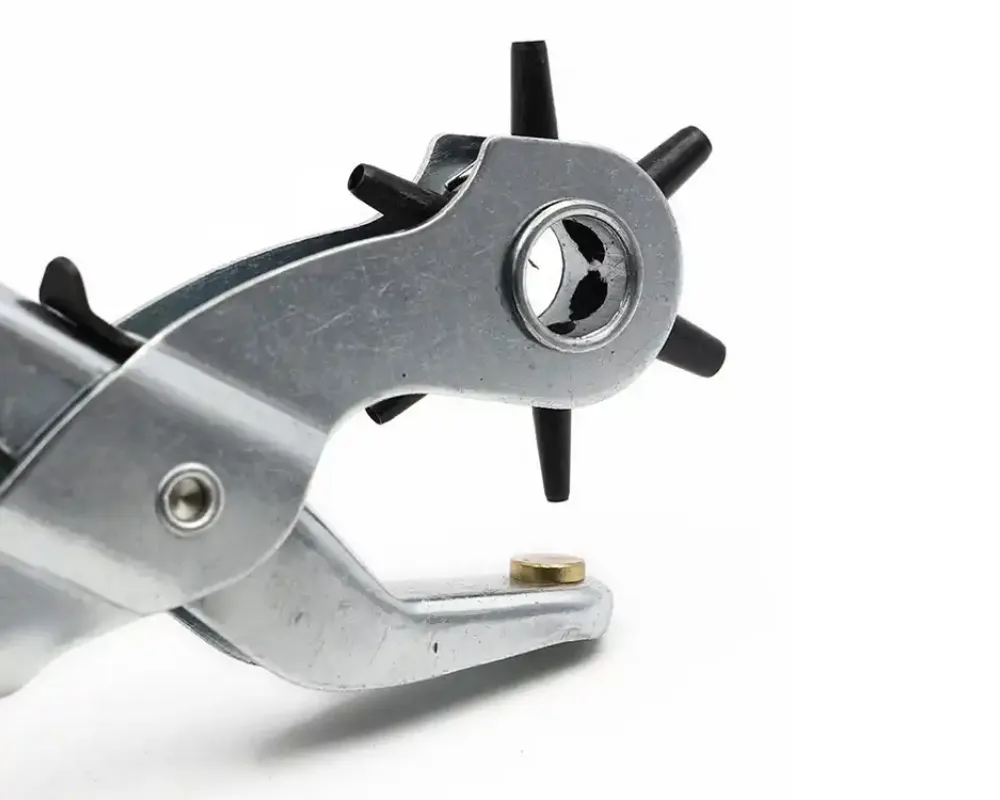
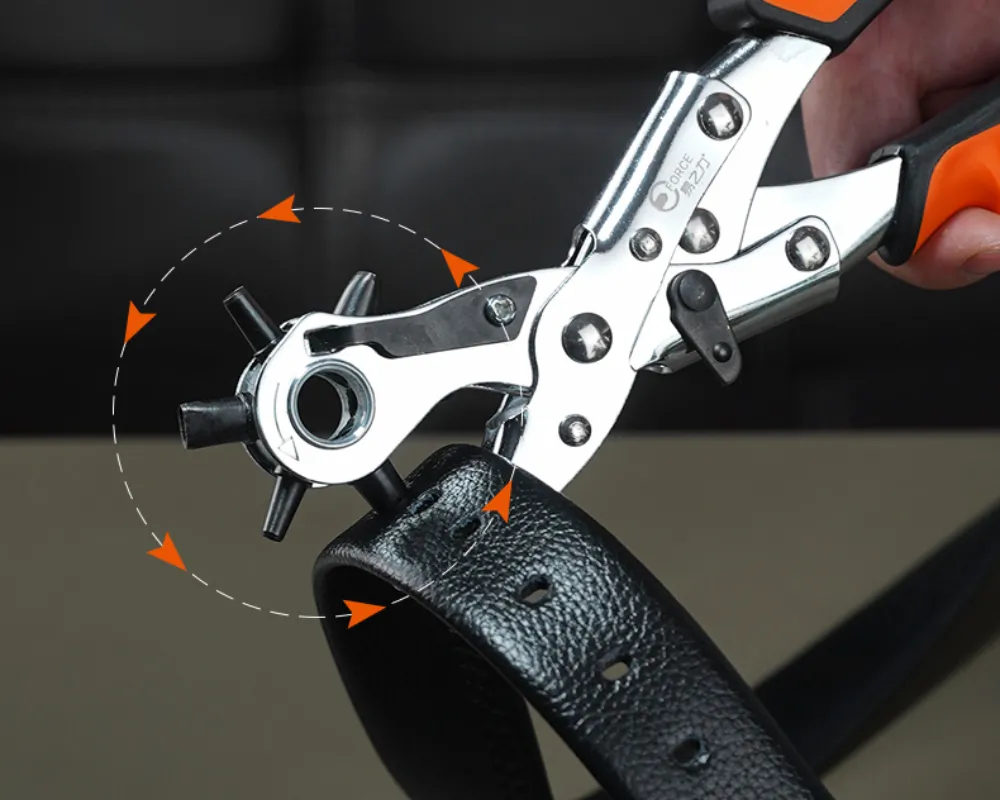
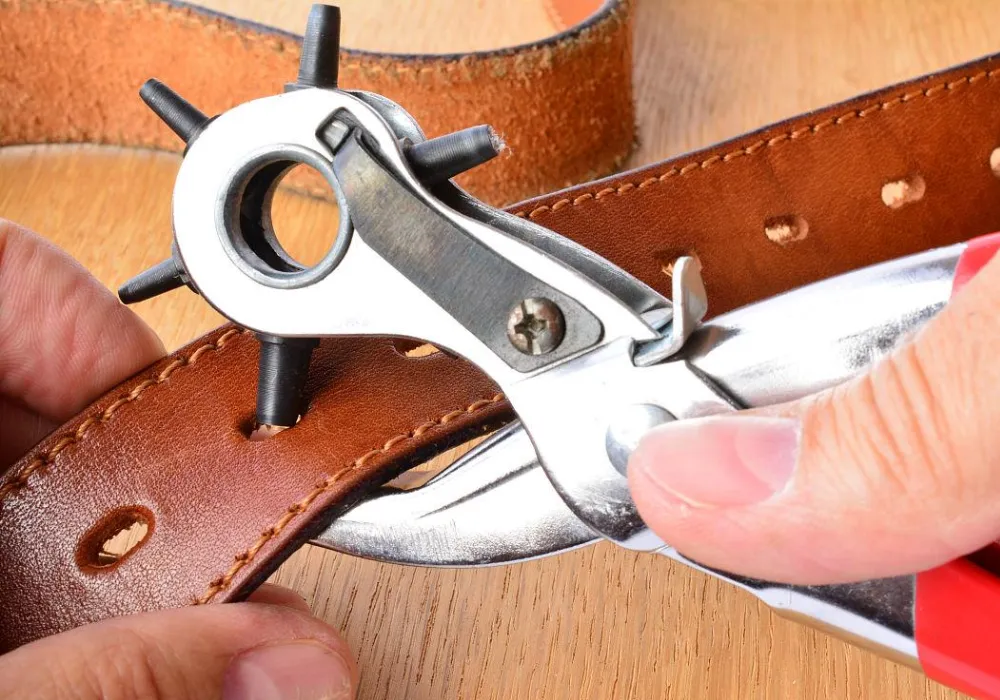
- Rotary Punch: This looks like a pair of pliers with a rotating wheel of different-sized punches. It is easy to use and very effective on most leathers.
- Drive Punch Set: This is a set of sharp, hollow steel tubes. You place one on the leather and strike it with a mallet to create a perfect hole. This is the best choice for very thick leather.
Household Alternatives
If you don’t have a leather punch, you can often find a good alternative in your toolbox.
- Power Drill: A drill with a standard bit can make a clean hole, especially in thicker leathers.
- Nail and Hammer: For a simple, no-frills method, a sharp nail and a hammer can get the job done.
Safety and Other Materials
No matter which method you choose, safety and preparation are key. A few simple items will ensure you get a clean result without damaging your work surface or yourself.
You will always need a ruler for measuring, a marker for marking the spot, and a cutting mat or a block of scrap wood to protect your table. Wearing safety glasses is also a good idea, especially when using a drill or a hammer and nail.
Tool Comparison Chart
| Tool | Pros | Cons | Ease of Use |
|---|---|---|---|
| Rotary Punch | Clean holes, multiple sizes | Can be hard to squeeze on thick leather | Easy |
| Drive Punch | Very clean holes, best for thick leather | Requires a mallet and a sturdy surface | Medium |
| Power Drill | Fast and powerful | Can tear or burn the leather if not careful | Medium |
| Nail & Hammer | Accessible and cheap | Can create a messy, ragged hole | Easy |
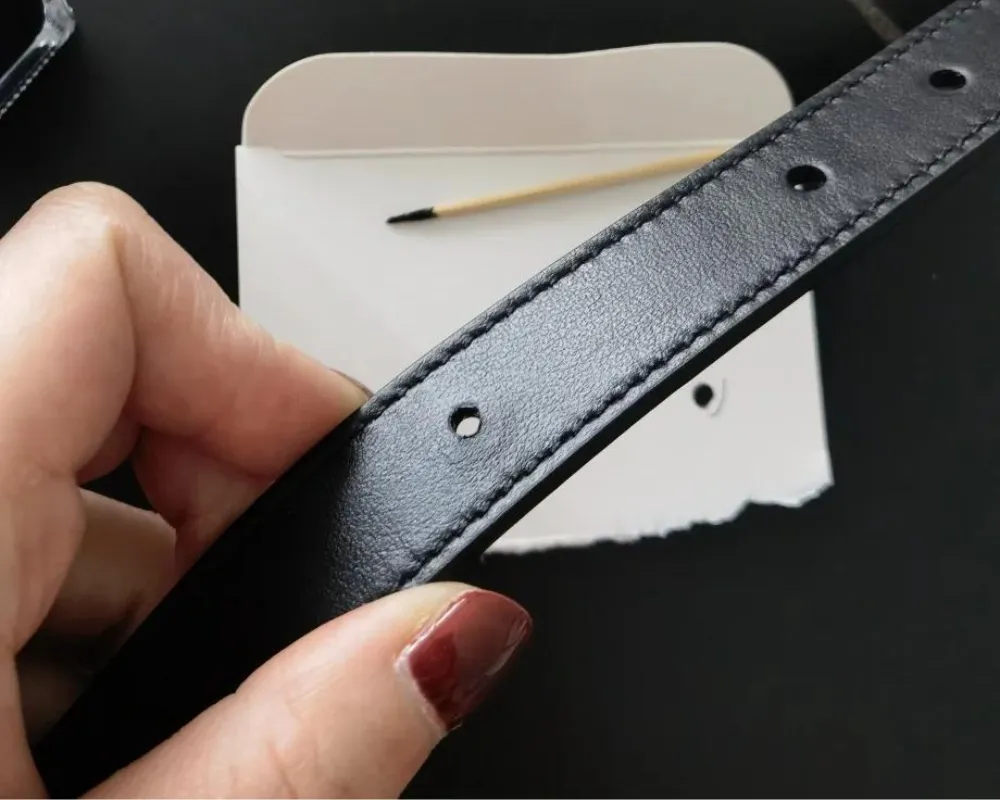
Preparation: Measuring and Marking the Hole Accurately
To prepare your belt, first measure the distance between the existing holes. The standard spacing is **1 to 1.5 inches**. Use a ruler to mark the spot for the new hole, keeping the same spacing. Use a pencil on light leather and a silver pen on dark leather. Double-check that your mark is centered to ensure a professional, even result.
Step-by-Step: How to Find the Perfect Spot
Proper placement is the key to a professional-looking result. Rushing this step can lead to a crooked, sloppy hole that ruins your belt. Follow these simple steps for perfect placement every time.
- Put the Belt On: Wear the belt as you normally would and pull it to a comfortable tightness. Note where the buckle’s prong naturally wants to rest on the strap. This is the ideal spot for your new hole.
- Mark the Spot: While still wearing the belt, use a marker to make a small dot in that ideal spot.
- Measure the Spacing: Take the belt off and lay it flat. Use a ruler to measure the distance between the existing holes.
How far apart should holes be on a belt?
The standard distance between belt holes is usually one inch (about 2.5 cm). However, it can sometimes be up to 1.5 inches. Use the existing holes on your belt as the definitive guide. Measure that distance from the last hole to your new mark and adjust your mark if needed to match the pattern.
Marking Techniques for a Clean Result
The final step is to make sure your mark is perfectly centered. Use your ruler to ensure the dot is exactly in the middle of the belt’s width. A crooked hole will be very noticeable.
The best tool for marking depends on the color of your leather. For light-colored belts, a simple pencil works great. For dark leather, a silver pen, which you can find at any craft store, is the best choice. It will create a clear, visible mark that you can easily follow with your punch or drill.
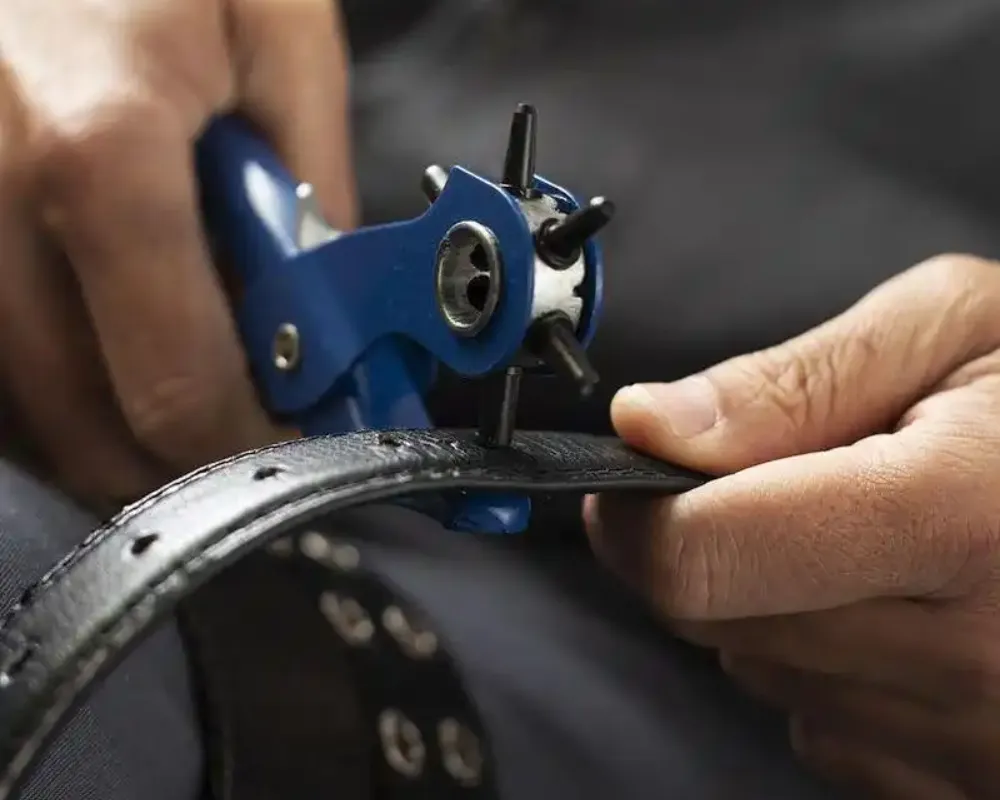
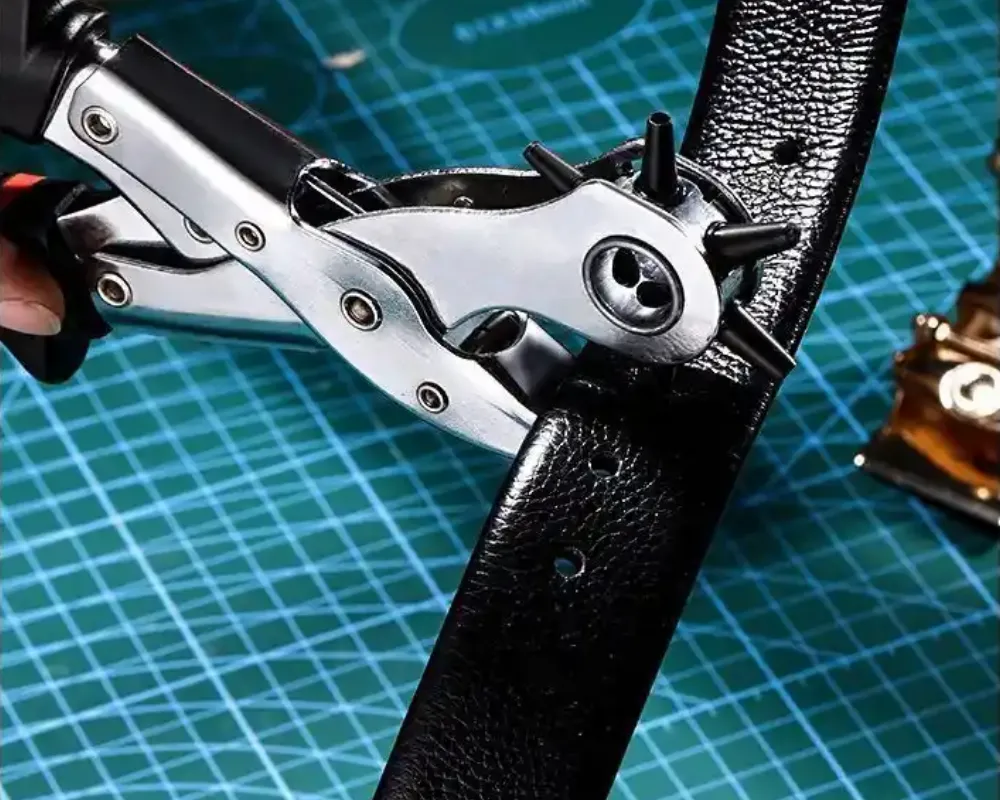
Method 1: Using a Professional Leather Hole Punch
Using a professional leather punch is the best way to make a clean hole in a belt. A **rotary punch** is a plier-like tool that is easy to use on most leathers. For very thick belts, a **drive punch** and mallet are ideal. These tools create a perfect, round hole that looks just like the originals, ensuring a professional and long-lasting result.
For a truly professional result, nothing beats a tool designed for the job. A leather hole punch will give you a clean, perfectly round hole every time. It is the recommended method for any high-quality belt.
Using a Rotary Punch
A rotary punch is the most common and user-friendly tool. It is perfect for most top-grain and genuine leather belts.
- Select the Right Size: Rotate the wheel on the punch to select the punch size that matches the existing holes on your belt.
- Position the Punch: Open the pliers and place the belt between the jaws. Carefully align the punch tip with the mark you made.
- Squeeze Firmly: Squeeze the handles together firmly and evenly. You should feel a clean “pop” as the punch cuts through the leather.
Using a Round Drive Punch

For very thick or tough full-grain leather, a drive punch is the better choice. It uses the force of a mallet to make a perfect cut.
- Position the Punch: Place your belt on a cutting mat. Position the sharp, hollow end of the drive punch directly over your mark.
- Strike with a Mallet: Hold the punch straight and give the other end a firm, confident strike with a mallet. For very thick leather, you may need a few strikes.
- Check Your Work: Lift the punch to reveal a clean, perfect hole.
A key tip is to match the punch size to the buckle’s prong, not just the old holes. The new hole should be just large enough for the prong to pass through snugly. This prevents the hole from stretching out over time.
Method 2: Using a Power Drill for Quick Holes
Yes, you can drill a hole in a leather belt. This method is fast and effective, especially on thick leather. To do it safely, secure the belt to a block of scrap wood. Choose a drill bit that matches the existing holes. Drill slowly on a low speed to avoid burning or tearing the leather. This is a good DIY option if you don’t have a leather punch.
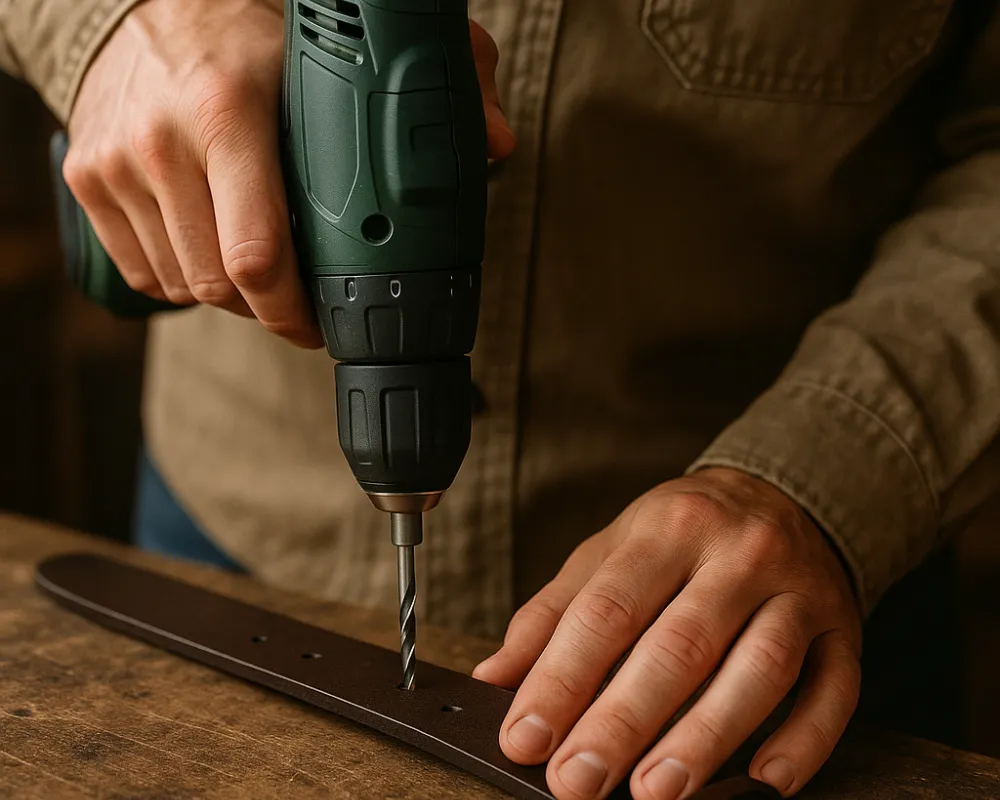
A Quick and Powerful Option
If you have a power drill, you have a powerful tool for making a hole in a belt. This method works very well on thick, tough leathers where a rotary punch might struggle. However, it requires a steady hand and a bit of caution to get a clean result.
Step-by-Step Guide to Drilling
Follow these steps for a safe and effective process:
- Secure the Belt: Lay your belt on a piece of scrap wood. This will protect your work surface and give you a stable base.
- Choose the Right Bit: Select a standard drill bit that is the same size as the existing holes. A 1/8 to 3/16 inch bit is usually a good choice.
- Drill Slowly: Set your drill to a low speed. Hold it straight and apply steady, even pressure. Drilling too fast can generate heat, which can burn the leather or cause it to tear.
- Clean the Edges: The drilled hole may have slightly rough edges. You can smooth them out with a small piece of fine-grit sandpaper.
Pros and Cons of the Drill Method
The biggest advantage of using a drill is its speed and power. It can get through a thick leather belt in seconds. However, it is also a riskier method for beginners.
If you are not careful, the drill bit can slip and damage the belt. It can also create a less clean hole than a punch. Always wear safety glasses and test the drill on a scrap piece of leather first if you can.
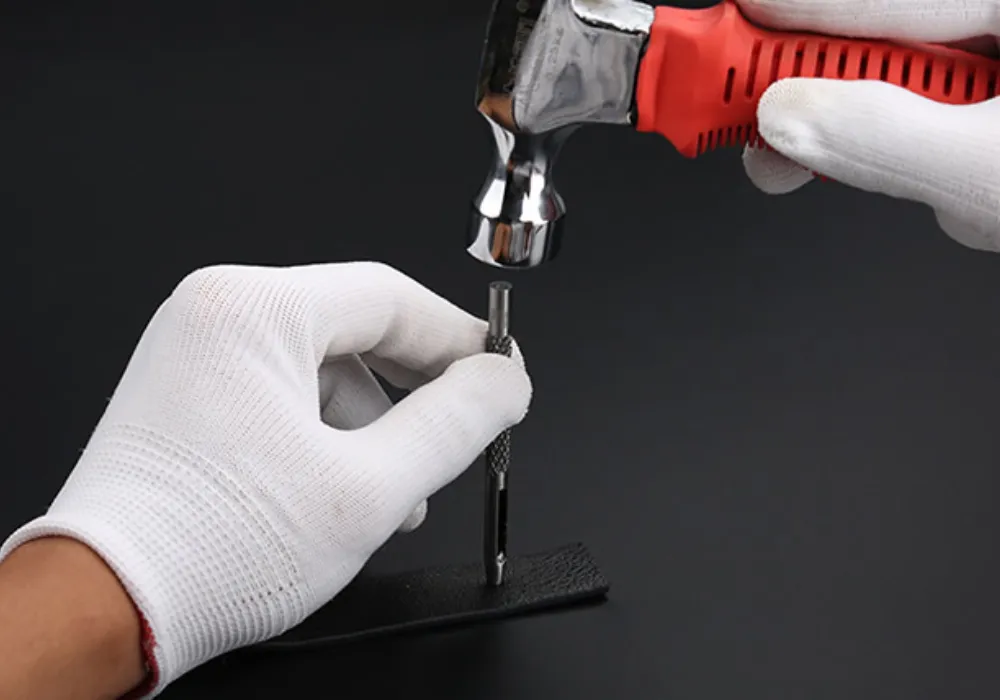
Method 3: Using Household Items – Hammer and Nail or Awl
How to make a hole in a belt without a punch? You can use common household items. A **hammer and a sharp nail** can create a simple hole. An **awl** is another great option for piercing the leather. These methods are budget-friendly but may result in a less clean hole than a professional punch. Always work on a protective surface like scrap wood.
With a Hammer and Nail
This is a classic DIY solution that almost everyone can try. All you need is a sharp nail and a hammer.
- Prepare Your Workspace: Place your belt on a sturdy piece of scrap wood.
- Position the Nail: Place the tip of the nail directly on your mark. Hold it straight and steady.
- Hammer Through: Give the nail a few firm taps with the hammer until it goes all the way through the leather.
- Widen the Hole: Wiggle the nail around in the hole to widen it to the right size.
With a Scratch Awl
An awl is a sharp, pointed tool often found in basic toolkits. It is designed for piercing holes, making it a great option for leather.
- Place on a Mat: Lay your belt on a cutting mat or a piece of wood.
- Pierce the Leather: Position the tip of the awl on your mark. Apply firm, steady pressure to push it through the leather.
- Rotate to Widen: Once the tip is through, rotate the awl in a circular motion to widen the hole to the desired size.
These household methods are very accessible. However, they tend to push the leather aside rather than cutting it. This can result in a slightly ragged hole. To prevent cracking, it’s a good idea to apply a bit of leather conditioner around the new hole after you’ve made it.
Method 4: Using a Pocket Knife or Sharp Blade
Using a pocket knife to make a hole in a belt should be a last resort. It is an emergency method that is very difficult to do cleanly and safely. If you must use a knife, it is best for thin leathers. Fold the belt and carefully cut a tiny slit. This method is imprecise and has a high risk of damaging the belt or causing injury.
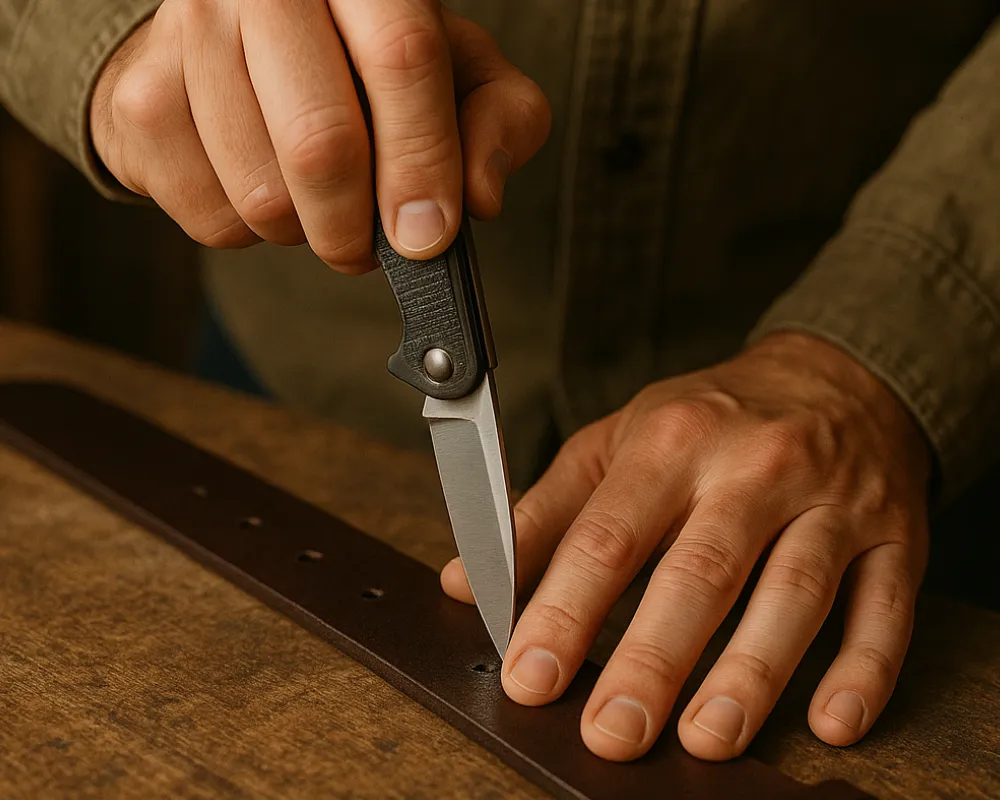
An Emergency Method
This method is for on-the-go fixes only. If you are out and desperately need to tighten your belt, a sharp pocket knife can work. However, it is very difficult to create a clean, round hole with a blade. This method has a high risk of creating an ugly slit that can easily tear. It is best used on thinner leather belts.
Step-by-Step Guide
Safety is the number one priority with this method. Always cut away from your body on a steady surface.
- Fold the Belt: Fold the belt in half at the mark you made.
- Cut a Small Slit: Carefully press the tip of the knife through the folded leather to create a small slit.
- Widen Carefully: Unfold the belt. Insert the tip of the knife into the slit and gently twist it in a circular motion to widen the hole. Be very careful not to slice through the leather.
Pros and Cons
The only real pro of this method is its portability. A pocket knife is a tool you might have with you in an emergency. However, the cons are significant. It is very imprecise, and there is a very high risk of damaging your belt or injuring yourself. This method should be avoided unless absolutely necessary.
Method 5: Alternative No-Tool Methods and Hacks
How to put a hole in a belt without tools? For a temporary fix, you can use a **heated nail or screw**. Carefully heat the tip with a lighter and press it through the leather to melt a hole. Another option is to use the pointy tip of a pair of **scissors** to pierce and rotate, creating a rough hole. These methods are not recommended for quality belts as they can be messy and damaging.
The Heated Nail or Screw Method
This is a common “no-tool” hack, but it requires extreme caution. The idea is to use heat to melt a hole through the leather rather than cutting it.
- Hold the Nail Securely: Using a pair of pliers, firmly grip a nail or a screw.
- Heat the Tip: Carefully heat the tip of the nail with a lighter or a candle for about 10-15 seconds.
- Press Through the Leather: While the tip is still hot, press it firmly onto your mark. It should melt through the leather to create a hole.
The Scissors Twist Method
If you have a sturdy pair of scissors with a sharp point, you can use them as a makeshift awl.
- Position the Tip: Place the tip of one of the scissor blades directly on your mark.
- Puncture and Rotate: Apply firm pressure and twist the scissors back and forth. The tip will gradually work its way through the leather, creating a hole.
These methods are free and accessible in a pinch. However, they are the most likely to create a messy, uneven, or burnt-looking hole. They are best saved for temporary fixes on older, less valuable belts. The heat method can also release unpleasant fumes, so it should only be done in a well-ventilated area.
Finishing and Smoothing the New Hole
Finishing the new hole is a crucial final step. It prevents the leather from fraying and gives your belt a professional look. You can smooth the edges with fine-grit sandpaper. Then, apply a leather conditioner or a bit of beeswax to seal the raw fibers. This simple step improves the appearance and ensures the longevity of your newly adjusted belt.
Why You Should Finish the Hole
Making the hole is only half the job. A raw, unfinished hole can have rough edges. These can fray over time. The hole can also stretch or even tear. Taking a few extra minutes to finish the hole will make it look cleaner. It will also make it much more durable. This is especially important for a high-quality leather belt.
Techniques for a Clean Finish
You can use a few simple techniques to get a professional result.
- Sand the Edges: Gently sand the inside edge of the new hole with a small piece of fine-grit sandpaper. This will smooth out any rough fibers.
- Apply Conditioner or Sealer: Rub a small amount of leather conditioner or beeswax into the raw edge of the hole. This will seal the fibers and prevent them from fraying.
- Burnish the Edge: For a truly professional finish, you can use a tool called a burnisher to smooth and polish the edge of the hole.
Fixing Common Issues
If your hole is a little uneven, don’t worry. You can often fix it by carefully enlarging it with a slightly bigger punch or drill bit. Just be sure to work slowly and carefully to keep the hole centered.
Safety Precautions and Common Mistakes to Avoid
When adding a hole to a belt, safety is key. Always work on a **protective surface** like a cutting mat and wear **safety glasses**, especially when drilling. Common mistakes include **making too many holes**, which weakens the belt, and **punching the wrong size hole** for the buckle. Always measure carefully and double-check your work to avoid these errors.
Safety First
Working with sharp tools always requires caution. Follow these simple safety tips to avoid injury.
- Protect Your Work Surface: Always use a cutting mat or a block of scrap wood underneath your belt. This will protect your table from damage.
- Wear Safety Gear: When using a drill or a hammer, it is always a good idea to wear safety glasses to protect your eyes from any flying debris.
- Work in a Ventilated Area: If you are using the heated nail method, make sure you are in a well-ventilated area to avoid inhaling any fumes.
Common Mistakes to Avoid
A few common mistakes can ruin an otherwise perfect job. Be sure to avoid these pitfalls.
- Making Too Many Holes: Adding too many holes too close together can weaken the structure of the belt and cause it to tear.
- Punching the Wrong Size: A hole that is too big will look sloppy. A hole that is too small will be difficult to use and will stretch out over time.
- Ignoring the Grain: If your belt has a distinct grain or pattern, make sure your new hole follows the same alignment.
The biggest mistake is rushing. Take your time to measure carefully and choose the right tool for the job. A few extra minutes of preparation can make all the difference between a professional result and a ruined belt.
Advanced Tips: Customizing Multiple Holes or Belt Modifications
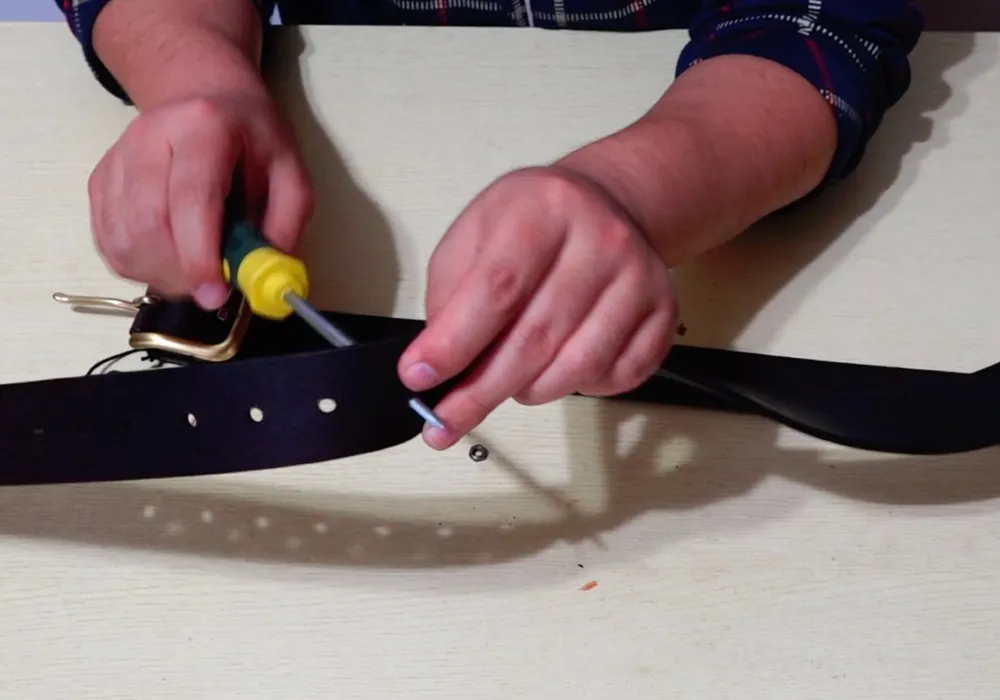
For advanced customization, you can add multiple holes for a decorative look or even reshape the end of your belt. This requires specialized tools like **oblong punch dies** and **edge bevelers**. You can also reinforce new holes with metal **grommets** for a unique, industrial style. For very valuable or exotic leather belts, it is always best to seek the help of a professional.
For the Pros
Once you have mastered the basics, you can try some more advanced techniques. You can add a series of evenly spaced holes for a decorative effect. You can use an edge beveler to give the new hole a rounded, professional finish. With the right tools, you can even reshape the tip of the belt for a completely custom look.
Customization Ideas
Don’t be afraid to get creative. You can use decorative punch sets to create holes in different shapes. You can also add metal grommets to your new holes. This not only reinforces them but also adds a cool, industrial vibe to your belt.
When to Seek Help
While DIY is great, some jobs are best left to the professionals. If you have a very expensive designer belt or one made from a delicate exotic leather, it is always safest to take it to a cobbler or a leather specialist.
Environmental and Sustainability Considerations in Belt Maintenance
Repairing your belt instead of replacing it is a great sustainable practice. By adding a new hole, you are reducing waste and extending the life of your product. This “repair, don’t replace” mindset is a key part of eco-friendly fashion. Choosing to use simple, manual tools also reduces your energy consumption. Proper long-term care, like regular conditioning, further enhances the belt’s longevity.
Eco-Friendly Practices
Choosing to add a hole to your belt is an inherently sustainable act. You are choosing to repair and reuse an item rather than throwing it away. This reduces waste and saves the resources that would have been used to create a new product. You can take this a step further by choosing to use simple, manual tools like a punch instead of a power drill. This reduces your energy consumption.
Long-Term Care
The most sustainable practice of all is proper long-term care. By regularly cleaning and conditioning your leather belt, you keep it strong and supple. This prevents it from stretching or cracking in the first place, reducing the need for frequent adjustments or replacements.
This “buy once, buy well” philosophy is the heart of sustainable fashion. It is about investing in quality items and caring for them so they last a lifetime.
Frequently Asked Questions (FAQs)
Common questions focus on how to make a hole without a punch and which tool is best. You can make a hole without a punch using a **drill** or a **hammer and nail**. The **best tool** is a professional leather punch, as it creates the cleanest hole. Belt holes should be spaced **1 to 1.5 inches** apart. The right hole size is one that the buckle’s prong fits through snugly.
How do you punch a hole in leather without a punch?
You can use a power drill with a standard bit. You can also use a sharp nail and a hammer. For a temporary fix, you can even use a heated screw to melt a hole through the leather.
What is the best tool to make a hole in a belt?
The best tool is a professional leather hole punch. A rotary punch is great for most leathers, while a drive punch is best for very thick belts.
Can you use a drill to make a hole in a belt?
Yes, a drill is a very effective tool for making a hole in a leather belt. Just be sure to use a sharp bit and drill on a low speed to avoid damaging the leather.
How far apart should holes be on a belt?
The standard spacing is one inch, but you should always measure the distance between the existing holes on your belt and use that as your guide.
What size hole for belt buckle?
The hole should be just large enough for the buckle’s prong to pass through without a struggle. Match the size to the existing holes on your belt for a consistent look.
How to fix a belt hole that’s too big?
Unfortunately, you cannot make a hole smaller. The best solution is to take it to a professional who may be able to patch it or suggest another creative fix.
Conclusion
A belt that fits perfectly is a small but significant luxury. With the right tools and a little bit of knowledge, you now have the power to achieve that perfect fit on any belt you own. From the professional precision of a leather punch to the simple ingenuity of a hammer and nail, there is a method to suit every need and every budget. By learning this simple skill, you are not just saving a beloved accessory; you are embracing a more sustainable and personalized approach to fashion.
This commitment to quality, customization, and longevity is at the heart of what we do at Hoplok Leather. With over two decades of experience, we understand that a great product is one that is built to last and to be cherished. We hope this guide has empowered you to take control of your accessories. We invite you to apply your new skills to your own projects and to continue exploring the rewarding world of leather craft.
Ready to Create Your Own Custom Leather Goods?
Inspired to take your leather crafting to the next level? At Hoplok Leather, we are a premier manufacturer of custom, private-label leather goods. We partner with brands to turn their vision into high-quality, market-ready products. Let our 22 years of expertise in sourcing and manufacturing help you create something truly exceptional.