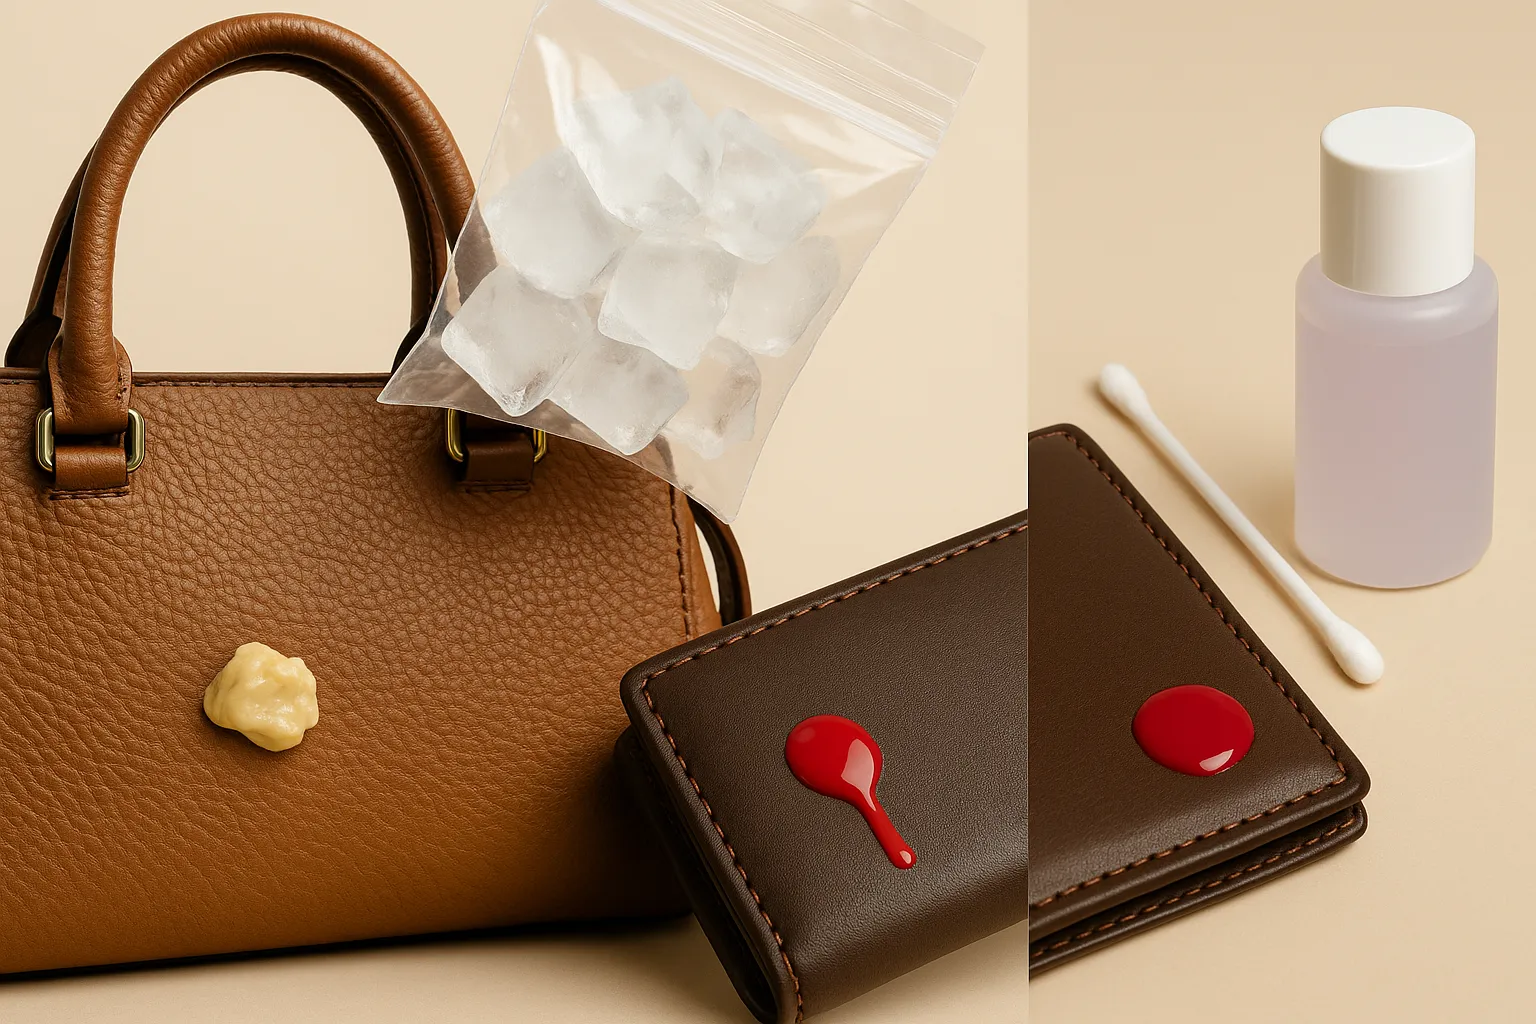
Few household accidents cause as much panic as a sticky mess or a chemical spill on a prized leather item. Imagine finding a stringy, gooey piece of chewing gum stuck to your favorite leather handbag. Or watching in horror as a drop of bright red nail polish lands on your pristine wallet. One is a physical nightmare of stickiness; the other is a chemical crisis in the making.
To remove gum from leather, use ice to freeze it until it’s hard and brittle, then gently pry it off with a dull edge like a credit card. For nail polish, you must use a cotton swab dipped in non-acetone remover to very carefully dab (never wipe) the stain. For both, it is critical to clean and condition the area afterward to restore the leather’s finish and moisture.
But here’s the secret: you can’t treat these two problems the same way. Tackling these stains requires two completely different mindsets. To remove gum, you need to think like a physicist, using temperature to change the gum’s physical state. To remove nail polish, you must become a chemist, using a careful solvent to dissolve the lacquer without destroying the leather.
This guide will give you the professional playbook for both roles. We’ll walk you through the safe, step-by-step methods for handling these leather emergencies, so you can solve the problem without creating a bigger one.
First, Do No Harm: What Are the Universal Rules for These Stains?
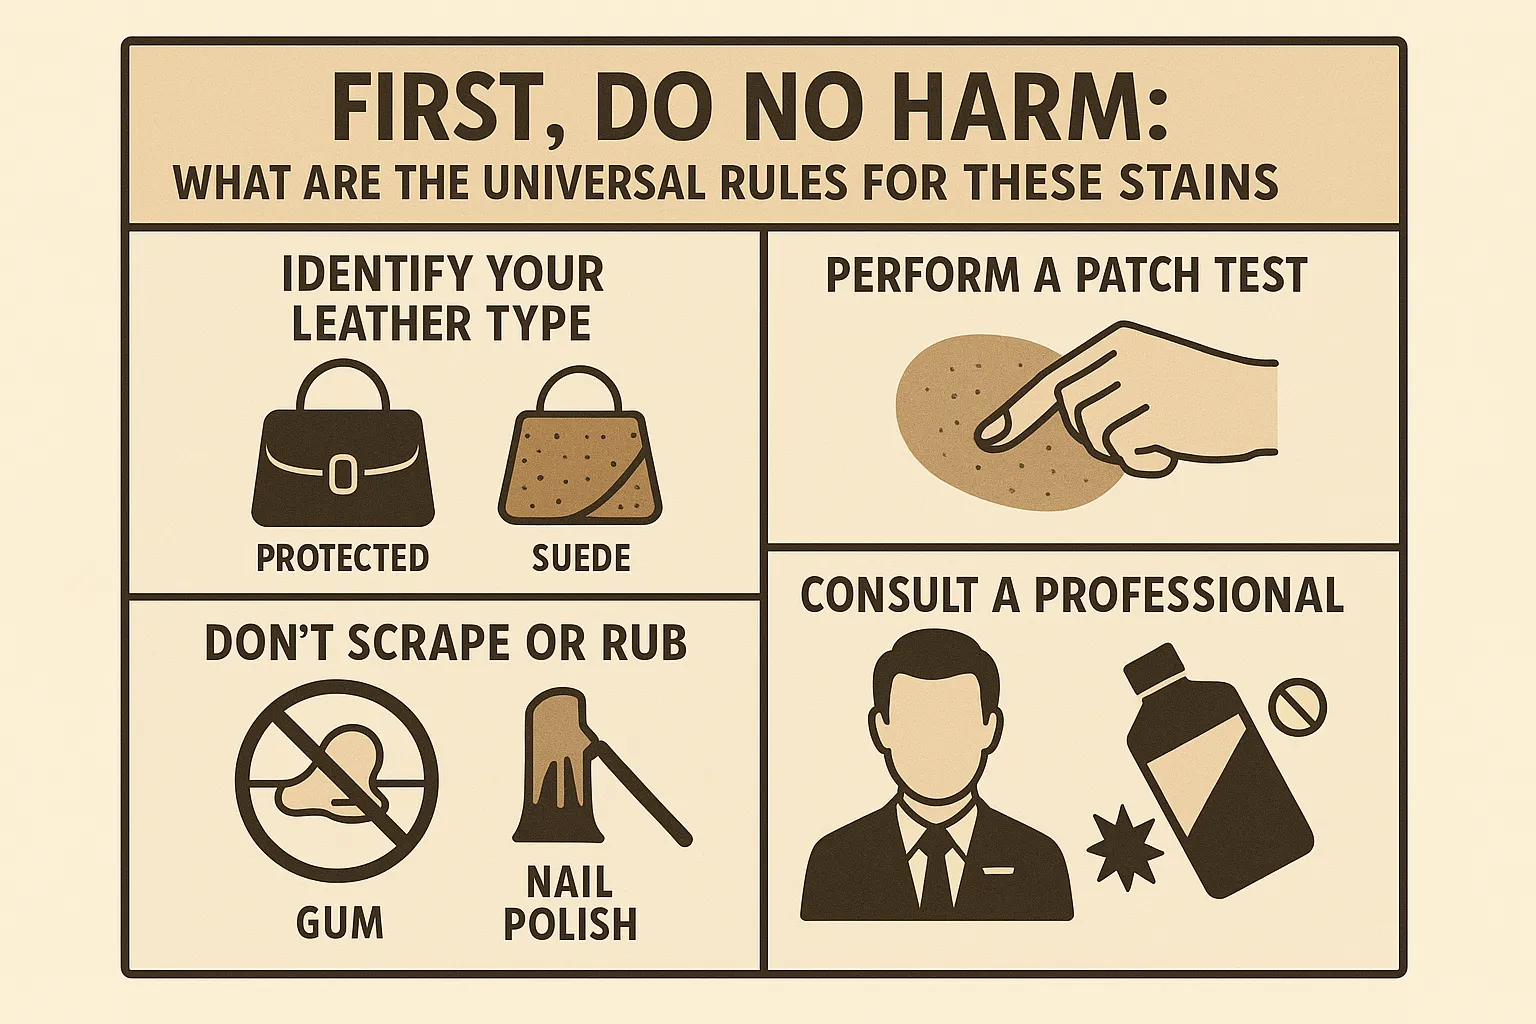
Before you treat either gum or nail polish, you must adopt a “do no harm” mindset. These are not typical dirt stains; they are aggressive and require caution. You must identify your leather type, perform a patch test for any chemicals, and avoid the instinct to scrape or rub aggressively. These universal rules are your first line of defense against turning a small accident into a permanent disaster.
Why You Must Identify Your Leather Type (Protected vs. Suede)
The methods in this guide are designed primarily for protected leather, which has a durable topcoat. Using these techniques on absorbent, unfinished leathers is extremely risky.
- For Gum: On suede, the sticky residue can get tangled in the fibers. Aggressive scraping to remove it can pull out the fibers and create a bald spot.
- For Nail Polish: On suede or aniline leather, the solvent (even non-acetone) and the dissolved polish will be absorbed instantly. This will create a large, discolored patch that is impossible to remove.
If you have a gum or nail polish stain on a suede or unfinished leather item, your safest and best option is to consult a professional leather cleaner immediately.
The Non-Negotiable Patch Test: Your Ultimate Safety Net for Chemicals
This rule applies specifically to nail polish removal. While “non-acetone” remover is gentler than acetone, it is still a chemical solvent. Different leather manufacturers use different types of finishes, and some may be more sensitive than others.
A patch test is a simple 2-minute check that can prevent a catastrophe.
- Find a hidden spot, like inside a pocket or on a seam allowance.
- Apply a tiny amount of the non-acetone remover with a cotton swab.
- Wait about 30 seconds, then gently blot it off.
- Let the spot dry and check for any color loss or damage to the sheen.
If you see any damage, no matter how slight, do not use the product on the visible stain.
The Dangers of Scraping and Spreading
When faced with these stains, your first instinct is to get them off as fast as possible. This often leads to two major mistakes: aggressive scraping and frantic wiping.
-
- Scraping: For gum, using a sharp object like a knife can easily slip and slice or gouge the leather, creating a permanent scar that is far worse than the original problem. Always use a dull, flexible edge.
– Spreading: For nail polish, wiping the stain with a cloth is a disaster. It will smear the lacquer and the solvent across a wider area, turning a small dot into a large, messy smudge that is much harder to contain and treat.
Always be deliberate and gentle. For gum, you want to “lift” it off. For nail polish, you want to “dab” and “dissolve” it in a controlled way.
How Do You Remove Chewing Gum? (The Physical Method)
To remove chewing gum from leather, the goal is to change its physical state from soft and sticky to hard and brittle. This is achieved through freezing. Do not use any chemicals or solvents. The cold temperature does all the work, allowing you to safely lift the gum off the surface without using any harsh products that could damage the leather’s finish.
The Science: Why Freezing is The Only Safe Way
Chewing gum is made of synthetic polymers. At room temperature, these polymers are soft, pliable, and incredibly sticky. When you try to pull or scrape soft gum, it just stretches and smears, working its way deeper into the leather’s grain. It’s a losing battle.
By applying intense cold, you cause a physical change. The polymers in the gum rapidly cool and contract, losing their elasticity and stickiness. The gum transforms into a hardened, brittle solid, making it easy to fracture and lift off the surface in one piece.
This method is safe because you are not using any chemicals that could react with the leather’s finish. You are simply changing the gum’s temperature.
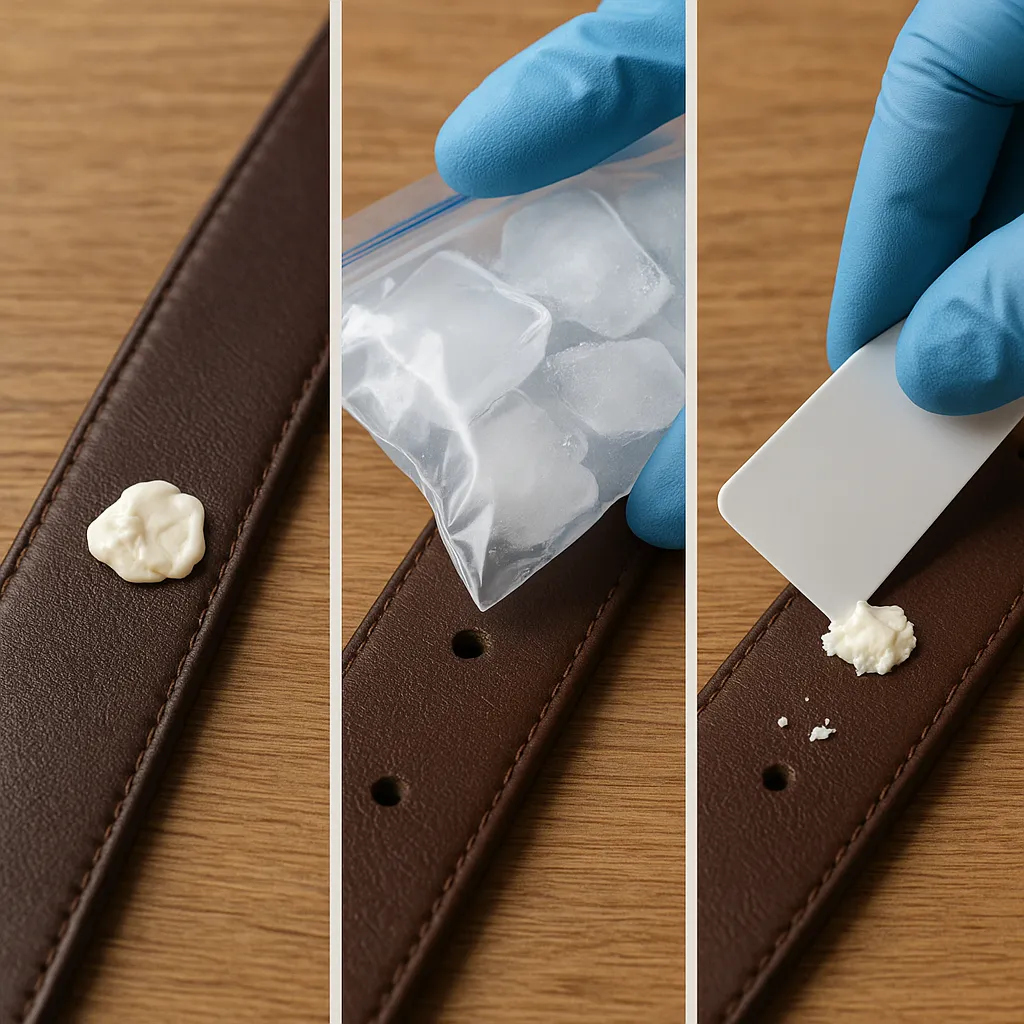
Step 1: The Freezing Technique Using Ice Cubes
The key to this step is to freeze the gum solid without getting the leather wet, which could cause a water stain. A plastic bag is your best friend here.
- Place a few ice cubes into a small, sealable plastic bag.
- Press the air out and seal the bag tightly.
- Place the bag of ice directly on top of the chewing gum.
- Hold it there for about 10-15 minutes. You need to wait until the gum is completely frozen solid. You can test it by tapping it with a fingernail; it should feel hard, not tacky.
Step 2: Gently Scraping Away the Hardened Gum
Once the gum is frozen solid, you have a small window of time to remove it before it thaws and becomes sticky again. Work quickly but carefully.
You need a scraping tool that is firm but not sharp. The edge of a credit card, a plastic spoon, or a dull butter knife are all excellent choices. Avoid using anything with a sharp blade.
- Slide the edge of your dull scraper underneath the hardened gum.
- Gently push or pry upwards. The goal is to get the entire piece of gum to pop off in one go.
- If it breaks, simply refreeze the remaining bits and repeat the process until it’s all gone.
Step 3: Cleaning Up the Sugary Residue
After the gum is gone, you might be left with a slight, sticky residue from its sugary coating. This is easy to clean.
Create a simple solution of warm water and a few drops of mild dish soap. Dampen a clean microfiber cloth in the solution, wring it out completely, and gently wipe the area to remove any stickiness. Follow up with a second cloth dampened with plain water to rinse, then pat the area dry. A final application of leather conditioner is a good idea to nourish the spot.
Gum vs. Nail Polish Removal Strategy
| Problem | Core Principle | Key Tool | Risk Level |
|---|---|---|---|
| Chewing Gum | Physical Change (Freezing) | Ice Cube & Dull Scraper | Low-Medium |
| Nail Polish | Chemical Dissolving (Solvent) | Non-Acetone Remover | High |
How Do You Remove Nail Polish? (The Chemical Method)

Removing nail polish from leather is a high-stakes operation that requires precision and the right chemicals. The goal is to use a solvent to dissolve the nail lacquer without dissolving the leather’s protective finish. This is a delicate balance. This method should only be attempted on protected leather after a successful patch test, and never on suede or unfinished leathers.
A Word of Warning: Why This is a High-Risk Removal
You are fighting fire with fire. Nail polish is a tough, chemical lacquer. To remove it, you need to use a chemical solvent. The danger is that the very solvent that breaks down the nail polish can also break down the urethane-based topcoat that protects your leather.
This is not a simple cleaning task. It is a controlled chemical stripping. One wrong move, like rubbing too hard or using the wrong product, can create a faded, discolored patch that is far worse than the original nail polish spot. Proceed with extreme caution.
Step 1: Choosing Your Weapon (Non-Acetone Remover ONLY)
Your choice of product is the single most important decision in this process. You must use a non-acetone nail polish remover.
Why is this so critical?
- Acetone: This is a powerful, aggressive solvent. It will instantly dissolve the nail polish, but it will also melt the protective finish on your leather, creating a permanent, dull, and often sticky mess. Never let acetone touch your leather.
- Non-Acetone Remover: These products use less aggressive solvents (like ethyl acetate). While they still carry risks, they work more slowly, giving you a better chance of dissolving the polish on the surface without immediately destroying the leather finish underneath.
Even with non-acetone remover, a patch test is not a suggestion—it is a mandatory safety step.
Step 2: The Dabbing Technique (Precision is Everything)
This process is all about precision and control. Your goal is to apply the solvent only to the nail polish itself, minimizing contact with the surrounding leather. Your tool of choice is a simple cotton swab.
- Dip, Don’t Soak: Lightly dip the tip of a cotton swab into the non-acetone remover. Gently press it against the side of the bottle to remove any excess; it should not be dripping.
- Dab Gently: Press the tip of the swab directly onto the center of the nail polish stain. Hold it for a few seconds to let the solvent start working. Do not wipe or swirl.
- Lift and Rotate: Lift the swab straight up. You should see some polish color on the cotton. Rotate the swab to a clean spot.
- Repeat Carefully: Continue this gentle dabbing process. As the outer edges of the polish begin to dissolve, you can use a very gentle lifting motion to try to peel them away.
Work slowly and patiently. This is not a fast process. You are carefully dissolving the stain, layer by layer.
Step 3: Neutralizing the Solvent and Cleaning the Area
Once the nail polish is gone, you must immediately remove any remaining solvent from the leather’s surface. Leaving it on can lead to long-term damage to the finish.
Create a mild solution of a few drops of dish soap in a bowl of warm water. Dip a clean microfiber cloth into the solution, wring it out completely, and gently wipe the entire area. This will neutralize and remove the solvent. Follow up with a second cloth dampened with plain water to rinse, and then pat the area completely dry. Finally, apply a quality leather conditioner to rehydrate the spot.
What is the Essential After-Care Process?
Successfully removing the gum or nail polish is a huge relief, but the job isn’t finished yet. The final step is a proper after-care routine. This involves cleaning the entire panel to avoid a “clean spot,” conditioning the leather to restore vital moisture, and applying a protectant to guard against future accidents. This process ensures your leather looks uniform and stays healthy.
Why You Must Clean the Entire Panel After Spot Treatment
After you’ve focused intensely on removing a spot, you may have inadvertently created a “clean spot.” This is an area that is now cleaner than the surrounding leather, which may have a light layer of everyday grime. This can make the treated spot look unnaturally light or discolored.
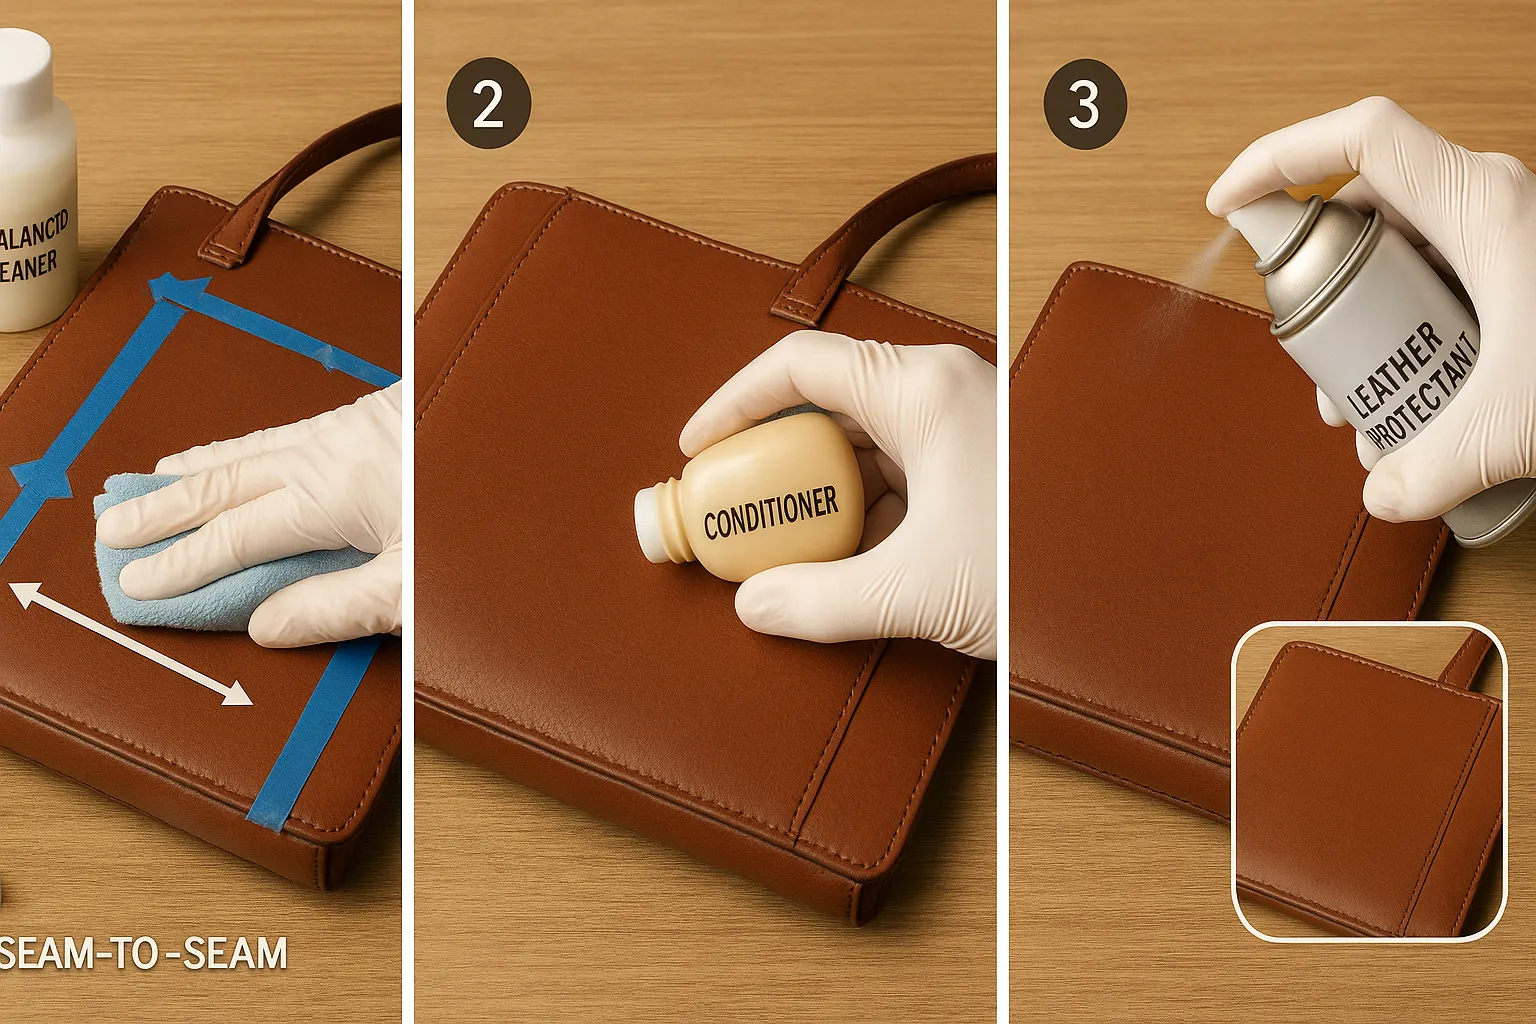
To create a seamless, uniform appearance, you must blend the treated area with its surroundings. The best way to do this is by cleaning the entire panel of the handbag or wallet from seam to seam.
Use your standard mild soap solution or a pH-balanced leather cleaner to gently wipe down the whole section. This evens out the finish and ensures there is no visible demarcation between the treated spot and the rest of the leather.
The Crucial Role of Conditioning to Restore Moisture and Finish
This is the most important step in the after-care process. Both the cold from the ice and the solvents in non-acetone remover will have stripped the leather of its natural oils, leaving it dry and vulnerable.
Conditioning does two critical things:
- It rehydrates the fibers: Conditioner replenishes the essential fats that keep the leather’s collagen fibers flexible and strong, preventing the area from becoming brittle and cracking.
- It restores the sheen: The conditioner helps to even out and restore the leather’s natural luster, making the repaired spot blend in perfectly.
After the area is completely clean and dry, apply a quality leather conditioner with a soft cloth and buff it to a healthy shine.
Applying a Leather Protectant to Guard Against Future Mishaps
Once your leather accessory is clean, conditioned, and looking its best, you’ll want to keep it that way. Applying a quality leather protectant spray is a wise final step. These products create an invisible, breathable barrier on the leather’s surface. This barrier can help repel minor spills and, in the case of a future nail polish accident, can provide a crucial buffer that slows down the solvent’s ability to damage the leather’s primary finish.
What About Suede, Nubuck, and Unfinished Leather?
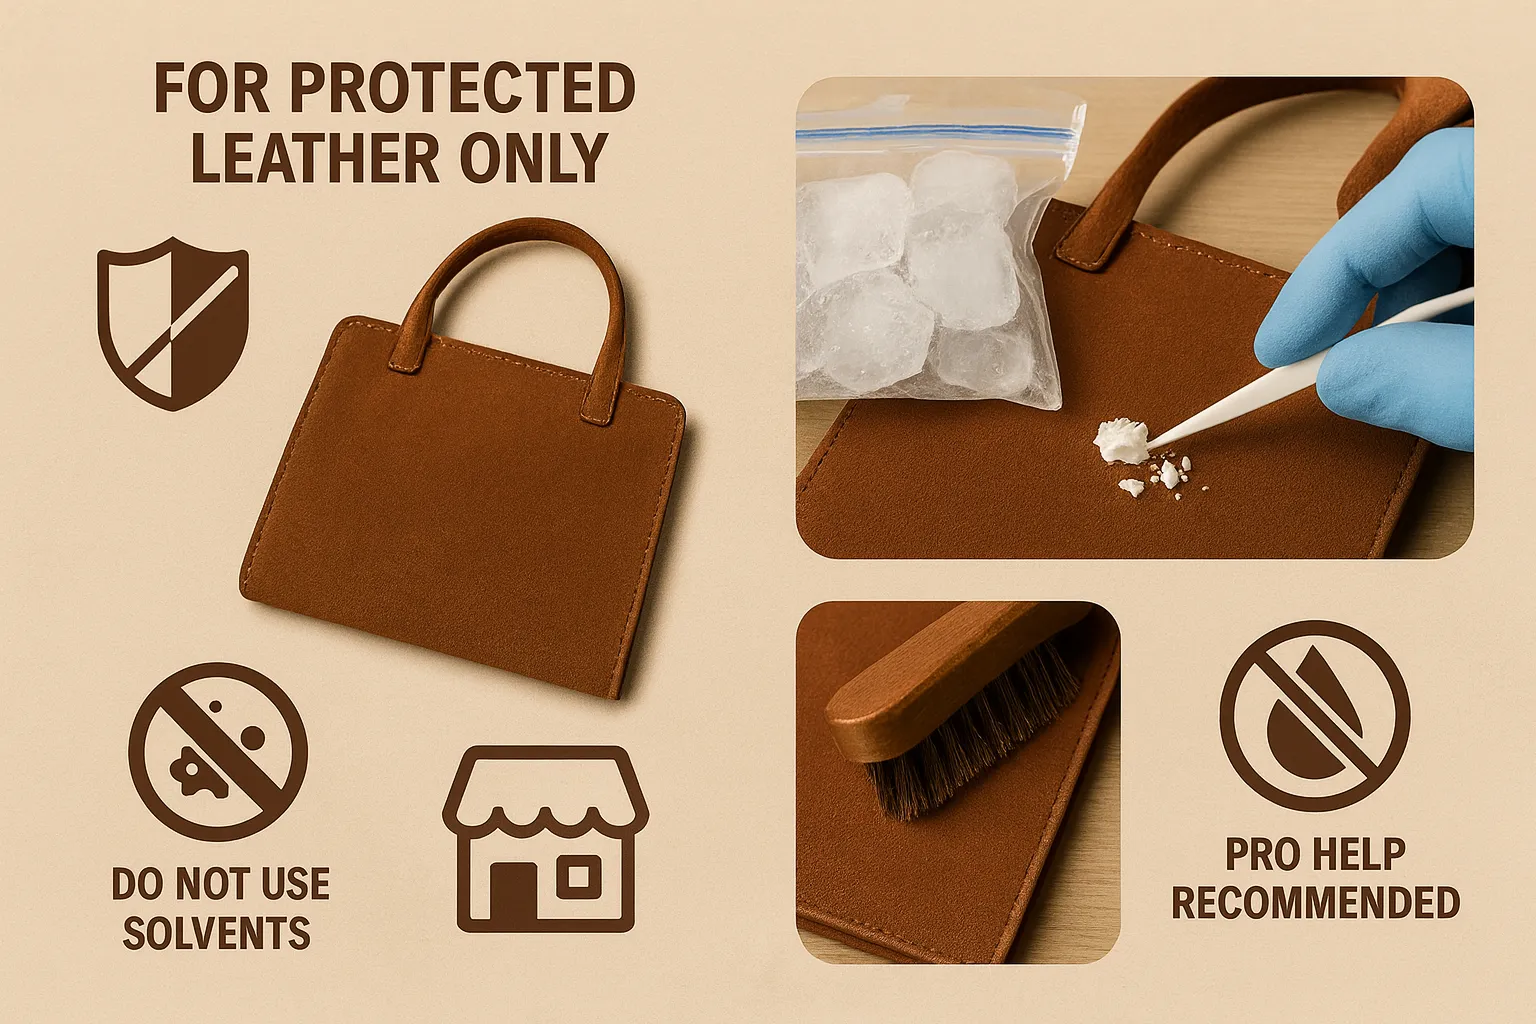
The methods in this guide are for protected leather only. For absorbent leathers like suede, nubuck, and aniline, these types of stains are a major problem. Because these materials have no protective topcoat, they react very poorly to both sticky substances and chemical solvents. For these delicate leathers, DIY removal is extremely risky, and professional help is strongly recommended.
How to Safely Remove Gum from Suede
The freezing method can still work for gum on suede, but you must be even more careful. The risk is that pulling off the frozen gum can also pull out the delicate suede fibers, creating a bald patch.
If you choose to proceed, follow the freezing steps, but when it comes to removal, be incredibly gentle. Try to fracture the gum into small pieces and lift them off, rather than prying the whole piece off at once. Afterward, use a suede brush to gently restore the nap of the area.
Why You Should Never Attempt to Remove Nail Polish from Suede
This is a red line you should not cross. Suede’s absorbent, fibrous texture makes it a nightmare for nail polish removal. The moment a solvent touches the suede:
- It will instantly absorb and spread, carrying the dissolved polish with it to create a much larger stain.
- It will permanently flatten and mat the suede fibers, ruining the texture and leaving a stiff, dark spot.
- There is no way to “rinse” the solvent out, so it will continue to damage the fibers long after you’re done.
A nail polish stain on suede is a job exclusively for a professional leather specialist. Do not attempt any DIY fixes.
The Extreme Risks for Aniline Leather
Like suede, aniline leather is highly absorbent and has no protective topcoat. While the freezing method for gum might be attempted with great care, nail polish is a different story. The solvents in non-acetone remover will be absorbed directly into the hide, stripping the dye and leaving a permanent, discolored spot. The risk of creating a larger, more obvious blemish is incredibly high.
When to Immediately Stop and Call a Professional
Knowing your limits is the key to preventing a small problem from becoming a catastrophe. It’s time to stop and call a professional if:
- The item is made of suede, nubuck, or aniline leather (especially for nail polish stains).
- The item is a high-value luxury handbag or accessory.
- Your patch test for nail polish remover fails.
- You are not confident in your ability to perform the steps with a delicate touch.
A professional has the experience and specialized products to handle these high-risk situations safely. The cost of their service is almost always less than the cost of replacing a ruined item.
Frequently Asked Questions (FAQ)
Q1: Can I use peanut butter or oil to remove gum from my leather wallet?
No, this is a common myth that can cause more harm than good. While the oil in peanut butter can help dissolve gum, it will also leave a greasy stain on your porous leather. The freezing method is much safer because it uses temperature, not oil, to solve the problem.
Q2: What should I do if the nail polish is glittery?
Glitter nail polish is tougher because the glitter particles don’t dissolve. Follow the dabbing method with non-acetone remover to dissolve the lacquer. Then, you may need to use a piece of tape to gently lift off the remaining glitter particles. Do not scrub them, as they are abrasive.
Q3: I used acetone by mistake and now there’s a white spot. Can it be fixed?
Unfortunately, that white spot is likely permanent damage where the acetone has stripped the leather’s finish and color. This cannot be fixed with cleaning or conditioning. Your only option is to consult a professional leather restoration specialist who may be able to re-dye and re-finish the area.
Q4: Does the freezing method for gum work on faux leather?
Yes, the freezing method is perfectly safe and effective for faux leather. Since faux leather is a type of plastic, it is not porous and the gum will not be as deeply embedded. The freezing and scraping method should work very well on this material.
Q5: What’s the best way to remove sticky residue from tape or stickers?
For protected leather, you can often use a small amount of a mild, natural solvent like eucalyptus oil on a cloth to gently rub away the adhesive. For a more aggressive option, a specialized adhesive remover for leather can be used. Always perform a patch test first.
Q6: Can I use rubbing alcohol to remove nail polish?
It is not the best choice. While rubbing alcohol is a solvent, it is less effective at dissolving nail lacquer than non-acetone remover. It can also be very harsh on the leather’s finish. It is better to use a product specifically designed for removing polish.
Q7: How do I get gum out of the stitching on my handbag?
This requires precision. After freezing the gum solid, use the tip of a dull toothpick or a plastic dental pick to carefully fracture and pick the hardened gum out of the thread channels. Work slowly and avoid pulling on the threads themselves. Be very patient.
Q8: Why did the leather change color after I removed the stain?
This can happen for two reasons. Either the cleaning agent was too harsh and slightly stripped the color, or you’ve created a “clean spot” that is now cleaner than the rest of the item. Always follow up a spot treatment with a full-panel clean and a conditioning session to blend the area.
Conclusion: A Product’s Resilience is Made, Not Found
When faced with extreme stains like gum and nail polish, the key is to understand the problem before you act. The success of the removal lies in a simple truth: gum requires a physical solution, while nail polish requires a chemical one. By approaching each with the right principle—freezing for gum, careful dissolving for polish—and a heavy dose of caution, you can often navigate these crises successfully. But for valuable items or delicate leathers, knowing when to call a professional is the smartest move of all.
This highlights a crucial insight for brands and designers. A leather product’s ability to withstand these “physical or chemical attacks” is not an accident. It is engineered during the manufacturing process. The quality and durability of the leather’s topcoat finish serve as a vital layer of armor. A professionally applied, high-quality finish can provide a crucial barrier, resisting chemical penetration and preventing physical adhesion. It buys the user precious time to act, turning a potential catastrophe into a manageable incident.
For brands dedicated to creating products that are not just beautiful but also resilient to the chaos of everyday life, choosing a manufacturing partner who prioritizes protective finishes is essential. At Hoplok Leather, we understand the science of creating durable surfaces that enhance a product’s longevity. Contact us today for a free design and manufacturing consultation, and let’s build the premium, life-ready products your customers can trust.