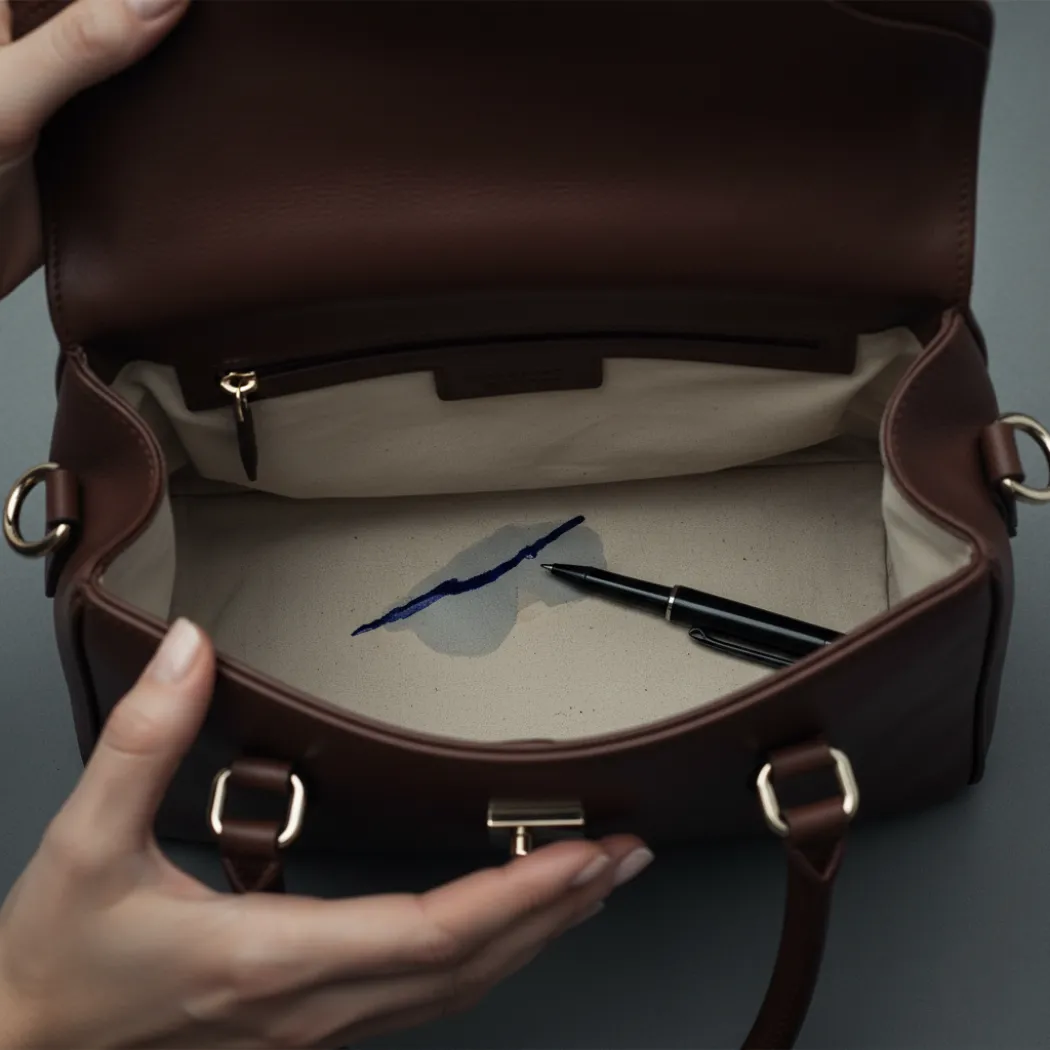
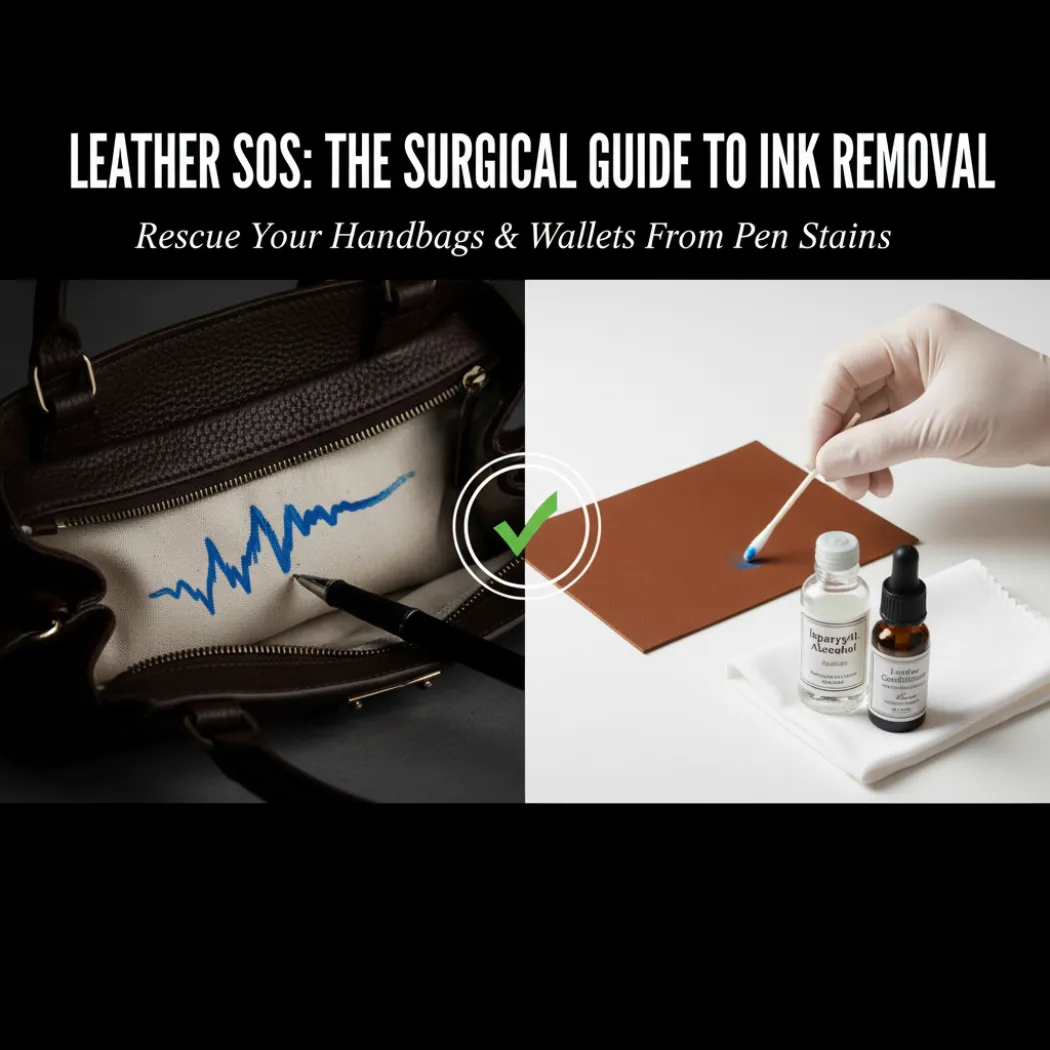
It’s a moment that makes your heart sink. You open your favorite leather handbag to find that an uncapped pen has left a sharp, blue line across the interior. It feels less like a stain and more like a permanent scar on a cherished item. Your first instinct might be panic, followed by the frantic urge to scrub it away.
To remove fresh ink from leather, you must act quickly. For protected leather, use a cotton swab dipped in isopropyl alcohol to gently dab—never rub—the stain. After lifting the ink, wipe the area with a water-dampened cloth to neutralize the alcohol, then apply a leather conditioner. For suede or delicate aniline leather, do not attempt DIY methods; seek professional help immediately to avoid permanent damage.
But before you begin, it’s crucial to understand that removing ink from leather is more like a surgical procedure than a routine cleaning. It requires precision, patience, and an understanding of the risks involved. One wrong move with the wrong product can spread the stain or strip the leather’s color.
While there are no guarantees, following the correct, careful steps gives you the best possible chance of a successful outcome. This guide will be your trusted surgical assistant, walking you through the entire process safely and effectively.
First, Do No Harm: What Are the Golden Rules of Ink Removal?
Before you touch the stain, your mindset should be that of a surgeon: first, do no harm. The initial moments are critical and can determine whether the stain is removable or becomes a permanent disaster. Following these four golden rules is not optional—it’s the only way to approach ink removal safely and increase your chances of success.
Why You Must Act Immediately
Leather is a porous material. Think of it like a sponge with microscopic holes. When ink first marks the surface, it sits on top. But as time passes, it slowly seeps deeper into the leather’s fibers. An ink stain that is minutes old is a surface problem; a stain that is days old has become part of the leather itself.
The longer you wait, the lower your chances of complete removal. Acting within the first few hours is your best and only window for an easy DIY fix.
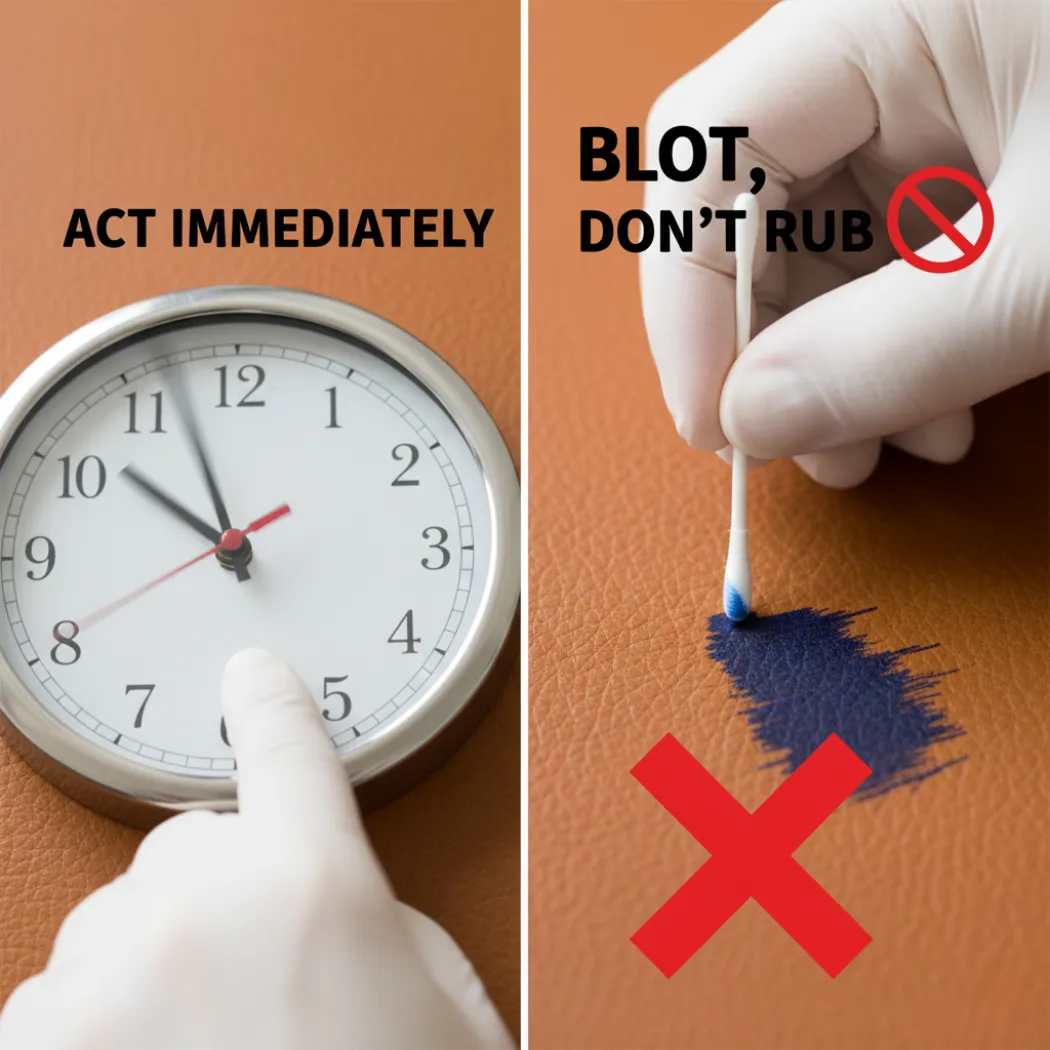
Blot, Don’t Rub: The Most Common and Costly Mistake
When you see a stain, your instinct is to scrub it out. You must fight this urge. Rubbing an ink stain is the worst thing you can do. It doesn’t lift the ink; it grinds the pigment deeper into the leather’s pores and breaks down the fibers, often creating a larger, smudged mess that is impossible to remove.
The correct technique is to gently blot or dab the stain with a clean cloth or cotton swab. This action is designed to lift the ink off the surface and transfer it to your tool, not push it further in.
Identifying Your Leather Type (Protected vs. Suede/Aniline)
As we’ve discussed, not all leather is the same. Applying an alcohol-based method to the wrong type of leather is a guaranteed disaster.
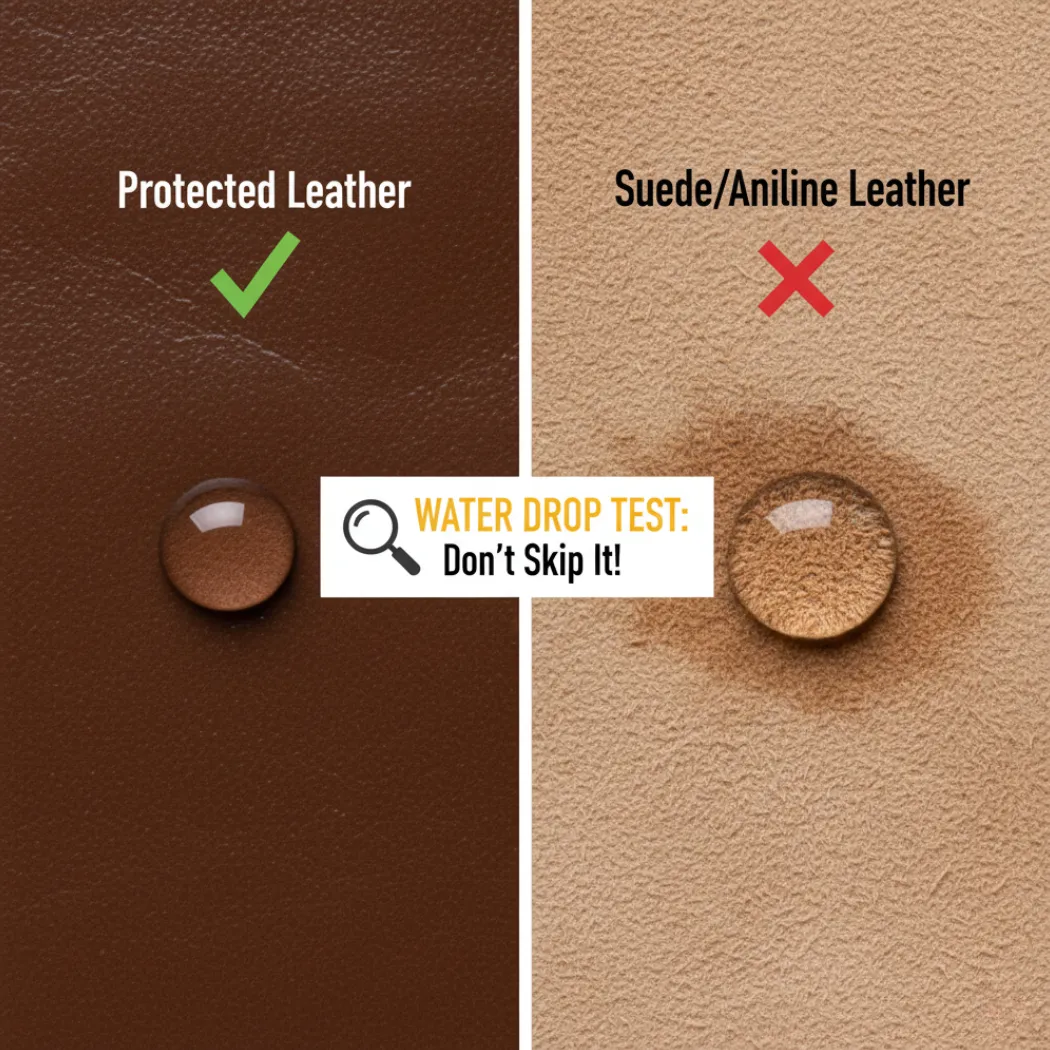
- Protected Leather: Has a clear topcoat. This is the only type of leather where a DIY alcohol method might be safe to attempt after a patch test.
- Suede/Nubuck: These absorbent leathers will be ruined by liquid cleaners. Do not attempt to use any liquid on them.
- Aniline Leather: This delicate, unprotected leather will absorb the ink and any cleaning agent immediately, likely making the stain worse. Do not attempt DIY removal.
If you’re unsure, use the simple water drop test. If a drop of water soaks in immediately, you should stop and consult a professional.
The Non-Negotiable Patch Test: Your Ultimate Safety Net
Even if you have protected leather, you must perform a patch test. Different manufacturers use different finishes, and some may react poorly even to mild solvents like alcohol. A patch test is your final safety check.
Choose a hidden spot on your handbag or wallet, like an interior seam allowance. Apply a tiny amount of the cleaning agent (e.g., rubbing alcohol) with a cotton swab. Wait a minute, then blot it away. Let the spot dry completely. If you see any color transfer on your swab or any damage to the finish, do not use that product on the visible stain.
What Kind of Ink Are You Dealing With?
Not all ink is created equal. The success of your removal effort depends heavily on the type of pen that caused the stain. Identifying the ink source is a crucial diagnostic step. Ballpoint ink is oil-based and easier to dissolve, while gel and permanent inks contain stubborn pigments and solvents that are far more challenging to remove safely from your leather goods.
Ballpoint Pen Ink (The Most Common & Treatable)
This is the most common type of ink stain found in handbags and on wallets. The good news is that it’s also the most treatable. Ballpoint ink is a thick, oil-based paste. This composition means it tends to sit on the surface of protected leather a bit longer than other inks. More importantly, it is often soluble in alcohol, which is why isopropyl alcohol is the go-to DIY remedy. Most leather ink removal sticks are also formulated primarily to tackle this type of ink.
Gel Pen & Rollerball Ink (More Difficult Due to Pigments)
Gel and rollerball inks are water-based, but they are packed with pigments that give them their vibrant colors. These pigments are the problem. Unlike the dyes in ballpoint ink, these solid particles can become physically lodged in the leather’s grain. They are less likely to dissolve with simple alcohol. While a quick response with alcohol might have some effect, these stains often leave a faint shadow behind. They have a higher risk of smudging when you try to clean them.
Permanent Marker (Sharpie) Ink (Almost Always Requires a Professional)
A permanent marker stain on leather is a worst-case scenario. This ink is designed to be permanent for a reason. It contains strong colorants and aggressive solvents that penetrate deep into surfaces, including the protective topcoat of leather.
Do not attempt to remove a permanent marker stain yourself. The solvents required to dissolve this type of ink are almost guaranteed to dissolve the leather’s finish along with it, creating a much larger, discolored, and irreparable bald spot. This is a job that requires the specialized skills and products of a professional leather restorer.
How to Remove Ink from Protected Leather? (The Step-by-Step DIY Method)
This method is designed for fresh, ballpoint ink stains on protected leather only. Before you begin, ensure you have followed all the golden rules: you are acting fast, you have identified your leather as “protected,” and you have successfully completed a patch test. This four-step process requires patience and a delicate touch but offers the best chance at a successful DIY removal.
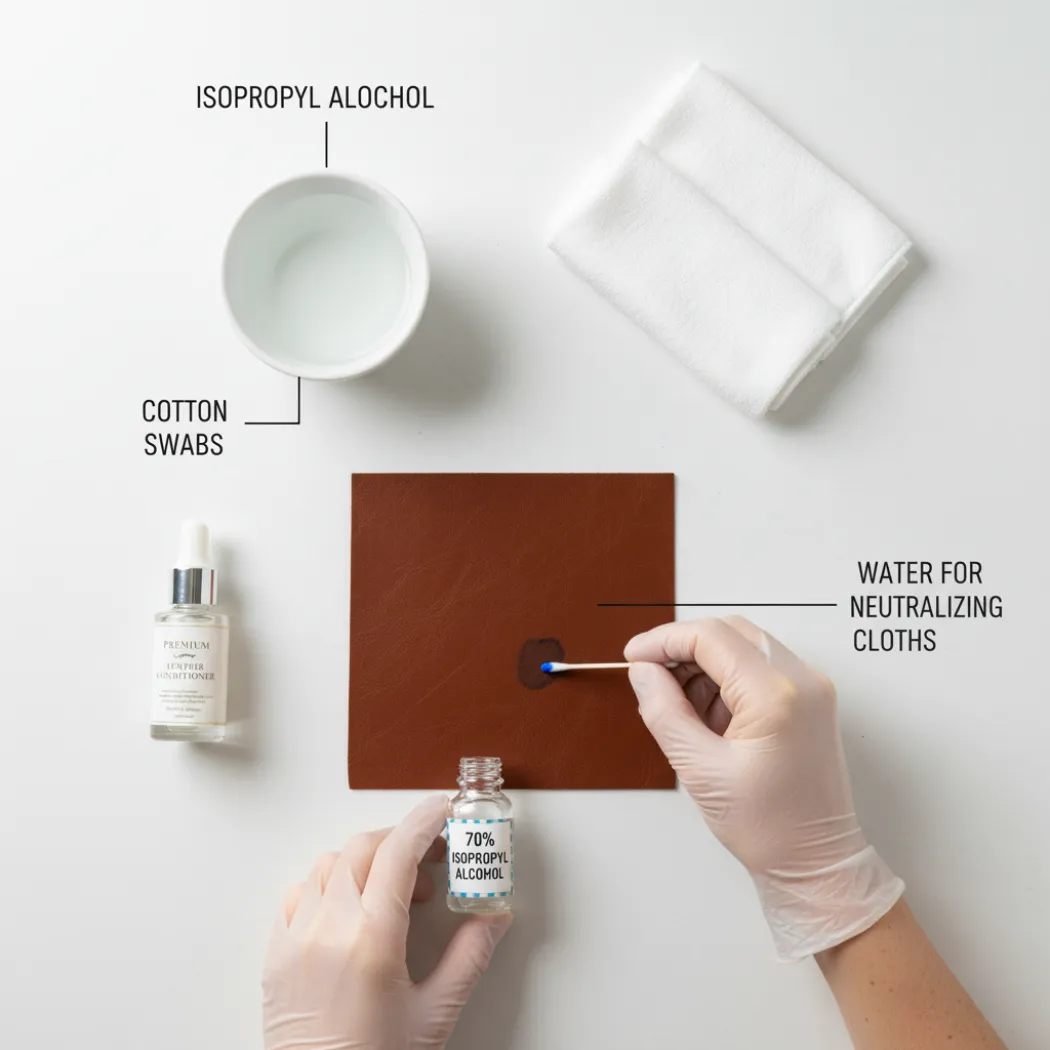
Step 1: Gather Your Precise Toolkit
For this delicate operation, you need tools that allow for precision. This is not the time for large cloths or sprays. Your surgical toolkit should include:
- Isopropyl Alcohol (Rubbing Alcohol): 70% concentration is standard and effective.
- Cotton Swabs (Q-tips): These are your primary application tool. You will need several.
- Clean, white microfiber cloths: One for neutralizing and one for conditioning.
- A quality leather conditioner: To be used at the very end.
- A small bowl of clean water: For the neutralizing step.
Step 2: The Isopropyl Alcohol Dabbing Technique
This is the most critical part of the process where your technique matters most. The goal is to lift the ink vertically off the leather, not to spread it horizontally.
- Dip, Don’t Soak: Lightly dip the very tip of a cotton swab into the isopropyl alcohol. You don’t want it dripping wet.
- Dab Gently: Press the tip of the swab directly onto the ink mark for a second or two. Do not rub, swirl, or wipe. Just a gentle, straight-down dab.
- Lift and Check: Lift the swab straight up. You should see some ink transferred onto the cotton.
- Use a Fresh Surface: Rotate the swab to a clean spot or get a new one for the next dab. This is crucial to prevent re-transferring the ink you just lifted.
- Work Slowly: Continue this gentle dabbing process, working your way along the ink line. It is a slow, methodical process. Be patient.
Stop if the stain spreads! If you notice the ink starting to bleed or smudge, stop immediately. It means the ink is spreading faster than you can lift it. At this point, allow the area to dry and consult a professional. Pushing further will only make it worse.
Step 3: Neutralizing and Cleaning the Area
Isopropyl alcohol is a solvent, and leaving it on your leather can cause it to dry out and damage the finish over time. Once you have removed as much ink as possible, you must neutralize the alcohol.
Lightly dampen a clean, white microfiber cloth with plain water. Wring it out thoroughly so it is just barely damp. Gently wipe the entire area where you applied the alcohol. This will safely remove any residue without soaking the leather. Pat the area dry with another clean, dry cloth.
Step 4: The Crucial Conditioning Phase to Restore Moisture
The final step is to restore the moisture that the alcohol has stripped from the leather. This is a non-negotiable step to prevent the treated area from becoming dry and brittle.
After the area is completely dry (wait at least 30 minutes), apply a small amount of a high-quality leather conditioner to a new, clean section of your microfiber cloth. Gently buff the conditioner into the treated area and the surrounding leather in a circular motion. This will re-nourish the leather and help the treated spot blend in with the rest of your item, leaving your handbag or wallet healthy and protected.
Which Commercial Products Are Safe to Use?
If the DIY alcohol method seems too risky, using a commercial product designed specifically for leather ink removal is an excellent and often safer alternative. These products are formulated by chemists to be effective on ink but gentle on leather finishes. However, it is crucial to choose the right product and avoid generic stain removers that can cause catastrophic damage.
What to Look for in a Leather Ink Remover Stick
Specialized leather ink remover “sticks” or pens are one of the best tools for this job. They look like a marker but contain a controlled-release cleaning formula. They are superior to sprays or liquids for ink stains because they offer incredible precision.
When choosing one, look for products that:
- Are specifically labeled for use on finished or protected leather.
- Mention that they are designed for ballpoint pen ink.
- Come from a reputable leather care brand.
These sticks allow you to apply the cleaning agent directly to the thin ink line without it bleeding into the surrounding, unstained leather—a huge advantage over less precise methods.
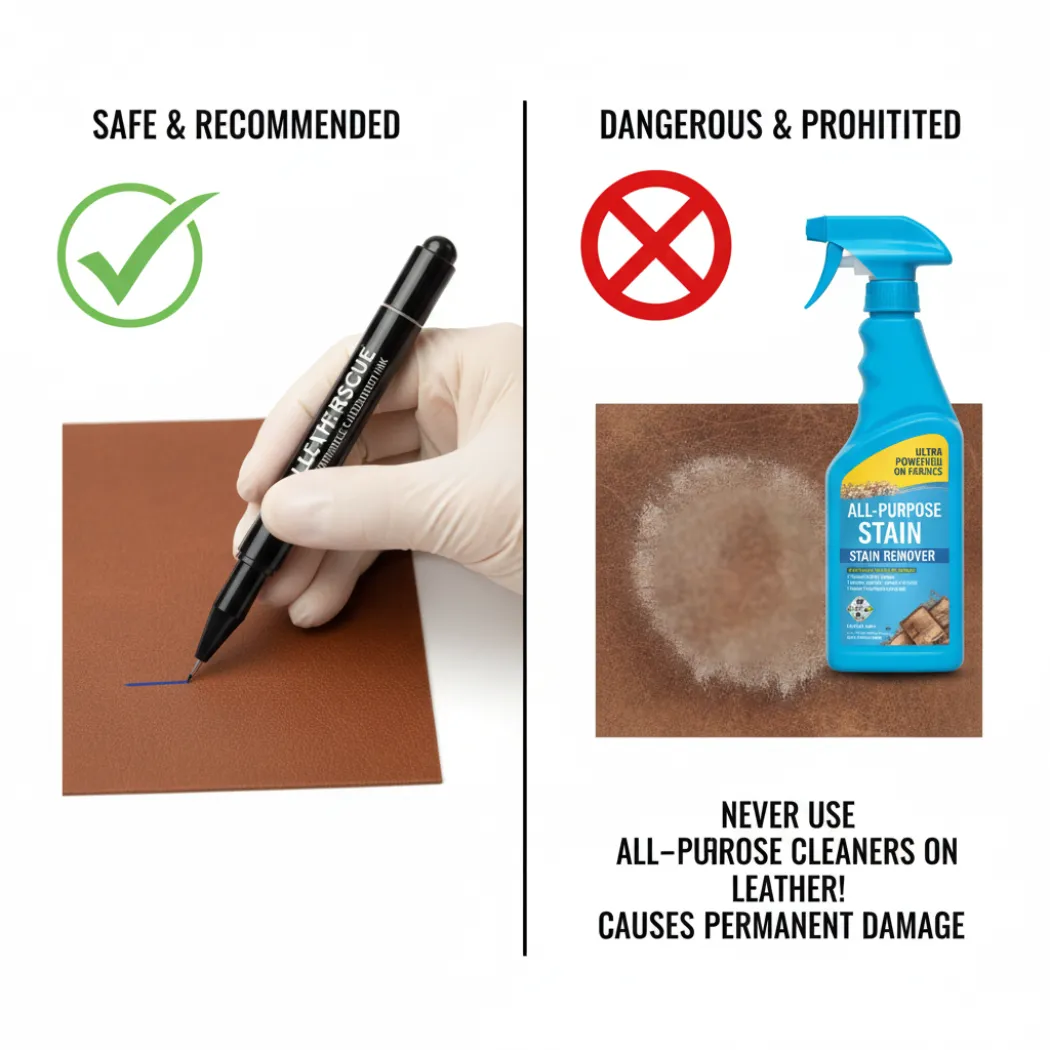
Are All-Purpose Stain Removers Safe for Leather? (The Answer is No)
This is a critical point: never use a generic, all-purpose stain remover on your leather goods. Products designed for laundry or upholstery, even if they claim to remove ink, are formulated for fabric, not leather. They contain harsh detergents and chemicals that will strip the color and protective topcoat from your leather handbag or wallet, causing a large, faded, and irreparable blemish.
Treating an ink stain with an all-purpose cleaner is like using a kitchen degreaser on your own skin. It’s far too aggressive and will cause immediate, visible damage to the material’s finish.
How to Properly Apply a Commercial Product
Even with a specialized product, the application rules remain the same: be cautious and gentle.
- Read the Instructions: Always read and follow the manufacturer’s directions first.
- Perform a Patch Test: No matter what the label says, perform a patch test in a hidden area to ensure it is compatible with your specific leather finish.
- Apply with Precision: Use the product’s applicator tip (or a cotton swab) to apply the formula only to the ink stain itself. Avoid the surrounding leather.
- Follow with Cleaning and Conditioning: Just like with the alcohol method, after you’ve treated the stain, wipe the area with a damp cloth to remove any residue and always follow up with a quality leather conditioner to restore moisture.
What About Suede, Nubuck, and Aniline Leather?
The methods described above are strictly for protected leather. Attempting to use alcohol or any liquid-based cleaner on absorbent leathers like suede, nubuck, or aniline is a recipe for disaster. For these delicate materials, the approach changes from “stain removal” to “damage control” and almost always requires professional help for ink stains.
Why Liquid Cleaners Are a Disaster for Suede and Nubuck
Suede and nubuck have a soft, fibrous “nap.” They are incredibly absorbent and have no protective topcoat. When you apply a liquid to them:
- It will spread immediately: The liquid, along with the ink it dissolves, will be wicked into the surrounding fibers, creating a large, blurry mess.
- It will flatten the nap: The liquid mats down the delicate fibers, leaving a dark, stiff, and flat spot that ruins the texture.
- It will leave a water stain: Even if you manage to lift some ink, the liquid itself will likely leave a permanent ring.
First Aid for Suede: Using a Suede Eraser and Brush
If you have a very light, fresh ink mark on suede, you can attempt some gentle first aid, but manage your expectations. A suede eraser (which works like a pencil eraser) can sometimes lift surface-level pigments. Gently rub the eraser on the dry stain. Afterward, use a suede brush to lift the nap and brush away any eraser debris. If this has no effect, do not try anything else. You have reached the limit of safe DIY treatment.
The High Risk of Treating Aniline Leather at Home
Aniline leather, while smooth, has no protective coating. It is like a natural sponge. The moment ink touches it, the dye is absorbed deep into the hide. When you apply a cleaner like alcohol, it will also be absorbed instantly. Instead of lifting the stain, this usually just serves to push the ink deeper into the leather, creating a larger, darker, and now permanent splotch. It’s a high-risk gamble with a very low chance of success.
For valuable items made of aniline leather, an ink stain is not a DIY project. The cost of a professional cleaning is minuscule compared to the cost of replacing a ruined luxury handbag.
When to Immediately Stop and Call a Professional
Knowing when to quit is the most important skill in DIY stain removal. You should stop immediately and seek professional help if:
- You are dealing with suede, nubuck, or aniline leather.
- The ink is from a permanent or gel pen.
- The stain is old and has had days to set.
- Your patch test fails (it removes color or damages the finish).
- Your initial, gentle dabbing causes the ink to spread.
A professional leather restorer has access to specialized solvents and techniques that can safely remove stains that are impossible to treat at home.
What to Do After the Ink is Gone?
Successfully removing an ink stain is only half the battle. The final, critical steps involve restoring the treated area and taking preventative measures for the future. You need to address any dryness caused by the cleaning agent, protect the leather from future accidents, and adopt simple habits to keep your handbags and wallets ink-free.
How to Address Any Lingering Discoloration or Dryness
Using alcohol, even carefully, can leave the treated spot looking a little dull or feeling dry compared to the surrounding leather. This is because the solvent strips the area of its natural oils and, in some cases, can cause a very slight loss of pigment from the finish.
The conditioning step is not just for moisture; it also helps to blend the appearance of the treated area back into the rest of the leather.
If the spot still looks noticeably different after conditioning, you can apply a second, very light coat of conditioner just to that area and buff it well. For minor color loss, a professional can apply a pigment-matched dye, but for most successful DIY removals, a good conditioning is all that’s needed to restore a uniform look.
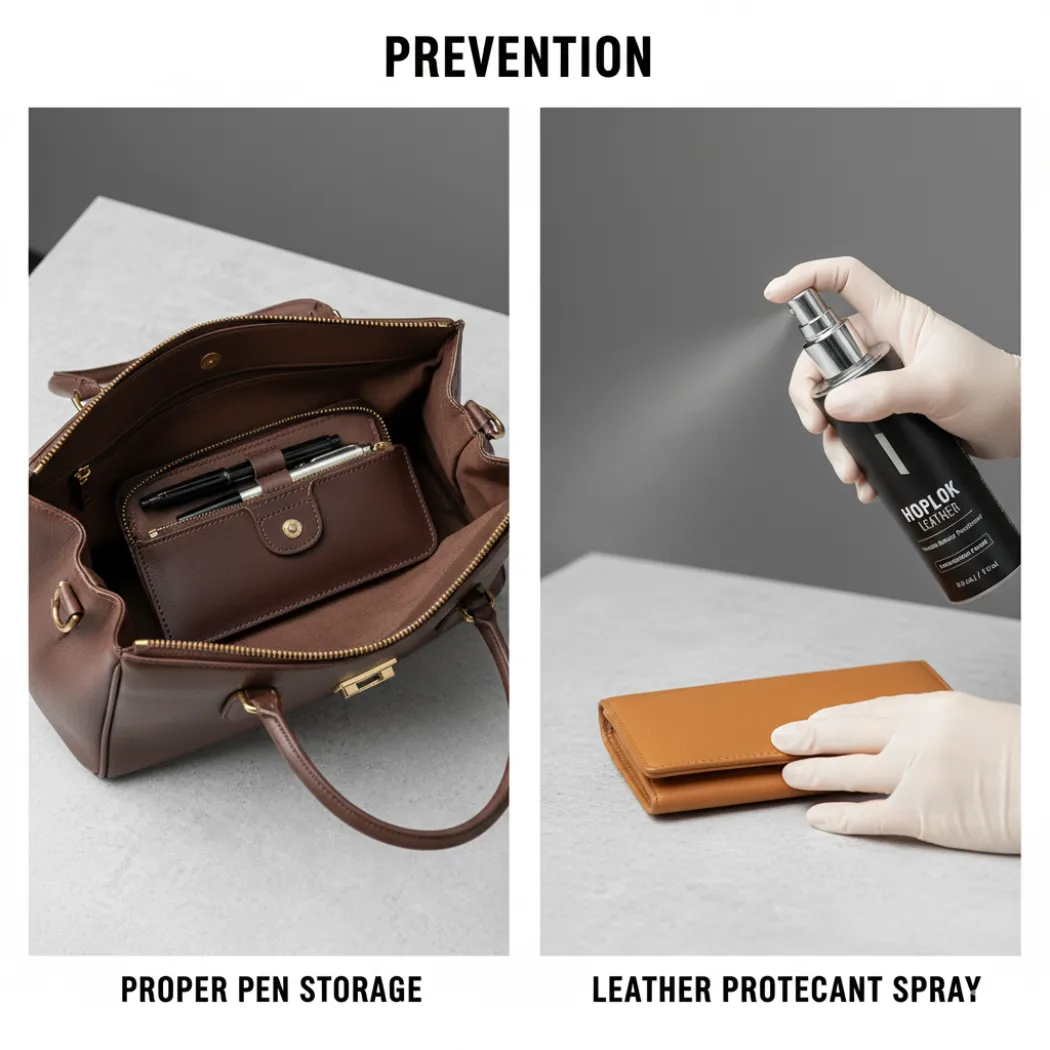
Applying a Leather Protectant to Prevent Future Stains
After going through the stressful process of removing an ink stain, the last thing you want is for it to happen again. A leather protectant spray is your best defense. These products create an invisible, breathable barrier on the leather’s surface.
This barrier does two things:
- It slows absorption: If another ink accident happens, the protectant gives you more time to blot the ink before it can soak into the leather’s pores.
- It makes cleaning easier: The barrier prevents stains from setting as deeply, making them easier to lift with a gentle cleaner.
After your bag is clean and conditioned, applying a light coat of a quality leather protectant is a wise final step.
The Importance of Proper Pen Storage in Your Handbag
The simplest solution is often the most effective. The vast majority of ink stains in handbags are caused by uncapped pens. The best way to prevent a stain is to eliminate the source of the problem.
-
- Use a Pen Case: Invest in a small, dedicated pen case or pouch to store your pens inside your handbag.
– Choose Retractable Pens: When possible, opt for retractable pens that don’t have a separate cap to lose.
– Check Your Pens Regularly: Before dropping a pen into your bag, give it a quick check to ensure the cap is on securely.
These simple habits can save you from ever having to go through the ink removal process again.
Frequently Asked Questions (FAQ)
Q1: Can I use hairspray to remove an ink stain from my leather wallet?
No, this is an outdated myth. Older hairsprays contained high levels of alcohol that sometimes worked on ink. Modern formulas contain polymers and oils that will leave a sticky, hard-to-remove film on your leather, creating a much bigger problem than the original ink stain.
Q2: What should I do if the ink stain is old and has dried?
Once an ink stain has set for more than a day, the chances of a successful DIY removal drop significantly. You can attempt the alcohol method after a patch test, but it is much less likely to work. For old stains, your best and safest option is to consult a professional.
Q3: Will soap and water work on a fresh ink stain?
Unfortunately, no. Ink is typically an oil-based dye, and soap and water are not effective at breaking it down. In fact, adding water can sometimes cause the ink to spread further into the leather’s pores, making the problem worse. Stick to a solvent-based approach.
Q4: Does this method work for removing ink from a white leather bag?
Yes, the alcohol dabbing method is the standard approach for white protected leather as well. However, the risk is higher because any color loss or damage to the topcoat will be much more visible. A patch test is absolutely essential, and you must work with extreme care.
Q5: Can I use nail polish remover instead of rubbing alcohol?
Absolutely not. Most nail polish removers contain acetone, which is an aggressive solvent that will dissolve both the ink and the leather’s finish, permanently stripping the color and texture from your handbag or wallet. Never let acetone touch your leather goods.
Q6: How do I know if I’ve damaged the leather’s topcoat?
If the topcoat is damaged, the spot where you cleaned will look different from the surrounding area. It might appear dull, matte, or feel slightly rougher to the touch. It may also absorb conditioner differently. Minor dullness can sometimes be blended with conditioner, but significant damage is permanent.
Q7: Is it expensive to have a professional remove an ink stain?
The cost varies, but it is almost always cheaper than replacing a high-quality leather handbag or wallet. Think of it as an investment in preserving your item. For valuable pieces, the peace of mind and higher success rate offered by a professional are well worth the cost.
Q8: What’s the best way to prevent ink stains in my handbag?
Prevention is simple: control your pens. The most effective method is to store all pens in a separate, dedicated pen pouch or case inside your bag. This creates a physical barrier that makes it nearly impossible for an uncapped pen to mark your bag’s lining or leather.
Conclusion: The Best Defense is a Quality Finish
When faced with an ink stain, the key takeaways are always to be quick, gentle, and cautious. While a careful DIY approach can work on fresh ballpoint stains on protected leather, the risk is always present. For valuable items, delicate leathers, or set-in stains, trusting a professional is always the wisest and safest choice to preserve the integrity of your cherished accessory.
However, this entire situation highlights a deeper truth for brands and designers. A handbag’s ability to resist an ink stain in the first place is largely determined at the manufacturing stage. The quality and application of the leather’s protective topcoat are paramount. A robust, professionally applied finish doesn’t just add sheen and durability; it creates a crucial barrier that can buy the user precious time to act before a stain sets. A product’s ease of maintenance and resilience to daily accidents are born from material science and expert craftsmanship.
For brands committed to offering customers high-quality leather goods that are not only beautiful but can also withstand the realities of everyday life, choosing a manufacturing partner who prioritizes detail and durability is essential. At Hoplok Leather, we understand how to select and apply the finest leather finishes to enhance a product’s lifecycle value. Contact us today for a free design and manufacturing consultation, and let’s build the classic, resilient products your customers will be proud to use with confidence.