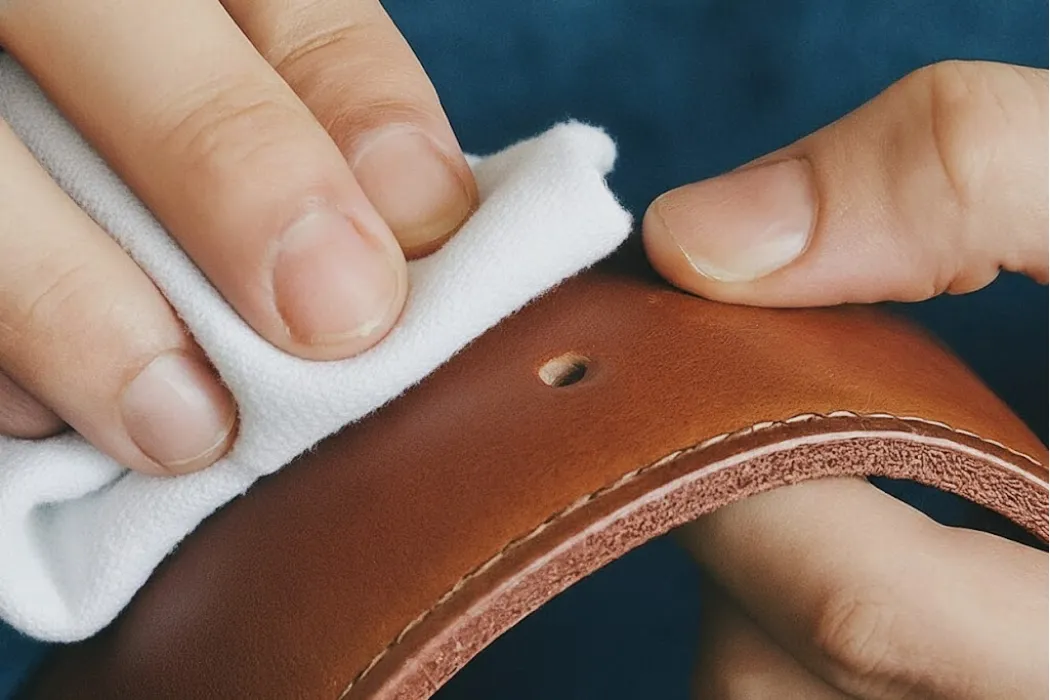
To clean a leather belt, first wipe it with a dry, lint-free cloth to remove loose dust. Next, apply a small amount of saddle soap or a mild, pH-neutral cleaner to a damp cloth and gently rub the leather in small circles. Wipe off any residue with a clean, damp cloth. You must let the belt air-dry completely, away from all heat and sunlight. Finally, once dry, apply a leather conditioner to restore its natural oils and flexibility.
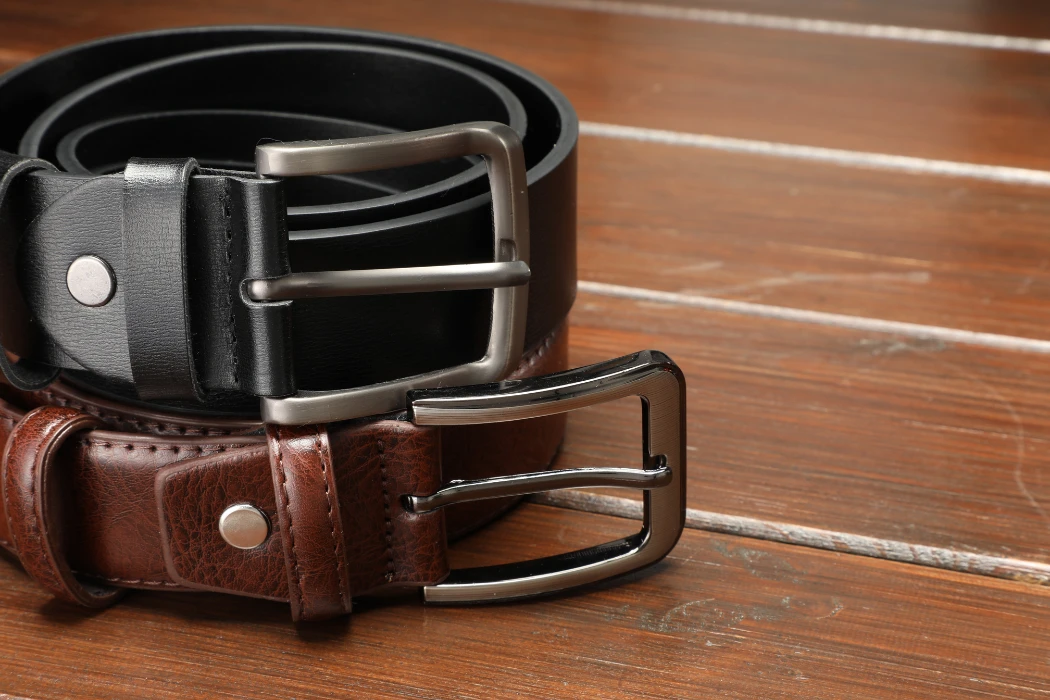
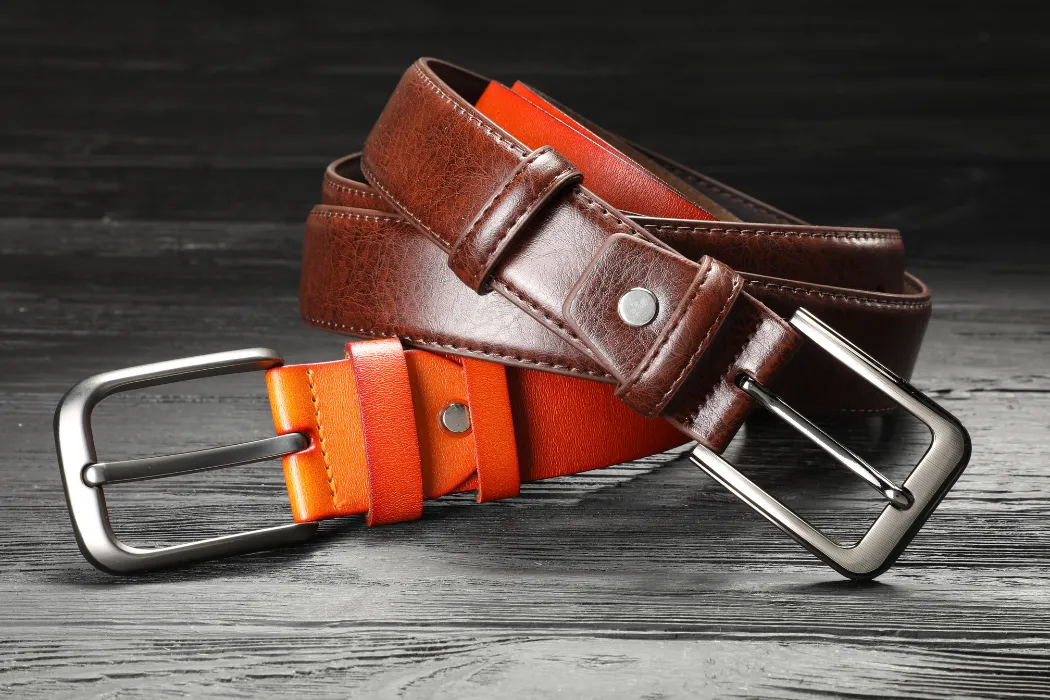
A high-quality, full-grain leather belt is an investment that can last for decades—but only if it’s properly maintained. Over time, that belt absorbs sweat, dirt, dust, and body oils. These contaminants are leather’s natural enemy. They work their way deep into the fibers, slowly breaking them down and drying them out. Without occasional cleaning, that $100+ heritage belt will become dry, stiff, and eventually crack and fail, often in just a few years.
This guide will go beyond the basics. We will cover the “Routine Clean,” how to tackle “Emergency Stains” (like oil or ink), and explain the critical differences in cleaning various types of leather. You will learn why cleaning a Suede belt (which should never see water) is a completely different process than cleaning a durable Bridle leather belt.
What Should I Do Before I Start Cleaning?
Before you apply any cleaner, you must identify your leather type (e.g., full-grain, suede, or “genuine”), as the wrong method can cause permanent damage. Once identified, gather your specific tools (like soft cloths, saddle soap, and conditioner) and perform a spot test on a hidden part of the belt (like the inner tip) to ensure the cleaner doesn’t cause discoloration.
The Most Critical Step: Identifying Your Leather Type
This is the most important step in this guide. Applying a water-based cleaner to suede will ruin it, while using a suede brush on a painted “Genuine Leather” belt will scratch the finish. You must match your method to your material. Here are the three main categories:
- Full-Grain / Top-Grain (Porous Leather): This is high-quality, “thirsty” leather. It has a natural, porous surface. It can (and should) be safely cleaned with saddle soap and then moisturized with an oil-based conditioner. This includes specialty finishes like Bridle or Veg-Tan leather.
- Suede / Nubuck (Fuzzy Leather): This leather has a soft, fibrous, “fuzzy” texture. It is extremely sensitive to water, which will stain and flatten the fibers (the “nap”). It must never be cleaned with soap, water, or conditioners. It requires a 100% dry-cleaning method using special suede brushes and cleaning erasers.
- “Genuine” / Painted / Patent Leather (Sealed Leather): This is low-grade leather with an artificial topcoat of paint or plastic. Because the surface is sealed, it’s non-porous. Conditioners cannot be absorbed. Cleaning this is like cleaning plastic—it just needs to be wiped down. Using an abrasive tool (like a suede brush) will scratch the painted finish.
If you are unsure, apply a single drop of water to a hidden spot. If it beads up and sits on the surface, it’s a sealed (Painted or Patent) leather. If it slowly soaks in and darkens the spot, it’s a porous (Full-Grain or Top-Grain) leather.
Gathering Your Supplies (The Manufacturer’s Toolkit)
You don’t need many supplies, but you need the right ones. Having these on hand will cover 99% of all leather belt cleaning scenarios. A professional toolkit includes:
- Microfiber Cloths: At least three clean, soft, lint-free cloths (one for cleaning, one for drying/residue, one for conditioning).
- Saddle Soap: The gold standard for cleaning porous leather. It’s a gentle, pH-balanced soap that cleans without stripping all the natural oils.
- Leather Conditioner: A high-quality conditioner (often containing mink oil, lanolin, or neatsfoot oil) is non-negotiable for porous leather.
- Suede Brush & Eraser: A specialized kit for Suede/Nubuck. The brush has brass bristles to lift the nap, and the eraser removes stains without water.
- Soft-Bristled Brush: A clean, old toothbrush or a dedicated horsehair brush is useful for working saddle soap into textured leather or removing dirt from seams.
The Golden Rule: Always Do a Spot Test
Never apply a new cleaner or conditioner directly to the front of your belt. Dyes, especially on cheaper leather, can be unstable. A cleaner that works perfectly on one brown belt might strip the color from another.
The process is simple:
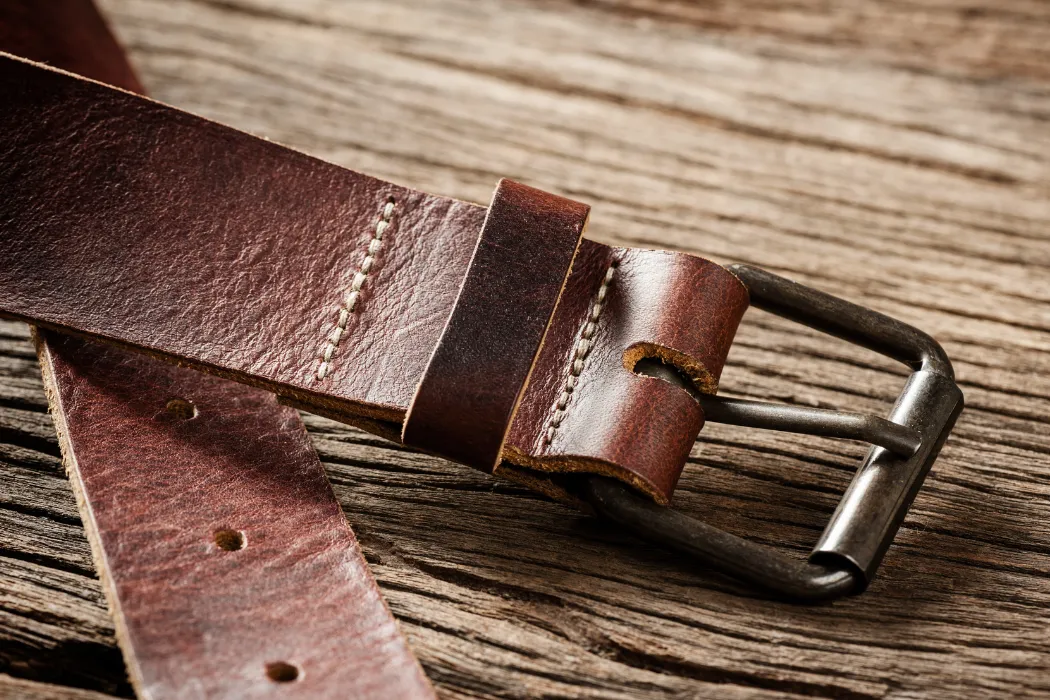
1. Choose a hidden area, like the last 2 inches of the belt’s tip on the backside (the part that gets tucked in).
2. Apply a tiny amount of the cleaner or conditioner to the spot.
3. Rub it in gently and let it sit for 5-10 minutes.
4. Check for any color loss on your cloth or any discoloration on the belt itself.
If there is no change, you are safe to proceed.
How Do I Perform a “Routine Clean” on a Standard Leather Belt?
For a routine clean (recommended every 3-6 months for a daily-use belt), first wipe away dust with a dry cloth. Then, use a damp cloth to work up a lather with saddle soap. Rub the belt in small, gentle circles. Use a clean, damp cloth to wipe off all soap residue. Let the belt air dry completely (which can take 12-24 hours), and finally, apply a quality leather conditioner to restore its oils and flexibility.
Step 1: Dry Brushing & Wiping (Removing Surface Dirt)
Before you introduce any moisture, you must remove all abrasive, topical debris. This is the same first step professionals take. Take your soft-bristled (horsehair) brush or a clean, dry microfiber cloth and give the entire belt a thorough wipe-down on both sides. This removes the surface layer of dust, grit, and dirt. If you skip this step, you risk turning that grit into a liquid abrasive when you add soap, scratching the leather’s finish.
Step 2: Cleaning with Saddle Soap vs. Mild Soap
This is the main cleaning phase. You are not trying to soak the leather, only to clean its surface. There are two primary options:
- Option 1 (Best): Saddle Soap. This is the gold standard for a reason. Saddle soap is a formulation specifically designed for leather. It contains a gentle, pH-balanced cleaner to lift dirt, but it also includes moisturizing agents like lanolin. This means it cleans the leather while simultaneously replenishing some of its oils. To use it, get your soft brush or cloth slightly damp and work up a light foam on the soap. Apply this foam to the belt in small, gentle, circular motions.
- Option 2 (Acceptable): Mild, pH-Neutral Soap. If you are in a pinch, a very mild, non-detergent soap can be used. Do NOT use dish soap, hand soap, or any detergent, as their high-alkaline pH will strip the leather’s natural oils. The only acceptable alternative is a non-scented, pH-neutral soap (like a basic bar of Dove). Use only a tiny amount on a damp cloth.
Step 3: Wiping Residue & Air Drying (The Patience Step)
Once you have cleaned the entire belt (including the edges), this step is critical for avoiding damage.
First, take a new, clean, slightly damp cloth and wipe the entire belt down again. This removes any lingering soap residue, which could otherwise dry and leave a dull film. Do not rinse the belt under a faucet.
Second, you must let the belt air dry naturally. This is the patience step. A damp belt can take 12 to 24 hours to dry completely. Hang it or lay it flat in a cool, well-ventilated room.
Warning: Never Use Direct Heat. This is the fastest way to destroy a leather belt. Direct heat from a hair dryer, a radiator, or direct sunlight causes a rapid, uneven loss of moisture. This makes the leather’s natural collagen fibers contract, tighten, and shrink, resulting in a stiff, brittle, and cracked belt. The damage is irreversible.
Step 4: Conditioning (The Most Important Final Step)
This is the step that separates “cleaning” from “maintenance,” and it is absolutely mandatory. The cleaning process (even with gentle saddle soap) will inevitably strip some of the leather’s natural oils, known in the industry as “fatliquors.” Failure to replace these oils is what leads to cracking.
Once the belt is 100% dry to the touch, apply a small, dime-sized amount of a quality leather conditioner to a clean, soft cloth. High-quality conditioners often contain mink oil, neatsfoot oil, or lanolin. Apply the conditioner to the belt in long, even strokes, covering the front, back, and edges. Let it soak in for 1-2 hours (or overnight). Finally, take a new clean, dry cloth and buff the entire belt to remove any excess and restore its sheen.
This single step replenishes the oils, keeps the fibers flexible, and ensures your belt will be protected from cracking for the next several months.
How Do I Remove Specific, Difficult Stains from a Leather Belt?
To remove oil or grease stains, do not use water; instead, immediately cover the stain with cornstarch or talcum powder and let it sit for several hours to absorb the oil. For ink stains, carefully dab (do not rub) the spot with a cotton swab dipped in rubbing alcohol, testing in a hidden area first. For water spots, prevent a ring from forming by dampening the entire belt evenly with a clean, damp cloth and letting it air dry.
Removing Grease & Oil Stains (Use Cornstarch)
This is one of the most common stains, often from food or lotion. The key is to act quickly and avoid water, which will only spread the oil and set the stain.
- Blot, Don’t Wipe: Immediately use a clean, dry cloth to blot any excess oil from the surface. Do not rub, as this will push the grease deeper into the leather’s pores.
- Apply Absorber: Generously cover the entire stain with cornstarch or talcum powder. These fine powders are highly absorbent and will “pull” the oil out of the leather.
- Wait: Let the powder sit for at least 4-5 hours, or preferably overnight. The longer it sits, the more oil it will absorb.
- Brush Off: Gently brush the powder off with a soft-bristled brush. Do not rub it in.
- Repeat if Necessary: For stubborn stains, you may need to repeat the process 2-3 times. Once the stain is gone, you can follow up with a light conditioning.
Removing Ink Stains (Use Rubbing Alcohol)
An ink stain is one of the most difficult to remove, and this method carries a high risk of damaging the leather’s dye. Always perform a spot test first. This method is a last resort.
- Act Fast: The fresher the ink stain, the better the chance of removal.
- Dab, Don’t Rub: Dip a cotton swab (Q-tip) in isopropyl (rubbing) alcohol (70%). Gently dab the ink spot, being careful not to press hard or rub. Rubbing will spread the ink and create a larger smear.
- Use a Clean Swab: As the swab picks up ink, switch to a new, clean one immediately. You are trying to lift the ink out, not rub it in.
- Condition Immediately: Alcohol is extremely drying and will strip all the oils from the leather. Once the spot is dry, you must apply a small amount of leather conditioner directly to that area to restore its moisture and prevent cracking.
Removing Water Spots & Rings (Blend the Stain)
This may seem counter-intuitive, but the best way to remove a single water spot is with more water. A single drop of water (like from rain) can dry into a distinct “ring” because it displaces the local oils and dyes. The goal is to “blend” that ring into the rest of the belt.
- Dampen a Cloth: Take a clean, lint-free cloth and get it slightly damp (not soaking wet).
- Evenly Wipe the Belt: Starting from the stain, wipe the *entire* belt strap with the damp cloth, from end to end. You are applying a very light, even layer of moisture across the whole surface. This prevents a new, larger water spot from forming.
- Air Dry: Let the belt air dry completely, away from heat. The original water spot should blend into the rest of the leather as it dries uniformly.
- Condition: A full-belt dampening will remove some oils, so a full conditioning (Step 4 from the previous section) is required once it’s dry.
Removing Mildew, Mold, or Sweat Stains (Use Vinegar)
If a belt is stored in a humid closet, it can develop mildew or mold. Similarly, heavy sweat can leave salty, white stains. The best tool to fight this is a mild acid.
- Create a Solution: Mix a 1:1 solution of white vinegar and cool water. Vinegar is a mild acid that will safely kill mold and mildew spores and dissolve the salt from sweat stains without harming the leather.
- Wipe Down: Dip a clean cloth into the solution, wring it out well, and wipe down the entire belt, focusing on the affected areas.
- Air Dry: Let the belt dry completely. The vinegar smell will dissipate as it dries.
- Condition: This process is drying, so follow up with a thorough application of leather conditioner to restore the oils and protect the leather.
Do Different Types of Leather Belts Require Different Cleaning Methods?
Yes, absolutely. The cleaning method is entirely dependent on the leather type. Applying the standard “saddle soap and conditioner” method (for Full-Grain) to a suede belt will permanently ruin it. Likewise, using a suede brush on a painted “Genuine Leather” belt will scratch and destroy the finish. You must match the method to the material.
How to Clean Suede & Nubuck Belts (The “Dry” Method)
This is the most critical distinction. Suede and Nubuck are “fuzzy” leathers with an open, fibrous nap. They have zero protection against water or oils, which will immediately stain, darken, and flatten the texture.
Rule #1: Do NOT use water, soap, or conditioner. This is a 100% dry-cleaning process.
- Brush the Nap: Use a specialized suede brush (which has stiff nylon or brass bristles). Brush gently in one direction to lift the “nap” (the fuzzy fibers) and remove any loose dirt or dust.
- “Erase” Stains: For small, dried stains or scuffs, use a suede eraser (which looks like a simple art gum eraser). Rub the eraser directly on the spot; the friction will crumble the eraser, pulling the stain out of the fibers.
- Protect: After cleaning, the only product you should ever apply is a specialized, nano-tech suede protector spray. This creates an invisible hydrophobic barrier that helps repel future water spots.
How to Clean Patent or “Genuine Leather” (The “Wipe-Down” Method)
This category includes any leather with a sealed, artificial topcoat. This includes high-gloss “Patent” leather and low-grade “Genuine Leather,” which is essentially a split-hide (suede) painted with a thick polymer coating to look like full-grain.
Because the surface is a non-porous layer of plastic or paint, conditioners cannot be absorbed, and saddle soap is unnecessary. Cleaning is simple:
- For “Genuine” (Painted) Leather: Simply wipe the belt down with a clean, damp cloth. A mild, pH-neutral soap (like Dove) can be used if it’s very dirty, but no conditioner is needed as it can’t penetrate the paint.
- For Patent (High-Gloss) Leather: The goal is to restore the streak-free shine. A small amount of mild glass cleaner (like Windex) on a soft cloth works perfectly. Do not use any oil-based conditioner, as it will leave a greasy, dull film on the glossy finish.
How to Clean Exotic Leathers (Alligator, Ostrich)
Exotic leathers like alligator, crocodile, ostrich, and snakeskin require special care due to their complex textures (scales or quill bumps) and delicate finishes. Using a standard, heavy cowhide conditioner can clog the detail between scales and may be too harsh.
It is highly recommended to use a conditioner specifically formulated for “reptile” or “exotic” leathers. These are often lighter, wax-based creams. When cleaning, always wipe with the grain or scale pattern, never against it, to avoid lifting the scales. For ostrich, a soft brush can help get dust out of the quill bumps before conditioning.
Leather Type Cleaning Matrix
Use this table as a quick reference guide to avoid a costly mistake. This is the same logic manufacturers provide to high-end brands.
| Leather Type | Primary Cleaning Method | Conditioner? | Key Tool(s) |
|---|---|---|---|
| Full-Grain (Veg-Tan) | Saddle Soap & Water | Yes (Essential) – Oil-based (Mink, Neatsfoot) | Soft Cloth, Conditioner |
| Full-Grain (Chrome-Tan) | Saddle Soap & Water | Yes (Essential) – Cream/Lotion-based | Soft Cloth, Conditioner |
| Suede / Nubuck | DRY CLEAN ONLY | NEVER. Use a protector spray only. | Suede Brush & Eraser |
| Genuine (Painted) | Damp Cloth & Mild Soap | No. (Cannot be absorbed by paint) | Microfiber Cloth |
| Patent Leather | Mild Glass Cleaner | No. (Will streak the finish) | Soft Cloth, Glass Cleaner |
| Exotic (Alligator, etc.) | Wipe with damp cloth (with scales) | Yes – Must be a special “Reptile” conditioner. | Soft Cloth, Reptile Cream |
What Cleaning Products Should I Never Use on a Leather Belt?
Never use harsh household chemicals like bleach, ammonia-based cleaners (e.g., Windex), or all-purpose disinfecting wipes. These products are highly alkaline or contain alcohol, which will strip the leather’s natural oils and dyes, causing irreversible drying, cracking, and discoloration. Likewise, avoid petroleum jelly (Vaseline), as it does not moisturize the leather and can create a sticky, dust-attracting seal.
Why Harsh Chemicals (Bleach, Ammonia) Are Destructive
This is a matter of basic chemistry. Leather is an organic, acidic material. The tanning process leaves the leather with a stable pH of around 4.5 to 5.5. This acidic state is what keeps the fibers strong and stable.
Harsh cleaners, in contrast, are highly alkaline (basic):
- Bleach: Has a pH of 11-13.
- Ammonia: Has a pH of 10-11.
When you apply a strong alkaline product to an acidic material, you cause a rapid chemical reaction. The alkalinity “burns” the leather, breaking down its fiber structure and stripping its natural tanning oils. This is not “cleaning”; it is chemical damage. It will cause the leather to become brittle and crack, and it can permanently alter the dye, leaving light or faded spots.
Why Household Wipes & Furniture Polish Are a Bad Idea
These products are convenient, but they are engineered for the wrong surfaces.
- Disinfecting/Household Wipes: The primary ingredient in most wet wipes (like Clorox or Lysol) is alcohol (isopropyl alcohol) or other harsh detergents. Just like rubbing alcohol for ink stains, this is an extremely effective solvent that will dissolve and strip the oils and finish from your belt, leading to a dry, faded, and cracked product.
- Furniture Polish (e.g., Pledge): Most furniture polish is designed for sealed, urethane-coated wood. It often contains silicone oils. These silicones do not “condition” leather. Instead, they sit on the surface, creating an artificial, high-gloss shine. This silicone film can plug the leather’s pores, preventing it from breathing and, worse, preventing future conditioners from ever being absorbed.
The Problem with Petroleum Jelly (Vaseline)
This is a common “life hack” that is fundamentally flawed. People assume that since petroleum jelly is a moisturizer for human skin, it must be good for animal skin. This is incorrect. Leather is not living skin; it is a processed material that cannot produce its own oils.
Petroleum jelly is an occlusive, not a conditioner. This means it is a mineral-oil-based sealant.
- It Doesn’t Absorb: It is not a “fatliquor.” It cannot penetrate deep into the fibers to replenish lost oils.
- It Seals the Surface: It simply sits on top, creating a greasy, waterproof barrier.
- It Attracts Dirt: This sticky film is a magnet for dust, dirt, and lint, which will get trapped on the surface.
- It Blocks Future Conditioning: Just like silicone, this heavy barrier can prevent high-quality, oil-based conditioners from ever reaching the fibers in the future.
In short, it will make your belt look shiny and feel greasy for a day, but it is slowly suffocating the leather and offers no real long-term conditioning benefits.
How Do I Clean and Polish the Metal Belt Buckle?
When cleaning a belt buckle, first isolate it from the leather with a cloth or plastic wrap to protect the leather from the cleaner. For a Solid Brass buckle, use a dedicated brass cleaner (like Brasso) or a natural paste of lemon and vinegar to remove tarnish. For a Plated Zinc Alloy buckle, you must only use mild soap and water, as any abrasive cleaner will strip off the thin plating.
Cleaning Solid Brass (Removing Tarnish & Restoring Patina)
Solid brass is the “gold standard” for hardware because it is durable and can be restored indefinitely. Over time, it will oxidize and develop a dark, rich “patina,” which many people like. However, if you prefer a bright, high-shine look, you can easily clean it.
- The DIY Method: Create a simple, mild acid paste. Mix one part lemon juice with one part white vinegar and add a little salt or baking soda to form a paste.
- Protect the Leather: Tuck a clean cloth or a piece of plastic wrap under the buckle to completely protect the leather from the acidic cleaner.
- Apply and Wait: Apply the paste to the brass buckle with a soft cloth. Let it sit for 5-10 minutes.
- Buff Clean: Use a clean, soft cloth to buff the paste off. The tarnish will lift away, revealing the bright, gold-toned brass underneath.
Cleaning Plated Zinc Alloy (The “Be Gentle” Method)
This is a critical warning. As we covered in our Types of Belts guide, over 90% of mass-market buckles are made from Plated Zinc Alloy. The “silver” or “gold” color is a coating only a few microns thick.
Never use an abrasive cleaner, a polish (like Brasso), or a harsh acid (like pure vinegar) on these buckles.
These products are designed to remove oxidation, and they will strip the thin plating right off the buckle, exposing the dull, grey zinc metal underneath. This damage is irreversible. The only safe way to clean a plated buckle is with a soft cloth and a drop of the same mild, pH-neutral soap (like Dove) you used for the belt. Treat it like a piece of costume jewelry.
Cleaning Stainless Steel & Sterling Silver
These are less common but easy to care for.
- Stainless Steel: This material is virtually indestructible and rust-proof. A simple wipe-down with a damp cloth and mild soap is all that is ever needed.
- Sterling Silver: This is a precious metal, often used in high-end Western or “exotic” belts. It tarnishes just like silverware. Do not use a brass cleaner. Use a specialized silver polishing cloth, which is imbued with a cleaner that safely removes tarnish without scratching the soft metal.
Manufacturer’s Insight (Hoplok): As manufacturers, we strongly encourage brands to invest in Solid Brass hardware. It may add $1.50 – $3.00 to the manufacturing cost, but its value is immense. A customer can safely polish a solid brass buckle for 50 years, making it look new again. When a plated zinc buckle inevitably flakes, the customer (who can’t tell the difference) sees a “broken” product. This directly impacts brand reputation and leads to returns, all to save a couple of dollars on the Bill of Materials.
Frequently Asked Questions (People Also Ask)
1. How often should I clean and condition my leather belt?
For a belt you wear daily, a full routine clean (with saddle soap) and conditioning is only necessary every 3-6 months. However, you should give it a quick wipe-down with a dry cloth every week or two to prevent dust build-up. Over-cleaning or over-conditioning can also be harmful, as it can oversaturate the leather.
2. Can I use coconut oil or olive oil to condition my leather belt?
This is not recommended. While these are oils, they are “organic” food-grade oils, which means they will go rancid over time. Applying olive oil or coconut oil can cause the leather to develop a sour, unpleasant smell and may lead to discoloration. Always use a conditioner with stable, non-rancid oils like mink oil, neatsfoot oil, or lanolin.
3. What do I do if my leather belt gets completely soaked in rain?
Do not use heat. This is the most critical rule. First, use a dry, absorbent cloth to blot (not rub) as much surface water as possible. Second, lay the belt flat on a towel in a cool, well-ventilated room and let it air dry naturally, which may take 24-48 hours. Once it is 100% dry (not just damp), it will feel stiff. This is normal. It must then be given a deep, thorough conditioning to restore the oils and fats that the water displaced.
4. How do I store a leather belt properly?
The best way to store a leather belt is to hang it vertically by its buckle (e.g., on a tie rack or a hook). This allows it to maintain its natural shape. The second-best method is to loosely roll it up (do not fold it) and store it in a drawer. Always store it in a cool, dry place away from direct sunlight and never in a humid environment where it can mildew.
5. My belt is cracking. Is it too late to save it?
Yes and no. You cannot *reverse* or “heal” existing cracks. That damage to the fiber structure is permanent. However, if the cracks are minor, you can slow or stop their progress by giving the belt a deep conditioning. The conditioner will add flexibility back to the surrounding leather, preventing the small cracks from getting bigger or spreading. But the visible cracks themselves are permanent.
6. Does cleaning remove the “patina”?
No, a proper cleaning does not remove patina. This is a common misconception. “Patina” is the beautiful, rich color and sheen that leather (specifically vegetable-tanned leather) develops from years of absorbing sunlight and natural oils from your hands. “Dirt” is a layer of grime, sweat, and dust sitting on top of the leather. Cleaning with saddle soap removes the dirt, but it does not remove the patina, which is embedded in the leather itself. In fact, cleaning often reveals the true beauty of the patina underneath the grime.
Conclusion: Cleaning Is Part of a Long-Term Partnership
Cleaning a leather belt is not just about removing a stain; it’s an essential act of maintenance that ensures a long-term partnership with a quality product. A $200 full-grain belt that is neglected and allowed to dry out will crack and fail, potentially faster than a $50 belt that is regularly wiped down and conditioned. The difference between a product that lasts 3 years and one that lasts 30 years often comes down to this simple care routine.
Understanding the “why” is the key: use the right methods (saddle soap, conditioner) for the right materials (Full-Grain, Veg-Tan), and strictly avoid the wrong ones (heat, bleach, alcohol). This knowledge is the final component of true quality.
As a brand, your responsibility to the customer doesn’t end at the point of sale; it extends to providing them with a product that can be cared for. A product that is engineered for a long life is easier to maintain. When a manufacturer uses drum-dyed leather, a scratch doesn’t reveal a different color underneath. When they use solid brass hardware, a customer can polish it back to new, year after year, instead of watching a cheap zinc plating flake away.
Choosing a manufacturing partner that provides this level of “lifetime value” is the ultimate B2B strategy. Hoplok helps you build more than just a belt; we help you build a product that your customers can form a lasting, proud partnership with. Contact Hoplok Leather to create a custom, durable, and easy-to-care-for product line for your brand.