Introduction
We’ve all been there. You look down at your favorite leather handbag—the one that carries your life, the one that gives you confidence—and you see it. The first, undeniable smudge. Or maybe it’s the wallet you use every day, now looking dull and darkened from the oils on your hands. A wave of anxiety hits: “How do I fix this? Will I make it worse?”
Safely cleaning leather starts with identifying its type (like protected or suede) and then using a pH-balanced cleaner made for that specific material. The general process involves a dry dusting, applying the cleaner with a soft cloth, and, most importantly, following up with a leather conditioner. This final step restores the natural oils that keep the leather soft and prevent it from cracking over time.
But before you reach for that damp cloth, stop for a moment. The true secret to successful leather care isn’t a magic product; it’s understanding the material itself. Real leather is a skin. It’s porous, it breathes, and it needs nourishment to stay healthy, just like our own skin. The biggest cleaning mistakes happen when we forget this simple fact.
This guide will do more than just show you *how* to clean. It will explain the *why* behind each step. By the end, you won’t just be following instructions—you’ll be a confident and capable caretaker for your most cherished leather goods.
Why You Must Identify Your Leather Type First?
Using the wrong cleaner on the wrong type of leather is the fastest way to turn a small spot into a big disaster. You wouldn’t use a harsh scrub on your face, and you shouldn’t use a powerful degreaser on delicate leather. Identifying your leather type is the non-negotiable first step to a safe and effective cleaning. It determines the products you use, the techniques you apply, and the results you can expect.
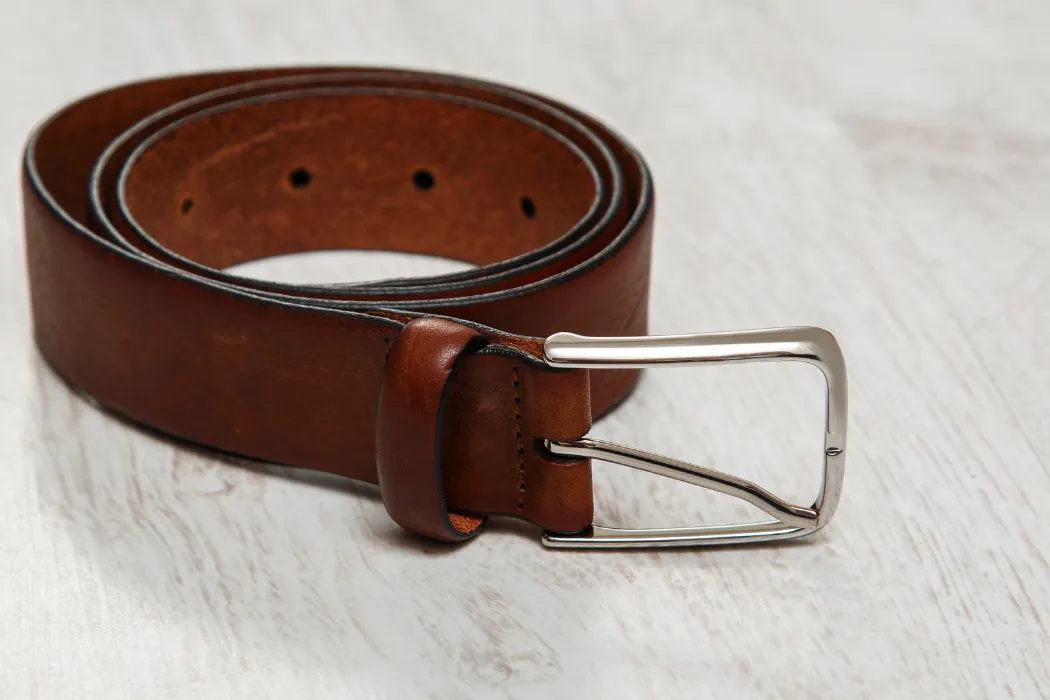
Is It Protected Leather? (The Most Common Type for Handbags)
Protected, or “finished,” leather is the most common type used for everyday items like handbags, wallets, and belts. It has a polymer-based topcoat that acts as a protective barrier. This coating makes it more resistant to stains and spills, which is great news for cleaning.
You can identify protected leather by its appearance and feel:
- It has a slight sheen and a consistent, uniform color.
- It feels smooth and slightly sealed to the touch.
- It’s less prone to scratching than more natural leathers.
Most of the general cleaning methods in this guide are designed for this durable and user-friendly type of leather.
Is It Unprotected Aniline Leather? (The Delicate, Luxury Type)
Aniline leather is a high-end, luxury material prized for its incredibly soft, natural feel. It is dyed in a vat but has no protective topcoat. This means you are touching the real, natural hide. While beautiful, this also makes it extremely delicate and highly absorbent.
Aniline leather will soak up liquids—including the oils from your hands—almost instantly. It stains easily and requires highly specialized care. For this reason, we always recommend consulting a professional for cleaning aniline leather.
Is It Suede or Nubuck? (The Napped, Absorbent Type)
Suede and nubuck are known for their soft, velvety texture. This “nap” is created by sanding the leather to raise the fibers. They are beautiful but act like sponges for dirt and liquids. You should never use liquid cleaners or conditioners on suede or nubuck as this will flatten the nap and cause water spots.
These materials require a completely dry cleaning method using special tools like a suede brush and a suede eraser to lift stains and restore the texture.
The Simple Water Drop Test: How to Tell the Difference in Seconds
If you’re unsure what type of leather you have, this simple test can give you a quick answer. Find a hidden spot on your item, like inside a flap or on a bottom seam.
- Place a single drop of water on the surface.
- Observe what happens:
- If the water drop beads up and sits on the surface, you have protected leather.
- If the water is quickly absorbed and darkens the leather, you have unprotected aniline leather.
- For suede or nubuck, the water will also absorb quickly and darken the material.
This quick check will help you choose the right cleaning path and avoid a costly mistake.
What is the Right Toolkit for Cleaning Leather?
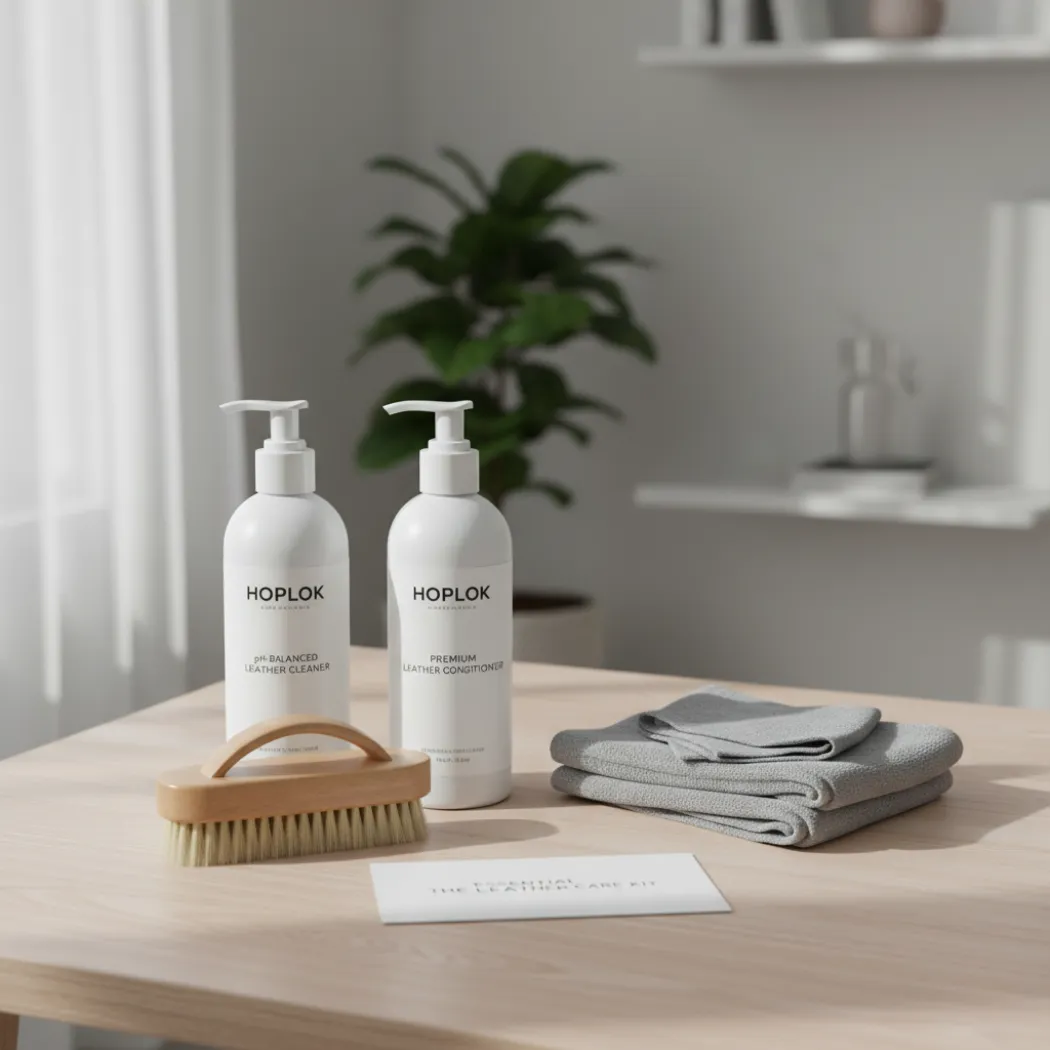
The right toolkit for cleaning leather is surprisingly simple. You don’t need a host of harsh chemicals. Instead, you need a few gentle, specialized items: a pH-balanced cleaner, a quality leather conditioner, several soft microfiber cloths, and perhaps a soft-bristled brush. Choosing the right products is less about brand names and more about understanding what they do for the leather.
Choosing the Right Cleaner: What Does “pH-Balanced” Actually Mean?
You’ll see the term “pH-balanced” on almost every quality leather cleaner. But what does it mean? In simple terms, pH is a scale that measures acidity and alkalinity. Leather, as a natural skin, has a slightly acidic pH. Using a cleaner that is too alkaline (like many household soaps) or too acidic (like vinegar) will disrupt this natural balance. This can strip the leather of its essential oils and damage its delicate fibers, leading to dryness and cracking.
A pH-balanced cleaner is formulated to be neutral or slightly acidic, matching the leather’s natural state. It effectively cleans the surface without stripping away the vital oils that keep your handbag or wallet soft and healthy.
Always look for cleaners that explicitly state they are pH-balanced or safe for all leather types. Avoid generic soaps, detergents, and any household cleaner not specifically designed for leather.
The Importance of Microfiber Cloths and Soft Brushes
The tools you use to apply your cleaner are just as important as the cleaner itself. Rough paper towels or abrasive sponges can cause microscopic scratches on the leather’s finish, resulting in a dull appearance over time.
Your ideal cleaning applicators are:
- Microfiber Cloths: These are perfect for cleaning leather. They are ultra-soft, highly absorbent, and lint-free, ensuring you are lifting dirt away without scratching the surface or leaving behind annoying fibers.
- A Soft-Bristled Brush: A horsehair brush is the industry standard. Its bristles are soft enough not to scratch the finish but firm enough to get into the grain of the leather and dislodge dirt before you start cleaning. It’s especially useful for textured leather.
What is a Leather Conditioner and Why is It Non-Negotiable?
A leather conditioner is a cream or lotion that nourishes the leather. Think of it as a high-quality moisturizer for your skin. The cleaning process, even when gentle, can remove some of the leather’s natural oils. If these oils are not replenished, the leather will slowly dry out, become stiff, and eventually crack—especially in high-stress areas like the straps of a handbag or the fold of a wallet.
Conditioning is the non-negotiable final step of any cleaning routine. It restores the essential moisture, keeps the fibers supple, and often adds a layer of protection against future wear and tear. Skipping this step is like washing your hands and not applying lotion—eventually, they will become dry and cracked.
Are All-in-One Cleaner & Conditioner Products a Good Idea?
Products that claim to clean and condition in one step are widely available. They can be convenient for a very quick, light touch-up. However, for a proper, deep clean, most experts agree that using separate products is far superior.
Here’s why: cleaning and conditioning are two different processes with opposite goals. Cleaning aims to remove dirt and oils from the surface. Conditioning aims to put nourishing oils back into the leather. Doing both at the same time is a compromise. For the best, longest-lasting results, it’s always better to clean first, then condition once the leather is clean and dry. This ensures that you are conditioning a pure surface, allowing the product to be fully absorbed.
How Do You Perform a General, Routine Leather Cleaning? (The Master Method)
This is the master method for routine cleaning on most protected (finished) leathers. It’s a safe and effective way to remove surface dirt, body oils, and light grime from your handbags, wallets, and belts. Follow these steps every few months to keep your items looking their best. For delicate materials like suede, skip to the special section below.
Step 1: The Pre-Clean (Emptying and Dry Brushing)
Before any liquid touches your leather, a thorough dry prep is essential. This prevents you from turning loose dirt into a muddy mess or grinding abrasive particles into the leather’s finish.
- Empty Your Item: For a handbag or wallet, remove all contents. Unzip all pockets and shake the item upside down over a bin to dislodge loose debris.
- Dry Brush the Surface: Take a soft-bristled horsehair brush and gently brush the entire surface. Use light, flicking motions to sweep away dust, paying special attention to seams, folds, and textured areas where dirt can hide.
This simple two-minute step makes the actual cleaning process much more effective.
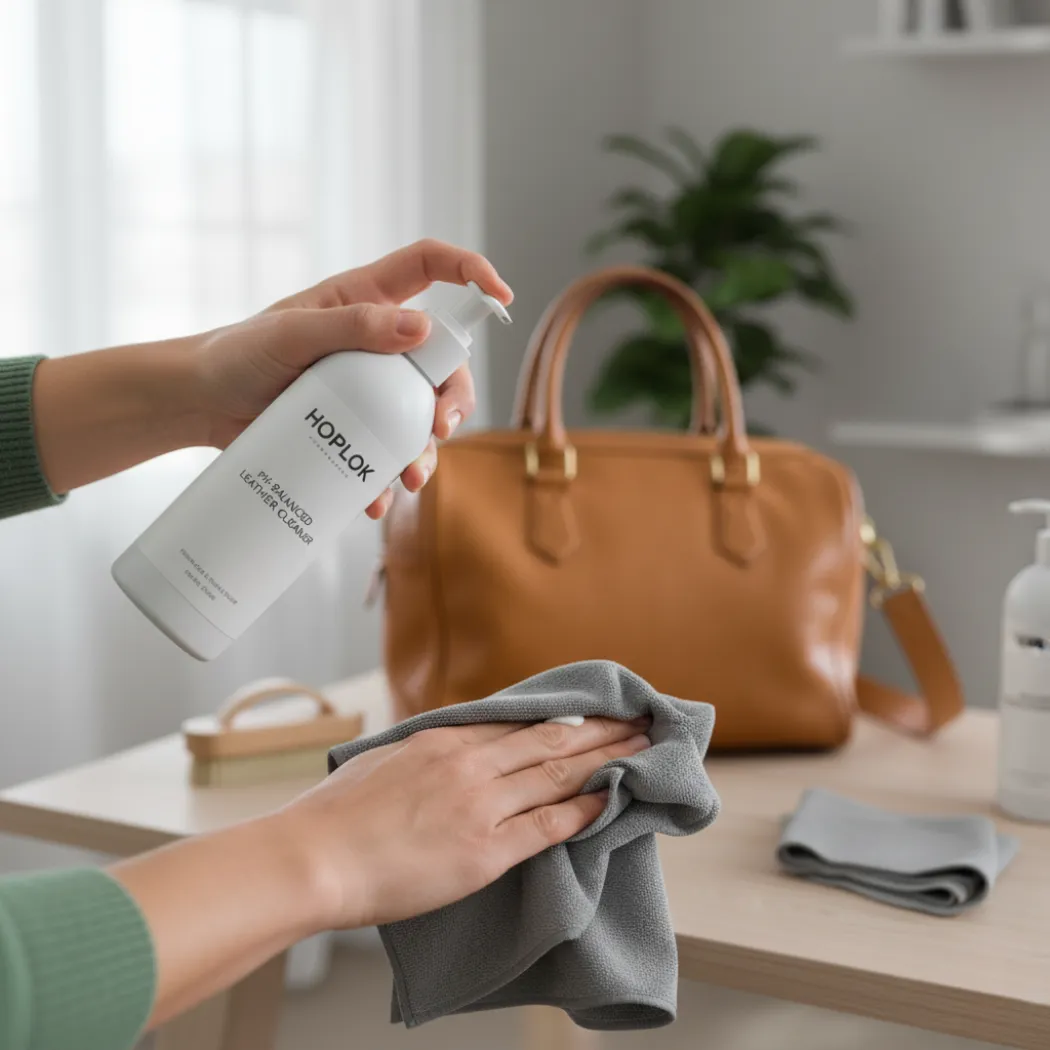
Step 2: The Cleaning Process (Applying the Cleaner Correctly)
Now, with a clean surface, you can apply your cleaner. The key here is technique. The goal is to lift the dirt off the surface, not saturate the leather.
The Golden Rule of Application: Never apply cleaner directly to the leather. Always apply it to your cloth first. This prevents oversaturation and ensures an even, controlled application.
- Apply a small, coin-sized amount of your pH-balanced leather cleaner onto a clean microfiber cloth.
- Work the cleaner into the cloth slightly so it’s damp, not dripping.
- Start in a less visible area. Gently wipe the leather in small, circular motions with light pressure. Don’t scrub.
- Work in sections. For a handbag, clean the front, then the back, then the sides. This methodical approach ensures you don’t miss any spots.
Step 3: The Rinsing Phase (Removing Residue without Soaking)
After you’ve cleaned the surface, you need to remove any remaining cleaner residue. Leaving it on can result in a dull or slightly sticky finish.
Take a second, fresh microfiber cloth and dampen it very lightly with clean, distilled water. Wring it out until it is almost dry to the touch. Gently wipe down the entire surface you just cleaned to remove any lingering soap or cleaner. The cloth should be just damp enough to lift the residue without leaving the leather wet.
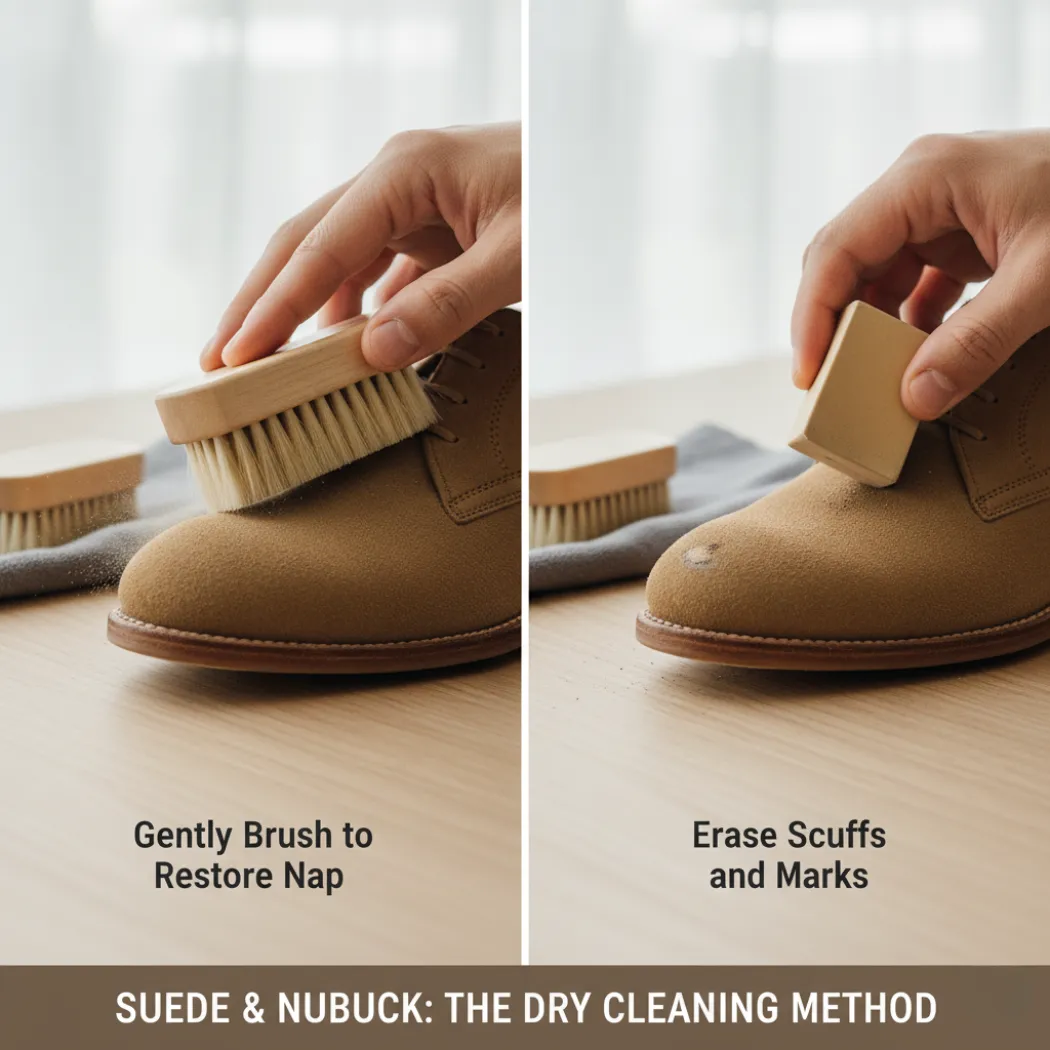
A Special Note on Suede and Nubuck (The Dry Method)
As we established, suede and nubuck are special cases. Do not use the liquid-based method above on these materials. Instead, you must use a dry cleaning method to protect their delicate, napped texture.
Your toolkit for suede is different:
- A suede brush (often with both nylon and brass bristles)
- A suede eraser (looks like a pencil eraser)
The process is as follows:
- Use the suede brush to gently brush the entire surface. This lifts the nap and removes loose dirt. Always brush in the same direction.
- For specific spots or scuffs, use the suede eraser. Rub it gently over the mark, just as you would erase a pencil mark.
- After erasing, use the brush again to restore the nap and sweep away the eraser debris.
Step 4: The Conditioning Phase (Nourishing the Leather)
This is the final, essential step for all smooth, protected leathers (do not condition suede or nubuck). After letting your item air dry completely for at least an hour, it’s time to replenish its moisture.
Apply a small amount of quality leather conditioner to a new, clean microfiber cloth. Use gentle, circular motions to buff the conditioner into the leather. A little goes a long way. Allow the conditioner to absorb for about 15-20 minutes, then take a final, clean cloth and give the entire item a gentle buff. This will remove any excess product and reveal a healthy, subtle sheen. Your leather is now clean, nourished, and protected.
How Do You Tackle Specific, Stubborn Stains?
While the methods below are effective for most colors, white leather presents a unique set of challenges, from yellowing to stubborn dye transfer. Because it requires a specialized approach, we’ve created a separate, in-depth guide on the topic.
When routine cleaning isn’t enough, you need a targeted strategy. For stubborn stains, the two most important rules are to act fast and blot, never rub. Different stains like oil, ink, or mold require different removal methods. Using the wrong approach can set the stain permanently, so it’s crucial to identify the type of stain before you begin treatment.
The Golden Rules of Stain Removal (Act Fast, Blot Don’t Rub)
Before we dive into specific stains, remember these two universal rules. They apply to nearly every stain on every type of leather and can be the difference between a successful removal and a permanent mark.
- Act Fast: The longer a stain sits, the deeper it penetrates the leather’s pores, making it exponentially harder to remove. Addressing a spill on your handbag immediately gives you the best chance of success.
- Blot, Don’t Rub: Your first instinct might be to scrub at a stain, but this is the worst thing you can do. Rubbing grinds the stain deeper into the leather and can enlarge the affected area. Always use a clean cloth to gently blot the stain, working from the outside in to absorb it.
How to Handle Common Water Stains and Rings
It’s ironic that water can stain leather, but it happens when a small area gets wet and dries unevenly, leaving a distinct ring. The fix is counterintuitive: you need to add more water.
Take a microfiber cloth and dampen it lightly with distilled water. Gently wipe the entire panel where the stain is located, feathering the moisture out from the stain’s center to the nearest seams. The goal is to create an even layer of moisture that will dry uniformly, causing the original water ring to disappear.
What to Do About Grease, Oil, and Food Stains
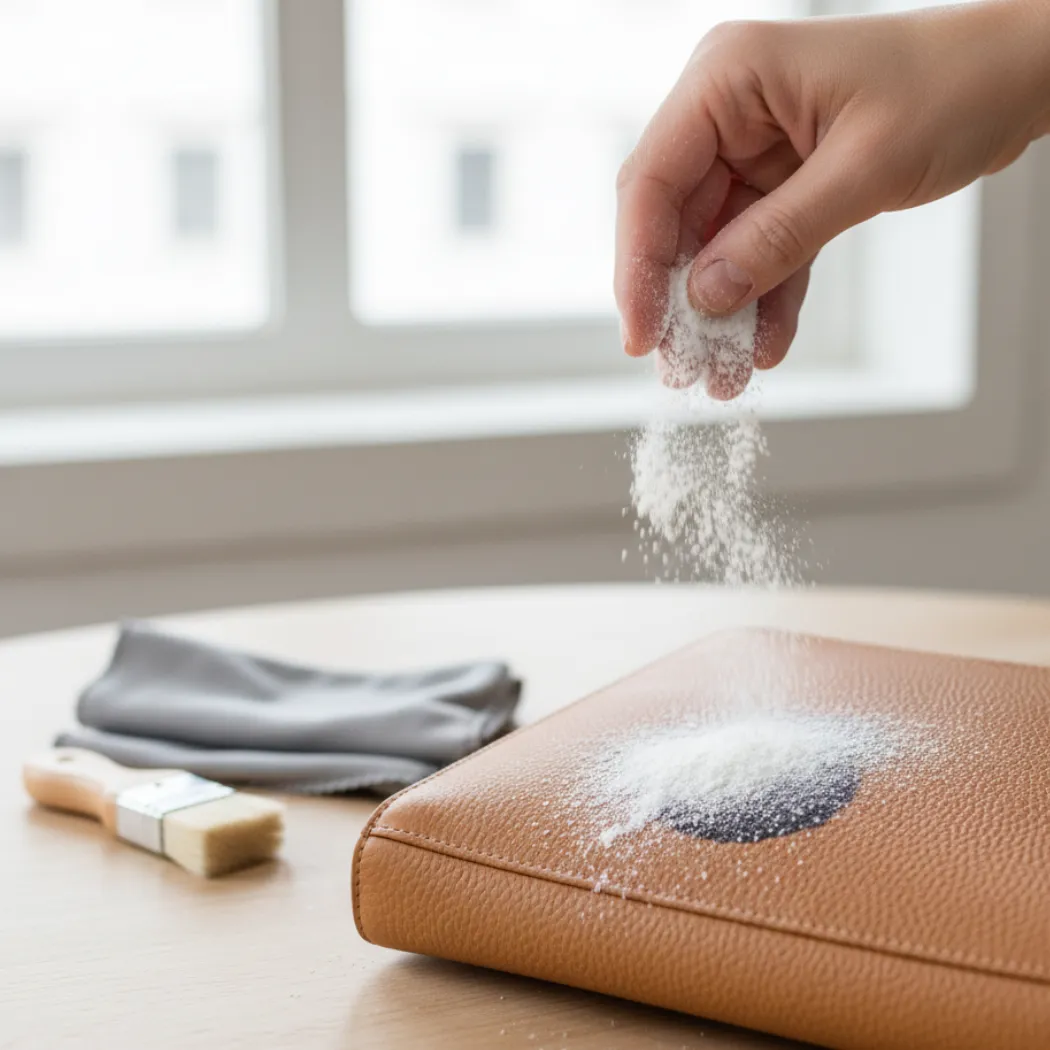
For oily stains on your wallet or bag, the goal is to absorb the oil out of the leather’s pores. Do not use water, as it will only repel the oil and potentially spread the stain.
- Gently blot any excess oil with a clean, dry cloth.
- Liberally sprinkle cornstarch or talcum powder over the stain.
- Let the powder sit for several hours (or even overnight). It will act like a sponge, drawing the oil out of the leather.
- Gently brush the powder away with a soft brush. For persistent stains, you can repeat the process.
How to Safely Remove Fresh Ink and Pen Marks
Ink is a dye, and it can become permanent very quickly. If you catch a pen mark on your handbag immediately, you have a chance to remove it. For older stains, it’s best to consult a professional.
After a successful patch test, you can try dabbing the ink mark very gently with a cotton swab dipped in isopropyl alcohol. Use a fresh side of the swab for each dab to lift the ink, not spread it. Once the ink is gone, wipe the area with a water-dampened cloth and then dry it immediately. For a safer commercial option, leather ink removal sticks are available.
How to Deal with Mold, Mildew, and Musty Odors
If you discover mold on a leather belt or bag that was stored improperly, you need to kill the spores and remove the stain. First, take the item outside to prevent spreading spores in your home. Mix a solution of one part rubbing alcohol to one part water. Dampen a cloth in the solution, wring it out, and gently wipe down the affected area. Let it dry completely in a well-ventilated area away from direct sun. The alcohol will kill the mold spores.
Leather Stain Removal Cheat Sheet
| Stain Type | Ideal Tool | DIY Method | Pro Tip | Link to In-Depth Guide |
|---|---|---|---|---|
| Grease & Oil | Cornstarch / Talcum Powder | Cover stain, let sit overnight, brush off. | Do not use water. | (Link to future article) |
| Fresh Ink | Cotton Swab | Dab (don’t rub) with isopropyl alcohol. | Patch test is essential! | (Link to future article) |
| Water Stains | Damp Microfiber Cloth | Evenly dampen the entire panel and let air dry. | Use distilled water to avoid mineral spots. | (Internal link within this page) |
| Mold & Mildew | Diluted Rubbing Alcohol | Wipe with a 1:1 solution of alcohol and water. | Clean the item outdoors. | (Link to future article) |
Are There Different Cleaning Methods for Different Leather Goods?
While the master cleaning method forms the foundation, different leather goods have unique features that require special attention. A handbag’s handles, a wallet’s card slots, and a belt’s buckle are all high-stress areas. Applying the general cleaning principles with a focus on these specific zones is the key to a truly thorough and professional result.
How to Clean a Leather Handbag (Focus on Handles, Straps, and Hardware)
A handbag is constantly being touched, set down, and exposed to the elements. Its high-contact points build up dirt and oils much faster than the main body of the bag.
- Handles and Straps: These areas absorb the most oil from your hands, often causing them to darken over time. During your routine clean, give these parts a little extra attention with your cleaning solution. Consistent cleaning can prevent this buildup from becoming permanent.
- Hardware (Zippers, Clasps): Metal hardware can tarnish and cleaner can get trapped around it. Use a cotton swab to apply your leather cleaner carefully around the edges of buckles and clasps. To polish the metal itself, apply a tiny amount of metal polish on a separate swab, being extremely careful not to get it on the leather.
How to Clean a Leather Wallet (Dealing with Interior Grime and Card Slots)
A wallet lives a tough life, constantly handled and stuffed into pockets. The biggest challenge is often the interior, which collects dust, lint, and grime.
The inside of a wallet is just as important as the outside. A clean interior not only looks better but can prevent dirt from transferring onto your cards and cash.
- Card Slots: These are notorious for collecting dirt. After emptying the wallet, use a soft, dry brush to gently sweep out any debris from the card slots and billfold area.
- Interior Cleaning: Use a microfiber cloth lightly dampened with your cleaning solution to wipe down the interior leather. For tight corners, wrap the cloth around a credit card to get deep into the slots and folds.
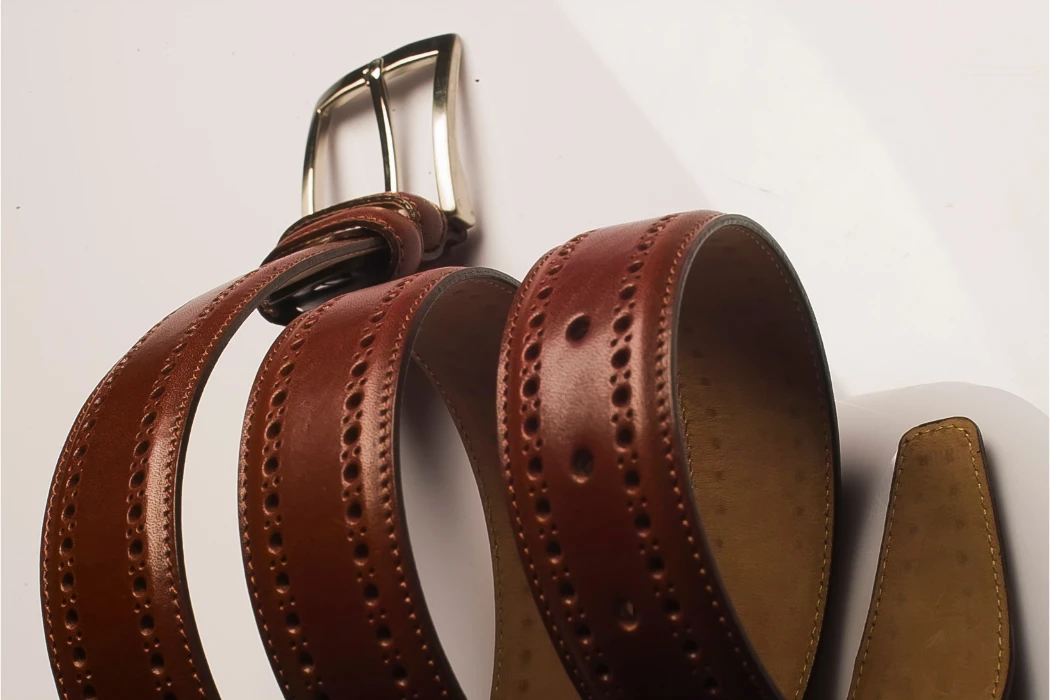
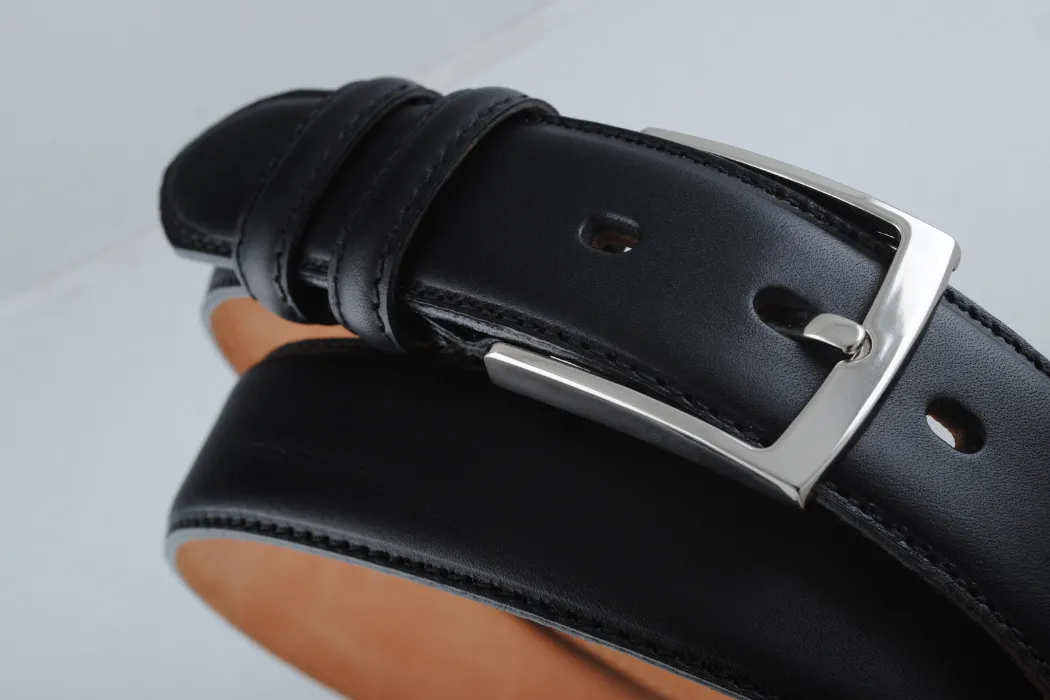
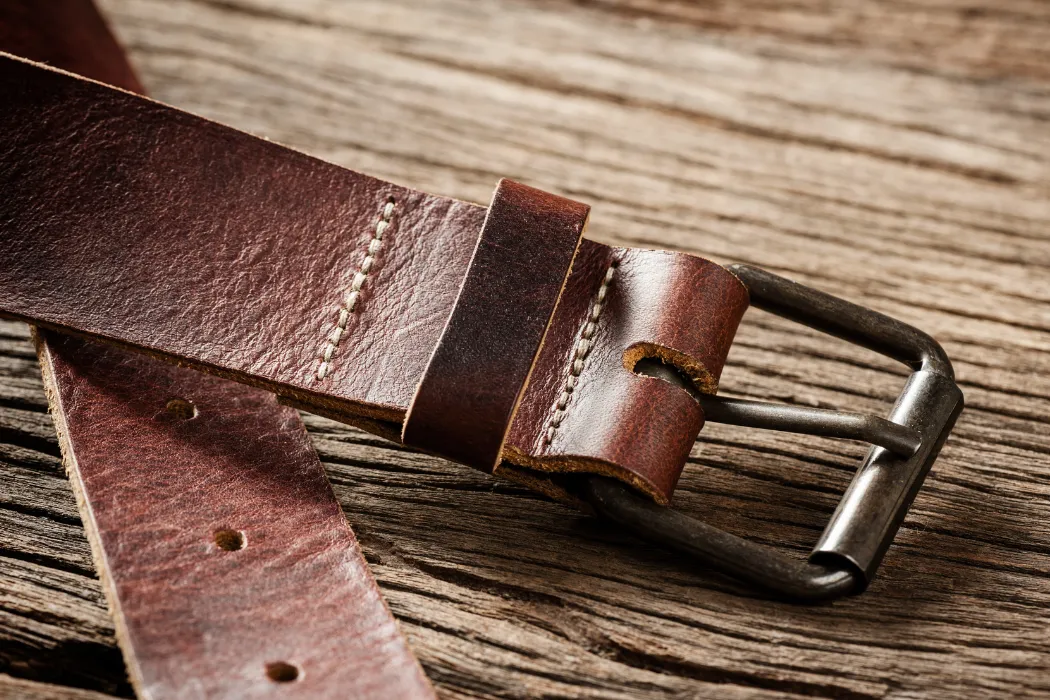
How to Clean a Leather Belt (Focus on the Buckle, Edges, and Holes)
A leather belt is subject to constant flexing, friction, and stress, especially around the holes and buckle. These areas require a focused approach to prevent cracking and premature wear.
- The Buckle Area: Dirt and tarnish can build up where the buckle meets the leather. Use a cotton swab to clean this area precisely. If the buckle needs polishing, remove it from the belt if possible.
- Edges and Holes: The edges of the belt get the most friction. During conditioning, pay special attention to the edges to keep them sealed and moisturized. Gently apply conditioner around the adjustment holes, as this is where cracks most often begin to form due to repeated bending.
What Products and Methods Will Absolutely Ruin Your Leather?
Knowing what to avoid is just as crucial as knowing what to use. The internet is full of “hacks” that can cause irreversible damage. Harsh chemicals will strip the leather’s finish, and abrasive tools will physically scratch it. Committing to a “do no harm” approach is the first step to preserving your valuable leather goods for the long haul.
The Dangers of Common Household Chemicals (Vinegar, Bleach, Rubbing Alcohol)
Your kitchen and bathroom cabinets contain powerful cleaners that are fantastic for hard surfaces but catastrophic for leather. Leather is a delicate skin, and these chemicals destroy its structure.
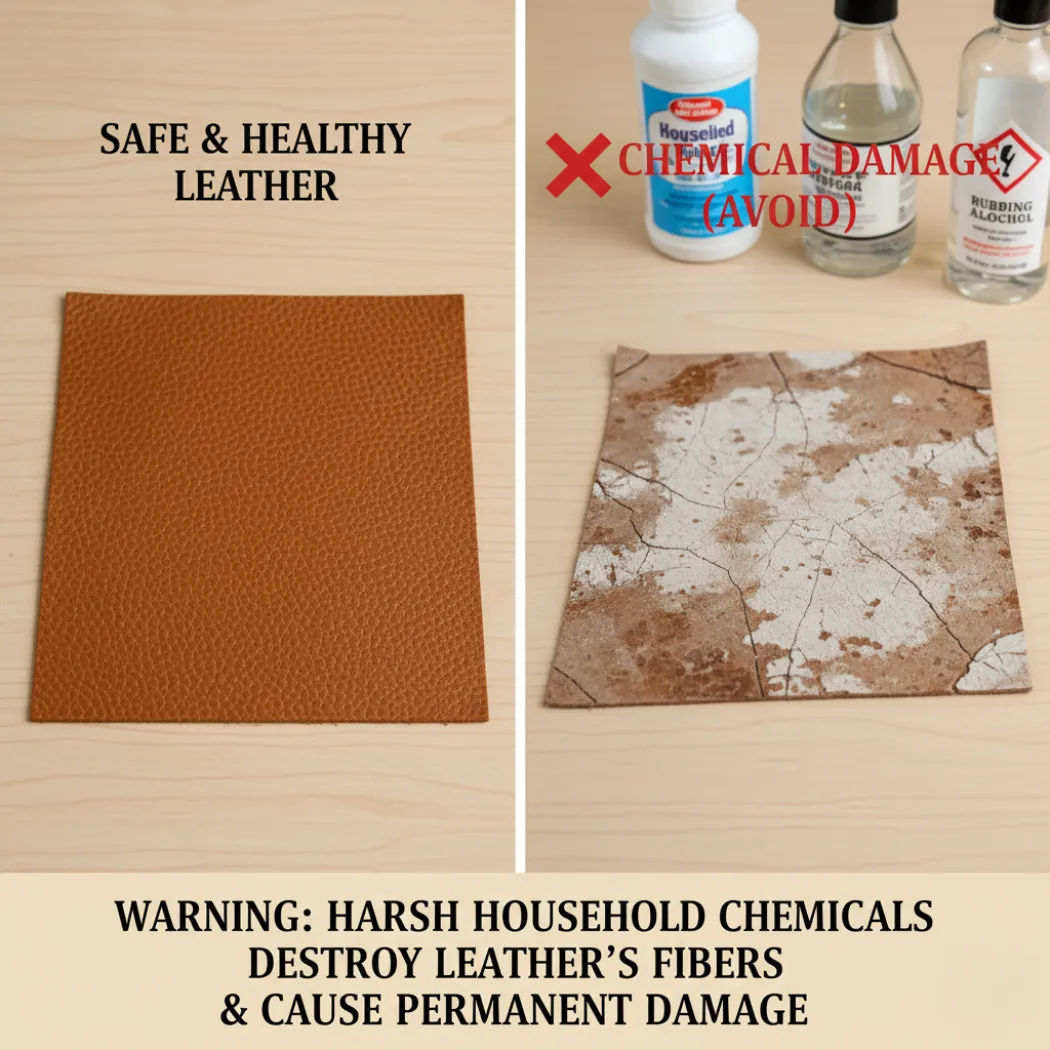
- Vinegar: As an acid, it can be too harsh for leather’s pH balance, causing it to dry out and become brittle.
- Bleach: This powerful chemical will not only strip the color and finish but will also break down the leather’s fibers, leading to permanent weakness and cracking.
- Rubbing Alcohol: While useful in tiny, controlled amounts for fresh ink, using it as a general cleaner is a disaster. It’s a solvent that will dissolve the leather’s protective topcoat and dye.
Why You Should Never Use a Magic Eraser or Abrasive Sponges
A Magic Eraser seems like the perfect tool for scuffs, but its name is misleading. It’s not a gentle sponge; it’s a micro-abrasive. Think of it as an extremely fine-grit sandpaper. When you use it on leather, you are physically scraping off the top layer of the finish.
You will likely remove the stain, but you will also remove the protective coating and sheen along with it. This leaves a dull, matte patch that is now more vulnerable to future stains. The damage is permanent.
Similarly, the rough side of a kitchen sponge or any abrasive cleaner will cause thousands of tiny scratches, permanently dulling the finish of your handbag or belt.
Debunking Widespread DIY Myths (Hairspray, Olive Oil, Toothpaste)
A quick online search will reveal dozens of well-intentioned but dangerous DIY leather cleaning tips. Here are three of the most common myths you should absolutely ignore:
- Hairspray: This myth comes from a time when hairspray had a high alcohol content, which could sometimes dissolve ink. Modern formulas leave a sticky, plastic-like film that is nearly impossible to remove.
- Olive Oil: While it might seem like a natural conditioner, olive oil is a non-drying oil that can oxidize over time, go rancid, and permanently darken the leather, attracting more dirt.
- Toothpaste: Most toothpastes contain baking soda and other mild abrasives. Using it to “buff out” a stain will only scratch and damage the leather’s delicate finish.
How Do You Prevent Damage and Maintain Leather Long-Term?
True leather care is more about prevention than reaction. By establishing a simple maintenance routine, you can protect your leather goods from the vast majority of potential damage. This involves regular conditioning, smart storage, and considering the use of a protectant spray. These proactive steps will keep your leather looking its best and drastically reduce the need for intensive stain removal.
Creating a Regular Conditioning Schedule
Conditioning is the single most important maintenance task. Just like your own skin, leather needs moisture to stay healthy. A regular conditioning schedule replenishes the natural oils within the hide, keeping it soft, flexible, and resistant to cracking.
How often should you condition? The answer depends on usage and climate. For a daily-use handbag or wallet, conditioning every 3 to 6 months is ideal. For a belt that you wear less frequently, once or twice a year is sufficient. If you live in a very dry climate, you may need to condition more often.
The best indicator is the leather itself. If it starts to look dull or feel slightly stiff, it’s telling you it’s thirsty. A quick conditioning session will bring it right back to life.
The Art of Proper Storage for Your Bags, Wallets, and Belts
What happens to your leather goods when you’re not using them is just as important as how you treat them when you are. Improper storage can lead to creasing, fading, and even mildew.
- Use Dust Bags: Always store your handbags in the breathable fabric dust bag they came in. This protects them from dust and scratches while allowing the leather to breathe.
- Stuff Your Bags: To prevent your handbags from losing their shape, stuff them with acid-free tissue paper or a purse pillow. This stops creasing and structural damage.
- Avoid Plastic: Never store leather in a plastic bag. Plastic traps moisture, creating a perfect environment for mildew and causing the leather to degrade.
- Store Belts Properly: The best way to store a leather belt is to either hang it by its buckle or roll it up loosely and place it in a drawer. Avoid folding it tightly, as this can create permanent creases.
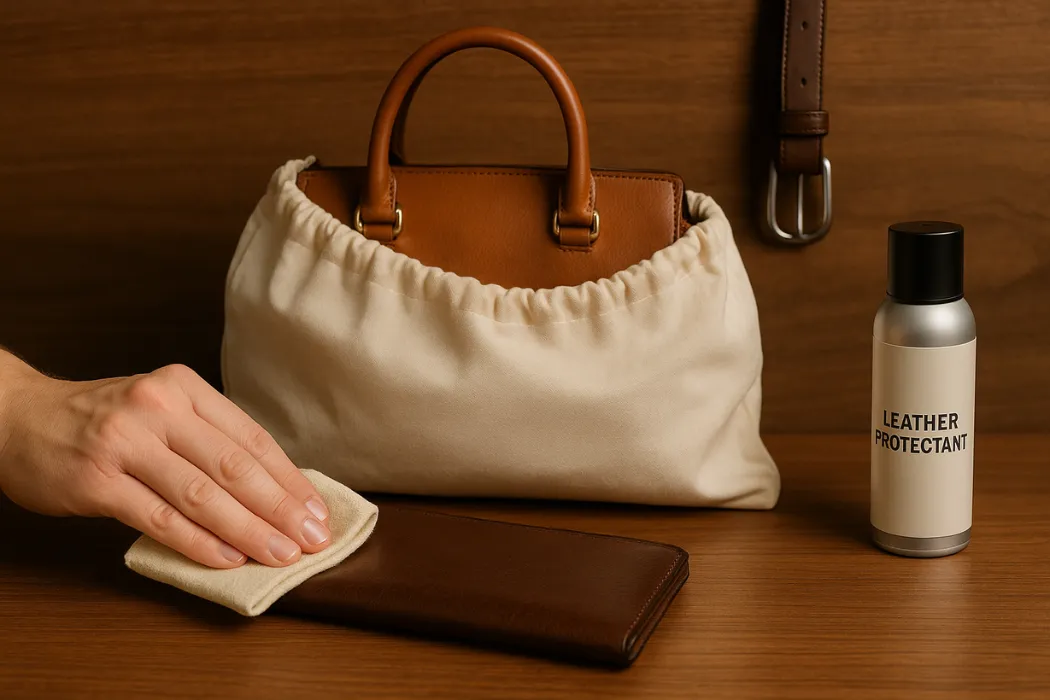
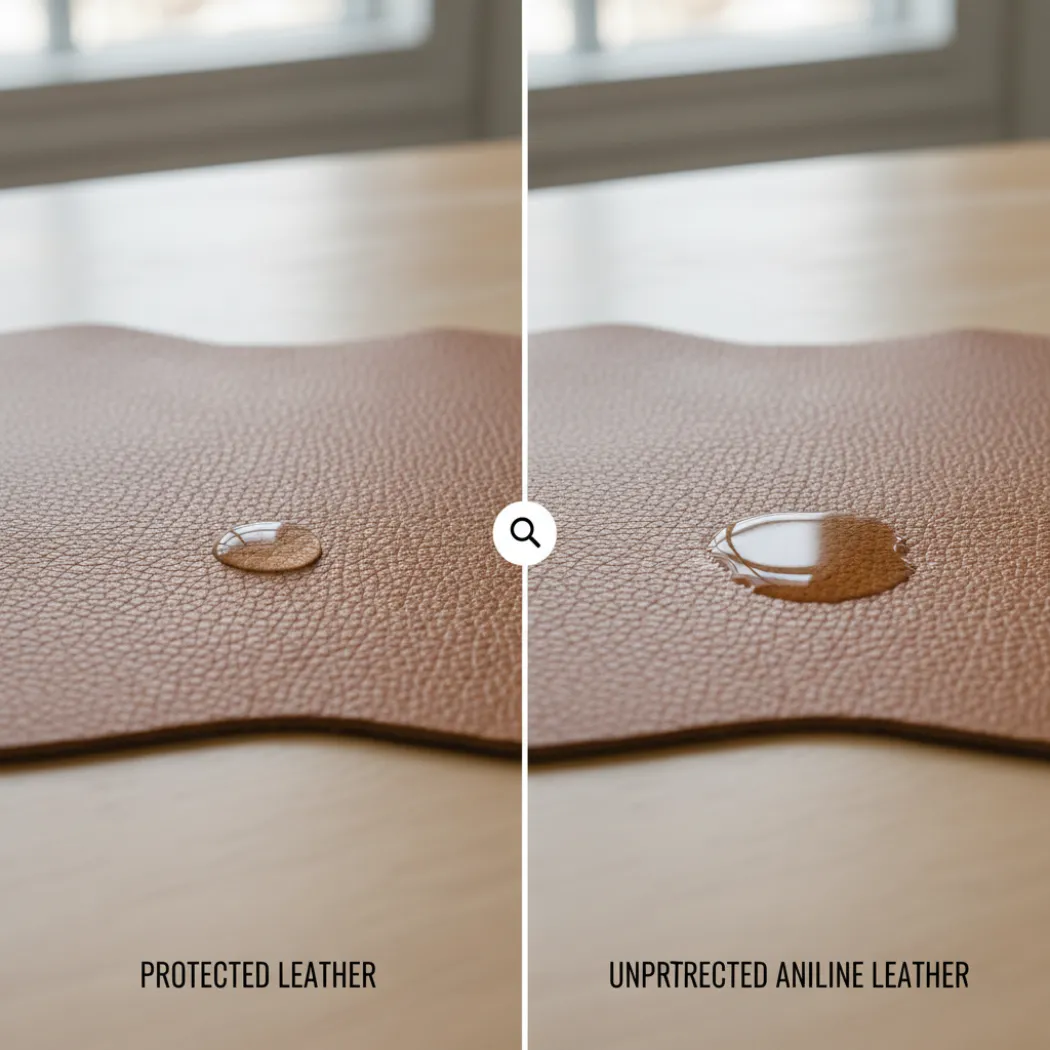
Are Leather Protectant Sprays Worth It for Your Accessories?
For many, especially those with new or light-colored leather accessories, a quality leather protectant spray is a worthwhile investment. These products create an invisible, breathable barrier on the leather’s surface that helps to repel water and prevent stains from setting in. Think of it as a force field for your handbag.
A good protectant can be especially effective at preventing dye transfer from clothing onto your bag or belt. When choosing a spray, look for one that is specifically formulated for the type of leather you have and avoid any products containing silicone, which can clog the leather’s pores. Applying a protectant after each cleaning is a great way to add an extra layer of defense to your care routine.
Frequently Asked Questions (FAQ)
Q1: How often should I condition my leather bag?
For a handbag you use daily, conditioning it every 3-6 months is the best practice to keep the leather hydrated and prevent cracks. For bags used less often, once or twice a year is sufficient. If the leather starts to look dull, it’s time to condition.
Q2: Can I use soap and water to clean my leather wallet?
It’s generally not recommended. Most soaps are too alkaline and will strip the leather’s natural oils. While a tiny drop of a very mild, pH-neutral soap in distilled water can be used cautiously on protected leather, a dedicated pH-balanced leather cleaner is always the safer choice.
Q3: What’s the main difference between cleaning real leather and faux leather?
The difference is huge. Real leather is a porous skin that needs a pH-balanced cleaner and a conditioner to stay moisturized. Faux leather is a non-porous plastic that should only be cleaned with mild soap and water. Never use conditioner on faux leather.
Q4: How do I get wrinkles or creases out of my leather belt?
For minor creases, simply wearing the belt will often smooth them out. For deeper wrinkles, you can hang the belt in a steamy bathroom for 20 minutes to let the moisture relax the fibers. Never use a direct, high-heat iron on your leather goods.
Q5: Can old, dried-out leather be restored?
It can often be significantly improved, but may not look brand new. The key is to rehydrate it slowly. Apply very light coats of a quality leather conditioner over several days, allowing each coat to absorb fully. This gradual process can restore much of its softness and flexibility.
Q6: Is it worth taking a stained leather handbag to a professional cleaner?
Absolutely, especially for valuable bags, delicate leathers like aniline, or tough stains like set-in ink or dye transfer. Professionals have specialized solvents and techniques that are much safer and more effective than DIY methods. It’s a wise investment to protect your item.
Q7: How do I clean the metal hardware (buckles, zippers) on my accessories?
The key is to protect the leather. Apply a small amount of a suitable metal polish to a cotton swab, not the hardware itself. Carefully polish the metal, making sure none of the polish touches the leather. Use a clean swab to buff it to a shine.
Q8: Does sunlight permanently damage leather?
Yes. Prolonged exposure to direct sunlight is one of leather’s worst enemies. UV rays can cause the color to fade irreversibly. The heat also dries out the leather’s natural oils, leading to brittleness and cracking over time. Always store your leather goods in a cool, dark place.
Conclusion: Great Leather is a Partnership Between Owner and Maker
Ultimately, caring for leather is a partnership. It’s a partnership between you and your cherished item, built on a foundation of understanding and consistent, gentle maintenance. As this guide has shown, the philosophy is simple: understand before you act, and maintain more than you clean. By treating leather as the natural, living material it is, you ensure that a high-quality handbag, wallet, or belt doesn’t just last—it evolves, developing a unique character that tells a story over time.
But this partnership actually begins long before you own the item. It starts with the maker. The ease of care and the longevity of a leather product are fundamentally determined the moment it is designed and manufactured. The choice of hide, the quality of the tanning process, the durability of the topcoat finish, and the resilience of the hardware—these decisions made in the factory directly impact the end customer’s experience for years to come. A product that is easy to care for and ages gracefully is the hallmark of a truly expert manufacturing partner.
For brands dedicated to providing customers with not just beautiful, but enduring and easy-to-care-for leather goods, the choice of a manufacturer is the most critical decision of all. At Hoplok Leather, we bring over 22 years of expertise to this partnership, offering end-to-end services from material sourcing to world-class manufacturing for global brands. Contact us today for a free design and manufacturing consultation, and let’s create the timeless, easy-to-care-for leather classics your customers will cherish for a lifetime.