Punching a single row of holes into a leather belt sounds simple, but it is one of the most precision-driven steps in belt embellishment craftsmanship. A crooked hole, a torn edge, or an inconsistent pitch can turn a premium brogue design into a rejected batch. For B2B buyers sourcing custom belts, understanding how CNC punching actually works is the difference between ordering blind and ordering with confidence.
Computer-controlled punching positions tools from a digital pattern to produce holes in leather or other compatible materials. Repeatability depends on the machine, tooling, material support and settings. Buyers should agree tolerances from production trials on the proposed belt construction; there is no universal CNC tolerance or distinction between “true” and hand-punched brogue decoration.
But punching quality depends on more than the machine. Leather type, thickness, pattern complexity, and quality-control checks all play a role in the final result. The sections below break down each of these factors, starting with how CNC punching compares to manual and laser methods.
What Is CNC Punching and How Does It Differ From Manual Perforation?
Computer-controlled punching follows a programmed layout using the equipment’s positioning and tool system. Actuation may be pneumatic or another machine-specific mechanism. Manual punching can also use accurate templates and jigs. Compare the resulting holes, production consistency and cost rather than assuming that computer control eliminates all variation.
The Basic CNC Punching Process
A CNC (Computer Numerical Control) punching system follows a few clear, repeatable steps before a single hole ever touches the leather. Each stage matters, because a small mistake early on tends to show up later as a visible defect.
- Pattern preparation: Provide a dimensioned vector layout in a format supported by the supplier’s system. Confirm units, scale, hole geometry and reference points before importing it.
- Material support: Hold the leather or belt panel flat using the equipment’s suitable support or hold-down system. Avoid unwanted stretching or movement and establish how the pattern references the strap edges.
- Tool selection: Match the hole shape, material stack and thickness to the available punch tools. A pattern may use individual punches or dedicated tooling; confirm whether tool changes are required.
- Trial and production: Produce an initial sample, measure it and approve the cut quality before running the batch. Output depends on the pattern, tool changes, material handling and equipment, so quote cycle time for the actual design.
- Process checks: Verify positioning, cutting condition and waste removal during production. Do not assume every machine has sensors that automatically correct pressure or dimensional drift.
For an equipment example, Zünd’s Punching Pricking Module uses independently operating punches and pneumatic force for compatible materials. Its published specifications apply to that equipment; confirm the system and setup proposed for the order.
Manual Punching, Laser Cutting and Computer-Controlled Punching
Several processes can create openings, and they leave different edge conditions. The right comparison includes material compatibility, setup, achievable geometry, repeatability and total order cost.
- Manual punching: A hand punch removes material to create an opening, while an awl primarily pierces it. Templates and guides can control layout. Evaluate the proposed manual process with samples and capacity evidence rather than treating it as suitable only for one-off work.
- Laser cutting: A laser can create openings in compatible materials, with potential heat effects on the edge. Confirm the complete material and extraction requirements first. Trotec advises against laser processing PVC and unspecified plastics; a leather-like appearance is not enough to establish suitability.
- Computer-controlled punching: Guided tools mechanically create the specified openings. Material movement, worn tools or poor support can still cause defects, so production checks remain necessary.
| Method | Throughput check | Precision evidence | Cost check | Suitability check |
|---|---|---|---|---|
| Manual punching | Time the actual layout and handling | Measure jig or template samples | Compare labor and tooling for the quantity | Accessible geometry and a demonstrated repeatable process |
| Laser cutting | Include setup, cutting and cleanup | Measure openings and heat-affected edges | Compare setup, processing and extraction requirements | Only verified laser-compatible material |
| Computer-controlled punching | Include tool changes and material handling | Measure production trials on the actual construction | Compare tooling and run cost for the order | Patterns compatible with the tool and support system |
Request comparable samples and quotations before selecting a process. A method that works for a flat swatch may need a different sequence when the belt is lined, stitched or fitted with hardware.
Why Precision Matters for Brogue Patterns
Precision is not just about looks. It also affects how a belt performs and how consistent an order looks once it reaches thousands of units.
- Structural integrity: Placing holes too close to the edge or to each other can weaken the leather and cause tearing, especially along the fold line near the buckle.
- Visual symmetry: Brogue patterns rely on evenly spaced, aligned holes to look intentional rather than sloppy, so even a small shift can throw off the whole design.
- Batch consistency: Define the permitted variation from the approved sample and drawing, including appearance zones and pattern registration across different sizes.
- Hardware fit: Functional holes must accommodate the actual pin and allow the belt to fasten and release as intended. Test the assembled buckle and strap together.
Tolerance should follow the functional and visual requirement of each feature. Establish it through sample measurement and fit checks rather than using one dimensional limit for every hole.
Which Perforation Layouts Can Buyers Specify?
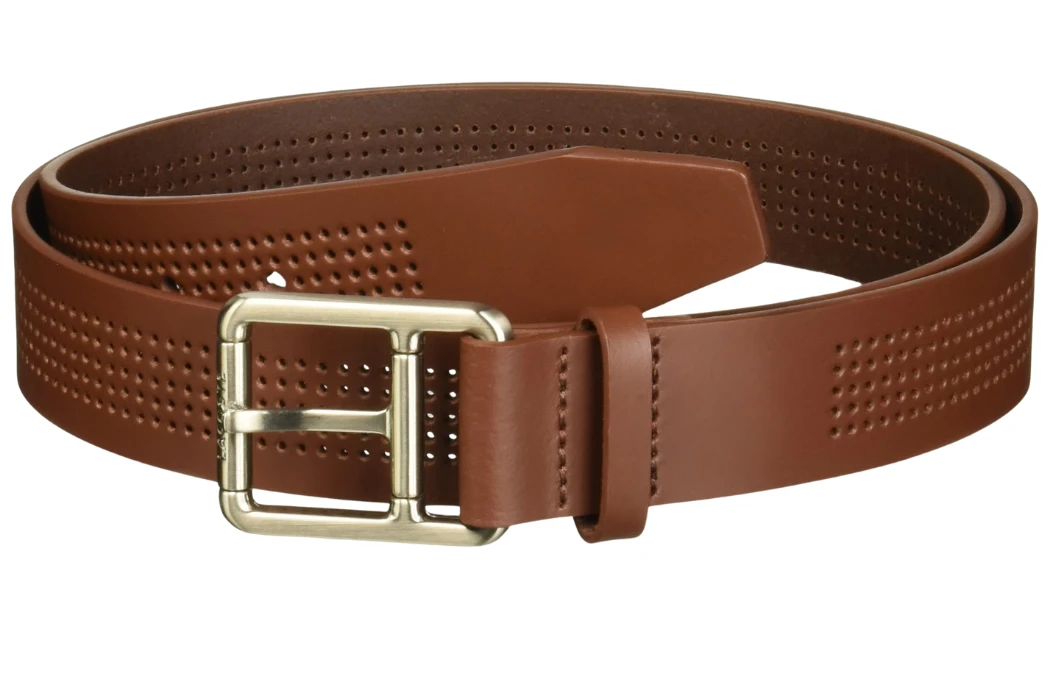
Brogue-inspired belt decoration can use rows, borders or clustered motifs associated with brogue styling. Shoe terms such as full, semi or quarter brogue are not standardized belt coverage specifications. If a mood board uses them, translate the reference into an actual drawing with defined pattern boundaries.
Broad Coverage, Bands, Accents and Borders
These four layout options describe the geometry directly. They are design examples, not grades or mandatory categories for perforated belts.
- Broad coverage: Repeat the decoration across a large part of the visible strap. Define solid zones around the buckle attachment, stitching and adjustment area where the design requires them.
- Decorative band: Concentrate the openings in a central band or selected section. Dimension the band width and its position so the pattern remains consistent between sizes.
- Localized accent: Use a small motif near the tip or another chosen area. Specify its distance from the tip, keeper and functional holes.
- Extended border: Run a motif along a longer edge zone. Confirm the remaining material between the openings and the outer edge, including any stitching line.
Buyers usually pick a layout based on how bold or subtle they want the finished belt to look.
Classic Perforation Motifs (Diamond, Straight-Line, Wingtip-Style)
Beyond the overall layout, the shape of the perforation pattern itself changes the belt’s character.
- Diamond motif: The pattern arranges small holes in a repeating diamond grid, giving a classic, formal look.
- Straight-line motif: A single or double row of evenly spaced holes runs parallel to the belt edge.
- Wingtip-inspired motif: A curved or pointed cluster can serve as an accent. Use the reference as a visual brief and dimension the actual shape on the belt drawing.
- Medallion motif: A circular or floral arrangement can repeat at specified intervals. Check the placement at the tip, buckle end and size transitions.
Some motifs reuse the same punch sizes in different positions; others need shaped or dedicated tooling. Confirm the tooling route and ownership after approving the pattern geometry.
Digitizing Custom Patterns and Confirming File Formats
Before a CNC machine can punch anything, the pattern has to exist as a digital file the press can read.
- Vector-based design: Designers draw the pattern in software like Adobe Illustrator or AutoCAD, mapping every hole as a precise point.
- File format: Ask which formats the equipment and programming workflow support. Supply a dimensioned reference alongside the vector file and verify the imported scale.
- Scaling checks: The design team checks that the pattern scales correctly for different belt widths and sizes.
- Approval samples: The design team typically confirms a digital proof before punching a physical sample, which saves both time and material.
A digital proof can identify layout errors, but it does not replace a physical sample. Approve the design file revision and punched construction together before production.
What Hole Size, Spacing, and Tolerance Specs Define Quality?
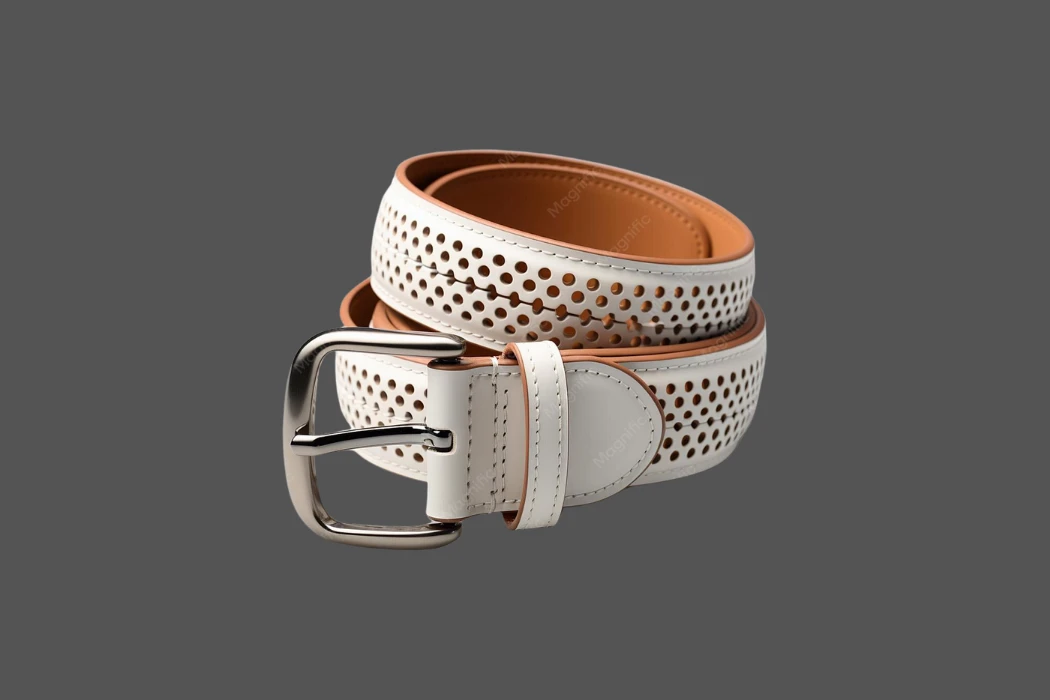
Specify hole shape and size, center-to-center pitch, pattern position and edge distance together. A change to one can alter the remaining material between openings and the visual density. The drawing should distinguish decorative openings from functional adjustment holes, which must be checked with the selected buckle.
Choosing Hole Dimensions
Choose dimensions from the design, available tooling and material trials. The categories below are useful ways to compare samples, not standardized diameter ranges.
- Fine perforation: Smaller openings can produce subtle texture. Check whether the proposed tool cuts them completely and whether the underside is clean after waste removal.
- Repeated decorative holes: Compare alternative sizes on the actual strap width. Keep the chosen diameter and permitted variation on the drawing rather than relying on a “standard brogue” description.
- Statement openings: Larger or shaped holes can create a bolder effect but remove more material. Assess the remaining section and bending behavior with the finished construction.
- Adjustment holes: Match the shape and size to the actual buckle pin, material thickness and intended fastening action. Approve the pin fit and check deformation after the agreed use test.
Smaller holes generally read as refined and formal, while larger holes create a bolder, more casual look.
Pitch and Spacing Guidelines
Pitch refers to the distance between hole centers, and it plays just as big a role in the final look as the hole size itself.
- Dense layout: Close spacing creates stronger visual coverage, but check the material remaining between adjacent holes and across neighboring rows.
- Balanced layout: Compare sample strips with different pitches while holding hole size constant. This makes the visual effect of spacing easier to assess.
- Open layout: Wider spacing leaves more material between otherwise identical holes. Check that the pattern still registers correctly at the strap ends and across the size range.
- Edge distance: State whether the dimension is measured from the hole center or its nearest edge. Select it for the material, seam layout and load path; a fixed distance cannot guarantee freedom from tearing.
For example, two 2 mm round holes at a 6 mm center pitch leave 4 mm between their edges along that line. This is a geometric example, not an approved strength criterion. Angled rows, larger neighboring holes and edge placement also affect the remaining section.
| Layout example | Hole specification | Spacing specification | Placement consideration |
|---|---|---|---|
| Localized accent | Dimension each chosen size and shape | Dimension the motif and adjacent solid zones | Position relative to tip, buckle or keeper |
| Decorative band | Approve the repeated opening geometry | Define pitch and row-to-row spacing | Keep band registration consistent across sizes |
| Broad coverage | Check all repeated and accent openings | Define pitches and minimum remaining sections | Review edge, seam and functional-hole zones |
Agreeing Tolerances and Alignment Checks
A drawing can specify separate tolerances for hole size, position, pitch and overall pattern registration. Also define how the flexible strap is supported and conditioned during measurement.
- Computer-controlled punching: Request measured trial results for the actual material and machine setup. Nominal positioning accuracy alone does not establish finished-hole accuracy.
- Laser cutting: Where the material is suitable, evaluate the opening geometry and heat-affected edge under the agreed measurement method. Do not infer tolerance from the process name.
- Manual punching: Assess the tools, templates and operator process through representative samples. Set the same required finished-product criteria where the design calls for them.
- Alignment checks: Compare measured holes with the approved drawing and datums. Check local spacing as well as cumulative pattern drift along the strap.
Specify tolerances that matter to fit or appearance and confirm the supplier can hold them consistently. An unnecessarily tight number can add cost without improving the product.
How Does Leather Type and Thickness Affect Punching Precision?
Thickness, firmness, finish and layer construction influence punching behavior. Full-grain, corrected-grain and split leather each vary within their category, so trial the actual material. A thicker strap may require different tools or settings, but it does not automatically require larger holes.
Grain, Finish and Layer Construction
Record the material description and finish system before trials. Grain retention is one feature; hide selection, processing, moisture condition and any coating also affect the result.
- Full-grain leather: Retains the original grain surface without corrective buffing. Check the actual leather for complete cutting, edge condition and pattern stability; the label does not guarantee clean holes.
- Corrected-grain leather: Has been surface-corrected for appearance. Trade use of “top-grain” varies, so clarify the description and check whether the finish chips, cracks or transfers during punching.
- Split leather: Comes from a lower split layer. Evaluate the specific material and any coating or backing for fraying, tearing and clean waste removal. Select settings from trials rather than assuming one speed is correct for the category.
- Bonded or coated constructions: Identify each layer and test for separation or coating damage around the openings. These risks need assessment; they do not mean every composite behaves unpredictably.
Approve the material code, finish and punched sample together. A later change in coating, thickness or backing should trigger a review of the punching setup.
Choosing Thickness for the Construction
Thickness should be specified together with strap width, layering, stiffness and buckle fit. Measure the finished stack, especially where folds or inserts change it.
- Thin constructions: Check support during cutting, handling distortion and the remaining material between holes. A clean cut alone does not prove adequate belt strength.
- Single-layer straps: Select thickness from the intended handle and fastening requirements, then trial the decorative and functional openings. There is no universal thickness for all brogue belts.
- Thicker constructions: Confirm equipment capacity, complete penetration and underside quality. Tool geometry and settings must suit the material; do not enlarge a design hole solely because the strap is thicker.
- Layered constructions: Decide whether punching occurs before or after bonding and stitching. Check registration, exposed layers and separation on the assembled sample.
| Construction | Process check | Acceptance evidence |
|---|---|---|
| Thin or soft material | Support and control movement during cutting | Measure openings; assess tearing and distortion |
| Single-layer strap | Match the tool and settings to the actual leather | Approve dimensions, underside and bending behavior |
| Thick or layered strap | Confirm penetration, registration and layer adhesion | Approve the complete stack and functional-hole tests |
Record the approved tooling and setup with the sample revision. This gives production a reproducible starting point and a basis for investigating changes.
Common Defects — Tearing, Fraying, Edge Cracking
Even with the right machine, punching errors still happen when the leather, tooling, or settings don’t quite match.
- Tearing: Investigate tool condition, support, hole spacing, material condition and the remaining section. The visible tear alone does not identify a single cause.
- Fraying: Check incomplete cutting, tool wear, backing or fiber structure and waste removal. Inspect both sides of the hole rather than assigning the defect only to a leather grade.
- Edge cracking: Examine the finish, material condition, bend stress and punching setup. Distinguish a cracked coating from a tear through the underlying leather.
- Hole distortion: Review movement, stretching, tool condition and measurement support. Compare the shape immediately after cutting and after the material relaxes.
Catching these defects early, during sampling rather than bulk production, saves both time and material costs.
How Do Factories Quality-Check Perforated and Brogue Belts?
The quality plan should combine process checks, appearance inspection and relevant performance tests. Specify checkpoints during production and the final lot-acceptance procedure separately. Statistical sampling may form part of final inspection, but it does not replace process control or a check the buyer requires on every unit.
Visual Inspection: Alignment, Cut Edges and Symmetry
Use the approved sample and drawing to define what inspectors examine. Agree lighting, viewing distance and the distinction between cosmetic variation and a functional defect.
- Row alignment: Check straight or intentionally curved rows against the design datums and agreed tolerance, including cumulative drift along the strap.
- Cut edges: Inspect the underside and face for incomplete cuts, retained plugs, frayed fibers and sharp or rough edges. Confirm that cleanup does not enlarge or distort the openings.
- Pattern symmetry: Compare mirrored motifs where symmetry is intended. Do not reject an intentionally asymmetric design against an assumed mirror pattern.
- Color and surface consistency: Inspectors also check that punching hasn’t caused any discoloration or shine around the hole edges.
Record defects with their location, dimensions and photographs. Some require measurement or a closer inspection; do not assume all relevant variation is visible within seconds.
Durability Testing (Tensile Strength, Edge Wear)
The finished fashion belt should meet its agreed fastening and bending requirements after perforation. Assess whether decorative holes introduce a weak line as well as checking the functional adjustment area.
- Leather tensile testing: ISO 3376 specifies a method for leather tensile strength and elongation; it does not provide a universal pass value for a belt. Define separate assembly testing where the perforation pattern or buckle attachment must be evaluated.
- Tear resistance near holes: Technicians test whether the leather tears more easily along a row of punched holes compared to solid leather.
- Edge wear testing: Repeated folding and flexing checks whether the punched edges start to crack or fray over time.
- Fastening tests: Repeatedly fasten and release the selected buckle under the agreed procedure, then inspect hole shape, strap condition and operation. Record the test conditions and acceptable change.
Functional holes deserve particular attention, but decorative rows can also influence strength. Include any critical remaining sections or folds identified during sample development.
AQL Sampling Protocols for Bulk Orders
A final sampling inspection can support a lot-acceptance decision. The buyer may also require full inspection of selected characteristics; the inspection scope should follow the agreed risk and quality plan.
- Sampling plan: ISO 2859-1 covers AQL-indexed lot-by-lot attribute sampling. The sample size and acceptance decision depend on the plan inputs, including lot size, inspection level and severity; order quantity alone is insufficient.
- AQL selection: Agree the value for each defect class and the applicable sampling rules with the buyer. No single AQL automatically defines a premium belt, and AQL is not a guarantee that a stated percentage of the shipment is defective or defect-free.
- Defect classification: Inspectors sort defects into critical, major, and minor categories, since a torn buckle hole matters more than a slightly uneven diamond motif.
- Acceptance decision: Apply the agreed acceptance and rejection numbers to the inspection results, then follow the contract’s rules for failed lots, rework and reinspection. Keep destructive-test requirements separate where they use a different plan.
Sampling carries statistical risk. Document the plan and results so that acceptance is traceable; it does not establish that every unit has been checked or guarantee shipment timing.
Frequently Asked Questions
What Is a Brogue Pattern on a Leather Belt?
It is a brogue-inspired decorative arrangement of openings, often using rows or clusters. Shoe-derived names do not define a standardized belt layout, so specify the actual drawing. Perforation removes material and can affect performance, which should be checked on the finished construction.
What Does Perforated Leather Mean?
Perforated leather simply means leather that has small holes punched through it in a repeating pattern. Manufacturers use perforation for both decoration, like brogue motifs, and function, like buckle adjustment holes. The holes can run in straight lines, grids, or custom shapes depending on the design.
What Is the Ideal Leather Thickness for a Belt?
The suitable thickness depends on the material, width, layers, stiffness and buckle fit. Approve a sample with the intended perforation and test the finished construction. A single thickness range cannot cover every fashion-belt design.
What Is the Standard Hole Size Used in Leather Perforation?
There is no single standard diameter for all decorative perforation. Specify each opening’s shape, dimensions, pitch and tolerance, then confirm tooling and sample quality. Functional adjustment holes also need a fit check with the actual buckle pin.
Can CNC Machines Punch Through Full-Grain Leather Cleanly?
Suitable equipment and tooling can punch full-grain leather, but results depend on the actual leather, finish, support and setup. Verify complete cutting and dimensions on trials; no universal tolerance or guarantee of clean holes follows from the full-grain label.
What Is the Difference Between Brogue and Perforated Leather?
Perforated leather is a broad description of leather with openings. Brogue-inspired decoration describes an aesthetic arrangement associated with brogue styling. For belt sourcing, an approved drawing is more precise than relying on a style label alone.
How Do Manufacturers Prevent Leather From Cracking During Punching?
Use appropriate tooling, support and settings, and test the selected leather and finish. Investigate whether damage occurs in the coating or the underlying material. Do not add conditioner or moisture as a blanket fix; first confirm compatibility and the controlled process with the material supplier.
What Tolerance Is Considered Acceptable in Leather Hole-Punching?
Acceptable tolerance is the value agreed for the design and demonstrated by the proposed process. Specify hole size, position and pattern registration separately where needed, together with the measurement method. Confirm functional-hole fit using the assembled buckle.
Getting Perforation Right, From Design to Delivery
A clear perforation brief includes the drawing, material stack, hole geometry, sample approval and inspection criteria. For custom belt development, send Hoplok the pattern and target quantities to confirm the available production method, tooling, materials and schedule. CNC capability and achievable tolerances should be confirmed for the particular project before they enter the purchase specification.